Installation
INSTALLATION
PROCEDURE
1. INSTALL REAR WIPER MOTOR ASSEMBLY
(a) Install the rear wiper motor assembly with the 3 bolts.
Torque:
5.5 N·m {56 kgf·cm, 49 in·lbf}
(b) Connect the connector.
2. INSTALL REAR WIPER MOTOR GROMMET
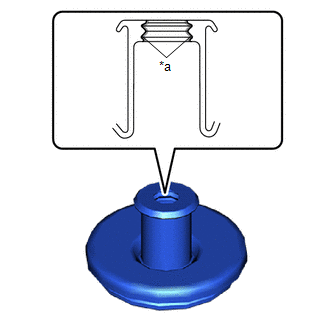
(a) Apply MP grease to the entire surface of the rear wiper motor grommet lip. HINT: Make sure the hole is not blocked by grease and that the grooves of the lip are filled with grease. |
|
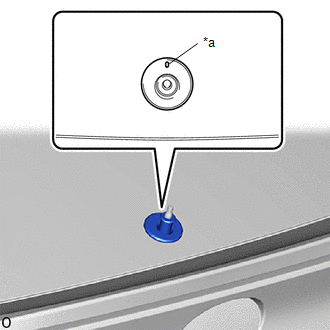
(b) Install the rear wiper motor grommet. HINT: Install the rear wiper motor grommet with its alignment mark facing up. |
|
3. INSTALL REAR WIPER ARM AND BLADE ASSEMBLY
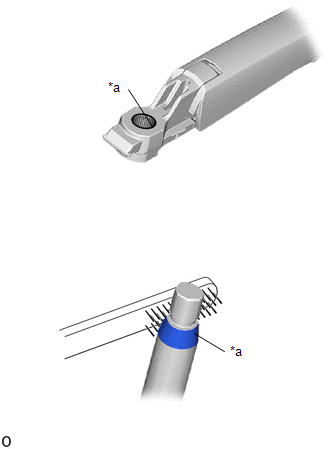
(a) If reusing the rear wiper arm and blade assembly: (1) Clean the wiper arm splines to remove burrs, dust, etc. NOTICE: Do not grind the wiper arm splines. |
|
(b) If reusing the rear wiper motor assembly:
(1) Clean the wiper pivot splines with a wire brush.
(c) Turn the ignition switch to ON.
(d) Operate the rear wiper motor assembly, then stop it at the automatic stop position.
(e) Turn the ignition switch to OFF.
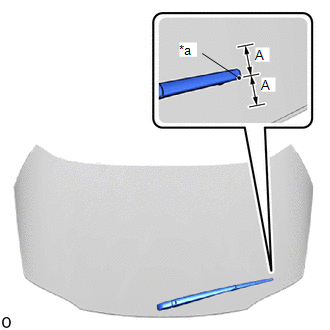
(f) Install the rear wiper arm and blade assembly with the nut in the position shown in the illustration. Torque: 5.5 N·m {56 kgf·cm, 49 in·lbf} HINT: Hold the rear wiper arm by hand while tightening the nut. Reference measurement:
|
|
(g) Turn the ignition switch to ON.
(h) Operate the rear wiper by spraying washer fluid onto the liftgate glass. Make sure the rear wipers operate correctly and do not contact the vehicle body.
(i) Turn the ignition switch to OFF.
(j) Raise the wiper arm twice after the wiper stops, and check the wiper adjustment position.
(k) Engage the claws and guides to close the rear wiper arm cap as shown in the illustration.
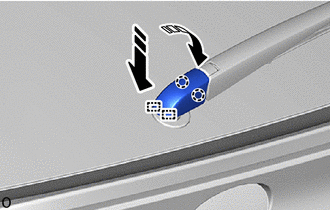
 |
Remove in this direction (1) |
 |
Remove in this direction (2) |
(l) Slide the rear wiper arm cap to engage the 2 claws as shown in the illustration. |
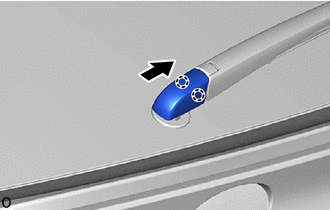 |
4. INSTALL LIFTGATE TRIM PANEL ASSEMBLY
Click here
5. INSTALL LH LIFTGATE SIDE TRIM PANEL
Click here
6. INSTALL RH LIFTGATE SIDE TRIM PANEL
HINT:
Perform the same procedure as for the left side.
7. INSTALL LIFTGATE UPPER TRIM PANEL ASSEMBLY
Click here