Blower Resistor
Removal
REMOVAL
PROCEDURE
1. REMOVE NO. 2 INSTRUMENT PANEL LOWER COVER SUB-ASSEMBLY
Click here
2. REMOVE BLOWER RESISTOR (for Single Type)
(a) Release the guides and detach the blower resistor as shown in the illustration.
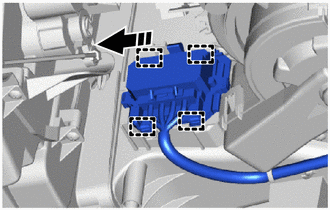
 |
Remove in this direction |
(b) Disconnect the connector to remove the blower resistor. |
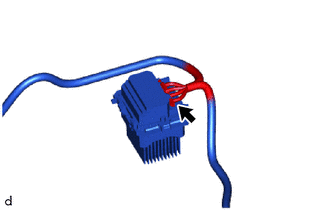 |
3. REMOVE BLOWER RESISTOR (for Double Type)
(a) Release the guides and detach the blower resistor as shown in the illustration.
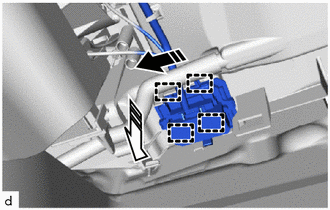
|
Remove in this direction (1) |
 |
Remove in this direction (2) |
(b) Disconnect the connector to remove the blower resistor. |
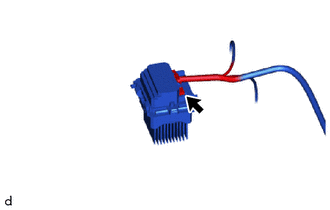 |
Components
COMPONENTS
ILLUSTRATION
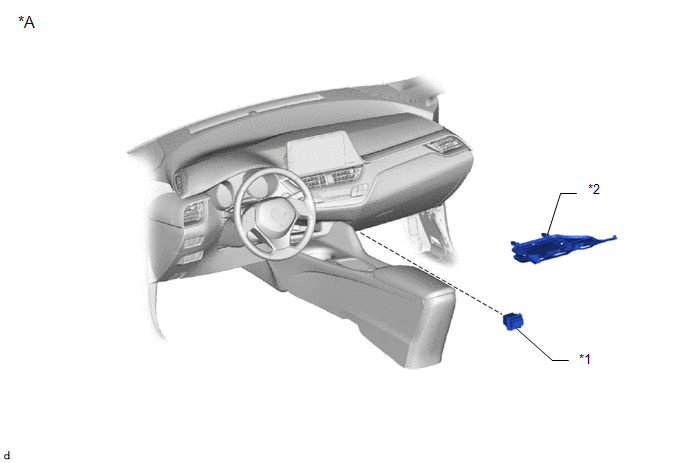
*A |
for Single Type |
- |
- |
*1 |
BLOWER RESISTOR |
*2 |
NO. 2 INSTRUMENT PANEL LOWER COVER SUB-ASSEMBLY |
ILLUSTRATION
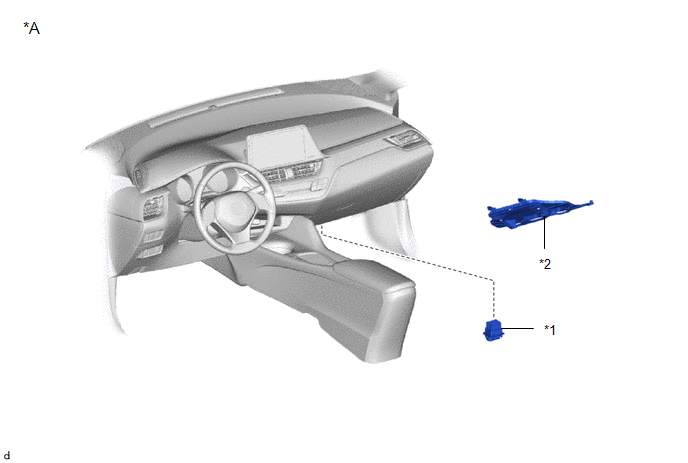
*A |
for Dual Type |
- |
- |
*1 |
BLOWER RESISTOR |
*2 |
NO. 2 INSTRUMENT PANEL LOWER COVER SUB-ASSEMBLY |
Installation
INSTALLATION
PROCEDURE
1. INSTALL BLOWER RESISTOR (for Single Type)
(a) Connect the connector.
(b) Engage the guides and install the blower resistor as shown in the illustration.
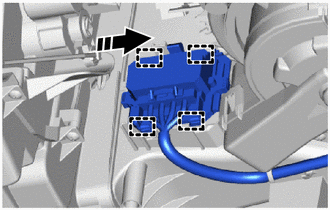
 |
Remove in this direction |
2. INSTALL BLOWER RESISTOR (for Double Type)
(a) Connect the connector.
(b) Engage the guides and install the blower resistor as shown in the illustration.
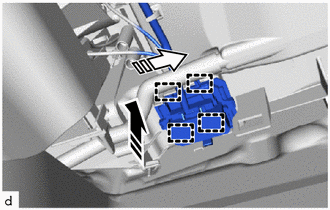
|
Remove in this direction (1) |
 |
Remove in this direction (2) |
3. INSTALL NO. 2 INSTRUMENT PANEL LOWER COVER SUB-ASSEMBLY
Click here