Intake air control system (1MZ−FE/3MZ−FE)
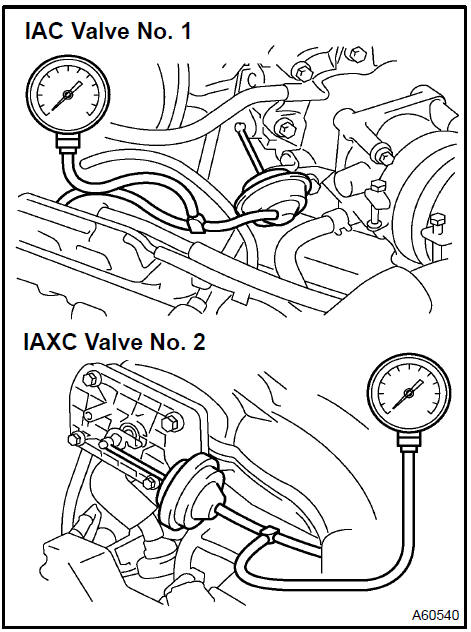
- Using a 3−way connector, connect a vacuum gauge to the actuator hose.
- Connect the hand−held tester to the DLC3.
- Start the engine.
- On the hand−held tester, enter the ACTIVE TEST mode.
:

- Move the shift lever to the P position.
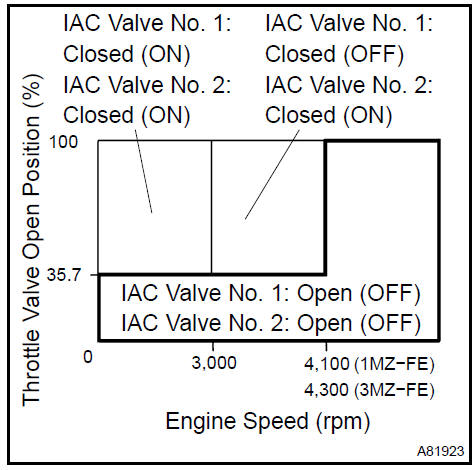
- While operating the accelerator pedal, check open and closed status of the IAC valve No. 1 (IMZ−FE only) and No. 2.
HINT: Values indicated in the illustration are for reference only. The throttle valve open position varies by engine speed.
- With vacuum of 26.7 kPa (200 mm Hg, 7.9 in. Hg) applied to the actuator, check that the IAC valve closes.
- 1 minute after applying the vacuum, check that the IAC valve remains closed.
1.
NOTICE: Do not adjust the screw.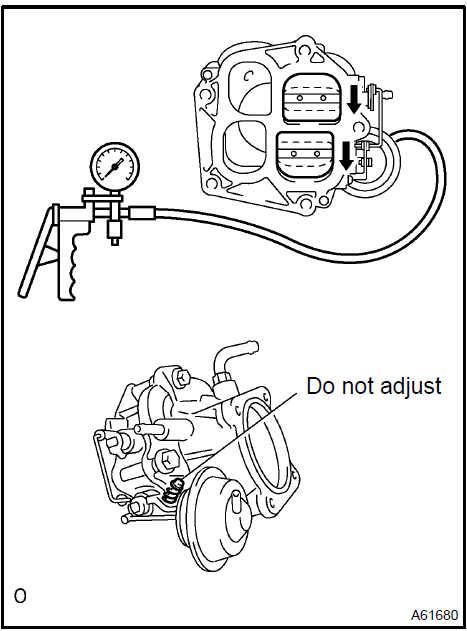 Inspect intake air control valve assy No.1 (1MZ-FE only) 2. INSPECT INTAKE AIR CONTROL VALVE ASSY No.2
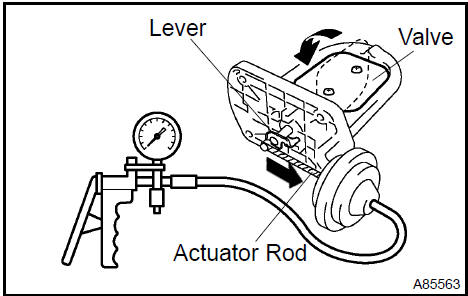
- Apply 26.7 kPa (200 mmHg, 7.9 in.Hg) of vacuum to the actuator. Check if the actuator rod pulls the lever and causes the valve to rotate open, as shown in the illustration.
- One minute after applying the vacuum, check that the actuator rod does not return.
2
 Inspect intake air control valve assy No.2 3. INSPECT INTAKE AIR CONTROL VALVE ASSY No.3
- Apply 26.7 kPa (200 mmHg, 7.9 in.Hg) of vacuum to the actuator. Check if the valve rotates open, as shown in the illustration.
- Apply the vacuum for one minute. The actuator should continue to be keeping the valve open.
3.
 Inspect intake air control valve assy No.3 4. INSPECT VACUUM SWITCHING VALVE ASSY FOR ACIS
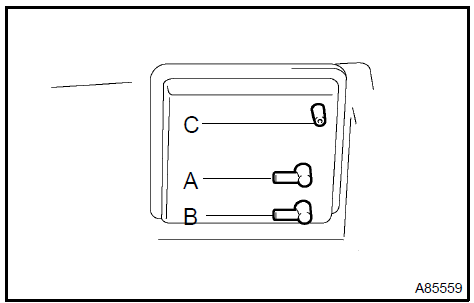
- Cover port C with your finger, and check that air flows from port B to port A.
- Cover ports C with your finger, and check that air does not flow from port A to port B.
- Cover port A and C with your fingers, and apply 60 kPa (450 mmHg, 18 in.Hg) of vacuum to port B. Check that there is no change in the vacuum after one minute.
If the result is not as specified, replace air cleaner cap.
 Inspect vacuum switching valve assy for acis 5. INSPECT VALVE ASSY, VACUUM SWITCHING FOR IAC VALVE No.1 (1MZ−FE ONLY) AND No.2
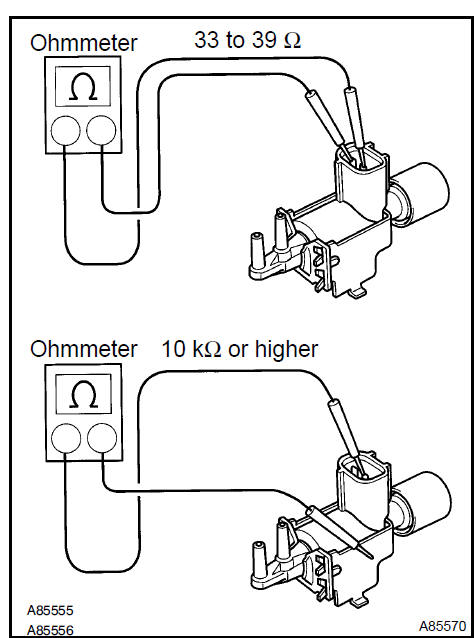
a. Check the VSV resistance.
Standard:

If the result is not as specified, replace the VSV assy.
b. Check VSV operation.
1. Check that air flows from port E to the filte
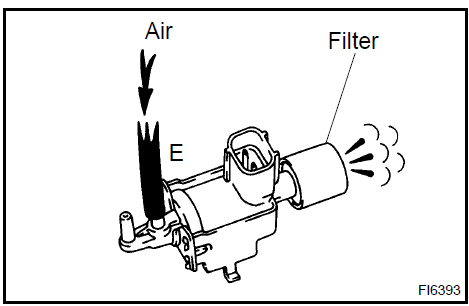
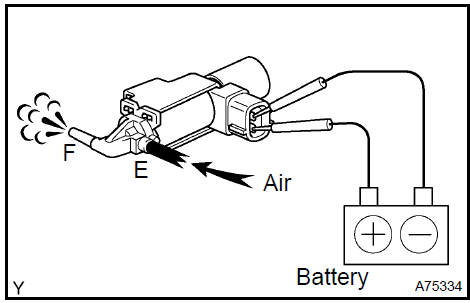
- Apply battery voltage across the terminals.
- Check that air flows from port E to port F.
If the result is not as specified, replace the VSV assy

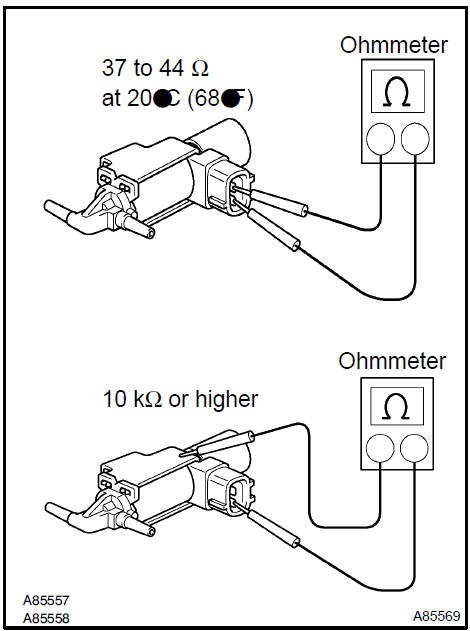
a. Check the VSV resistance.
Standard:

If the result is not as specified, replace the VSV assy No. 3.
b. Check VSV operation.
1. Check that air flows from port E to the filter.
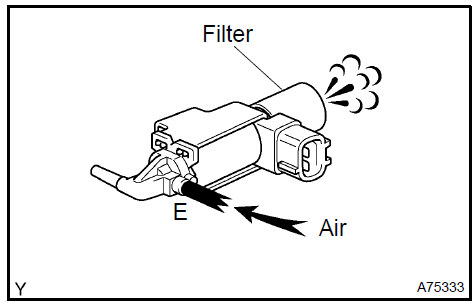
2. Apply battery voltage across the terminals. Check that air flows from port E to F.
If the result is not as specified, replace the VSV assy No. 3.
Test yourself
A quick Toyota Camry quiz: every answer comes with an explanation and a link to the manual page.