Exterior/interior trim
Outside moulding
In this manual: Exterior/interior trim
13steps
~78min
3/5difficulty
Done 0 of 13
REPLACEMENT
 Remove outside moulding 2. INSTALL OUTSIDE MOULDING
HINT:
- The installation procedures are the removal procedures in reverse order. However, only installation procedures requiring additional information are included.
- Use the same procedures for the RH side and LH side.
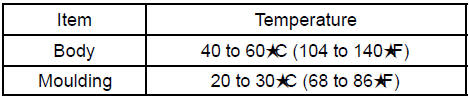
- When replacing the moulding, heat the body and moulding using a heat light.
- Using a heat light heat the moulding.
- Tie both piano wire ends to wooden block or similar object.
- Scrape the double−sided tape off by pulling the piano wire as shown in the illustration.
- If reusing the moulding, take care not to damage the moulding.
- Do not damage the body.
Remove outside moulding 2. INSTALL OUTSIDE MOULDING
- Using a heat light, heat the body.
- Remove the protective tape from the body.
- Wipe off the stains with cleaner.
- Clean the moulding (if reusing the moulding).
- Using a heat light, heat the moulding.
- Remove the double−sided tape from the moulding.
- Wipe off the stains with cleaner.
- Apply new bouble−sided tape to the moulding as shown in the illustration.
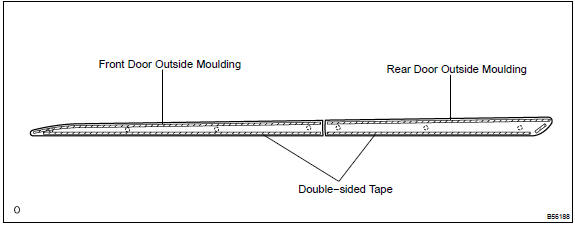
- Using a heat light, heat the body and moulding.
- Remove the peeling paper from the face of the moulding and attach the moulding securely to the vehicle body.
g. Push the moulding to the body.
NOTICE: Do not apply excessive force onto the moulding. Instead, apply steady pressure with your thumbs.Test yourself
A quick Toyota Camry quiz: every answer comes with an explanation and a link to the manual page.
Was this page helpful?