Roof headlining assy
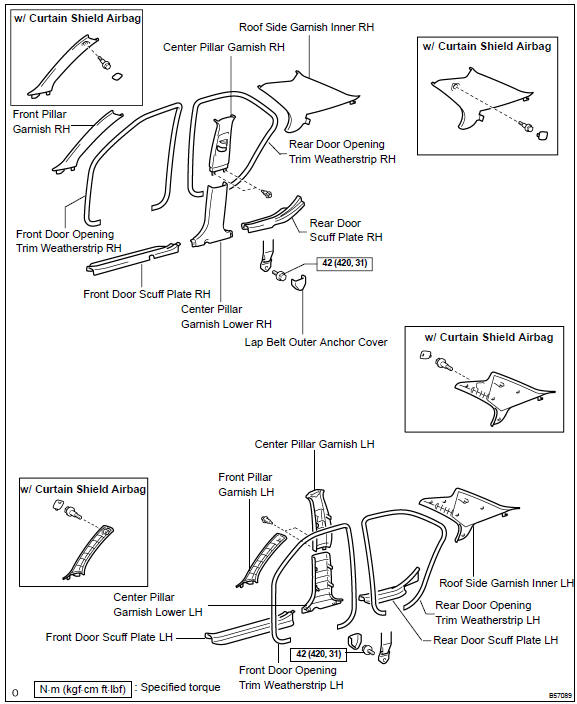
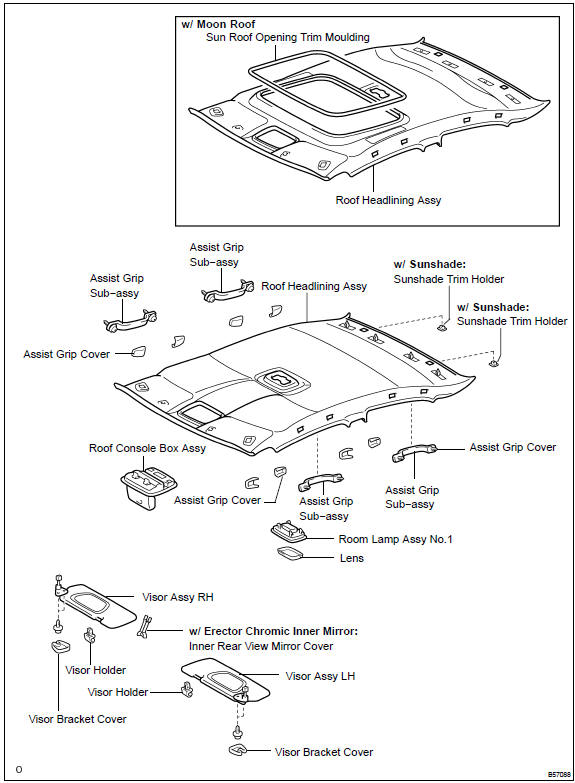
HINT:
- The installation is in the reverse order of the removal. However, when there is a special point concerning the installation, it is indicated.
- On the RH side, use the same procedures as on the LH side.
- REMOVE FRONT SEAT ASSEMBLY RH
- REMOVE FRONT SEAT ASSEMBLY LH
- REMOVE BENCH TYPE REAR SEAT CUSHION ASSY
- REMOVE REAR SIDE SEAT BACK ASSY RH
- REMOVE REAR SIDE SEAT BACK ASSY LH
- REMOVE SEPARATE TYPE REAR SEAT BACK ASSY RH
- REMOVE SEPARATE TYPE REAR SEAT BACK ASSY LH
- REMOVE CONSOLE PANEL UPPER REAR
- REMOVE RR CONSOLE BOX
- REMOVE CONSOLE PANEL UPPER
- REMOVE CONSOLE BOX FRONT
- REMOVE CONSOLE BOX DUCT No.1
- REMOVE AIR DUCT REAR No.1
- REMOVE AIR DUCT REAR No.2
- REMOVE FLOOR SHIFT SHIFT LEVER ASSY (MANUAL TRANSAXLE)
- REMOVE FLOOR SHIFT ASSY (AUTOMATIC TRANSAXLE
- REMOVE FRONT DOOR SCUFF PLATE RH
a. Using a screwdriver, remove the front door scuff plate.
HINT: Tape the screwdriver tip before use.
b. Employ the same manner described above to the other side.
18. REMOVE FRONT DOOR SCUFF PLATE LH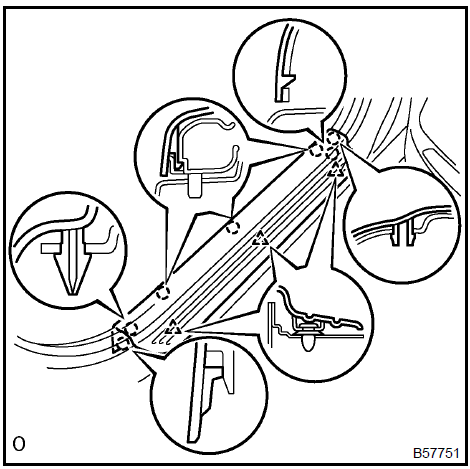
a. Using a screwdriver, remove the rear door scuff plate.
HINT: Tape the screwdriver tip before use.
b. Employ the same manner described above to the other side.
20. REMOVE REAR DOOR SCUFF PLATE LH
- REMOVE FRONT DOOR OPENING TRIM WEATHERSTRIP RH
- REMOVE FRONT DOOR OPENING TRIM WEATHERSTRIP LH
- REMOVE REAR DOOR OPENING TRIM WEATHERSTRIP RH
- REMOVE REAR DOOR OPENING TRIM WEATHERSTRIP LH
- REMOVE CENTER PILLAR GARNISH LOWER RH
- Pull the center pillar lower garnish upward to remove it.
- Employ the same manner described above to the other side.
a. Using a screwdriver, remove the lap belt outer anchor cover.
HINT: Tape the screwdriver tip before use.
b. Remove the bolt and front seat outer belt floor anchor.

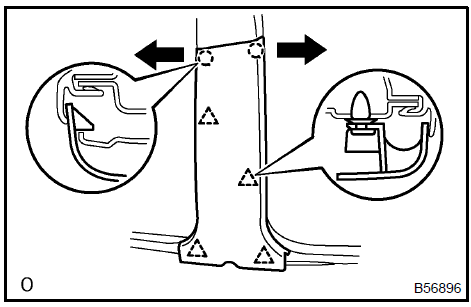
- Remove the 2 clips
- Using a screwdriver, remove the center pillar upper garnish.
HINT: Tape the screwdriver tip before use.
e. Employ the same manner described above to the other side.
28. REMOVE CENTER PILLAR GARNISH UPPER LH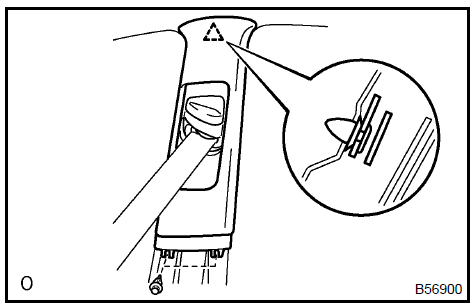
a. Using a screwdriver, remove the roof side garnish inner.
HINT: Tape the screwdriver tip before use.
b. Employ the same manner described above to the other side.
30. REMOVE ROOF SIDE GARNISH INNER LH (W/O CURTAIN SHIELD AIR BAG)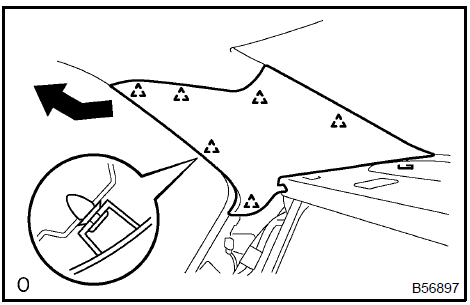
a. Using a screwdriver, remove the roof side garnish inner cover.
HINT: Tape the screwdriver tip before use.
- Remove the bolt.
- Using a screwdriver, remove the roof side garnish inner.
HINT: Tape the screwdriver tip before use.
32. REMOVE ROOF SIDE GARNISH INNER LH (W/ CURTAIN SHIELD AIR BAG)
a. Using a screwdriver, remove the front pillar garnish.
HINT: Tape the screwdriver tip before use.
b. Employ the same manner described above to the other side.
34. REMOVE FRONT PILLAR GARNISH LH (W/O CURTAIN SHIELD AIR BAG)
a. Using a screwdriver, remove the front pillar garnish cover.
HINT: Tape the screwdriver tip before use.
- Remove the bolt.
- Using a screwdriver, remove the front pillar garnish.
HINT: Tape the screwdriver tip before use.

d. Protect the curtain shield airbag.
NOTICE: Cover the curtain shield airbag with the protection cover as soon as the front pillar garnish is removed.1. Cover the airbag with cloth or nylon of 700 mm (27.56 in.) × 120 mm (4.72 in.) and fix the ends of the cover with tape, as shown in the illustration.
e. Employ the same manner described above to the other side.
36. REMOVE FRONT PILLAR GARNISH LH (W/ CURTAIN SHIELD AIR BAG)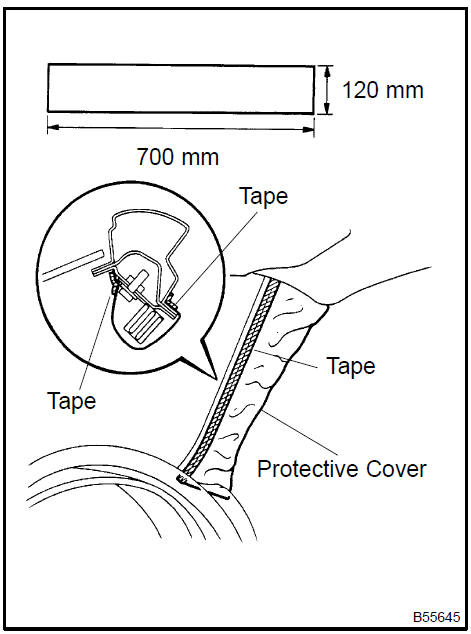
a. Using a screwdriver, remove the assist grip cover.
HINT: Tape the screwdriver tip before use.
b. Remove the 2 screws and assist grip.
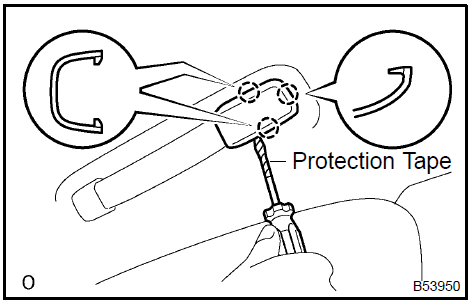
a. Using a moulding remover, remove the visor bracket cover.
HINT: Tape the screwdriver tip before use.
b. Remove the 2 screws and assist grip.
39. REMOVE LH VISOR ASSY
a. Using a screwdriver, remove the roof console box then disconnect the connector.
HINT: Tape the screwdriver tip before use.
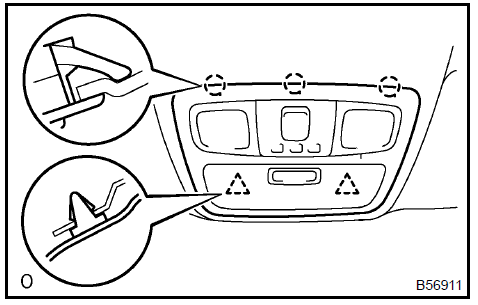
a. Using a screwdriver, remove the lens.
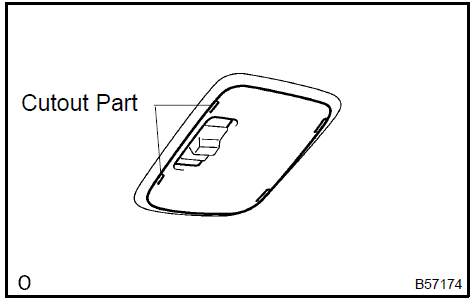
b. Using a screwdriver, remove the room lamp assembly No.1 then disconnect the connector.
HINT: Tape the screwdriver tip before use.

a. Remove the holder of the sun visor by turning it to the left.
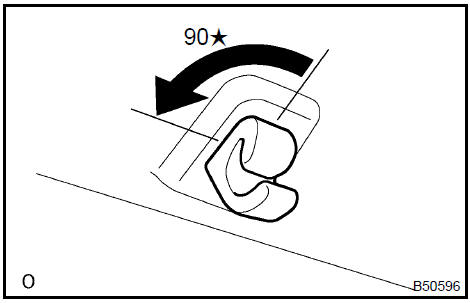 Remove visor holder
- REMOVE SUN ROOF OPENING TRIM MOULDING (W/ SLIDING ROOF)
- REMOVE ROOF HEADLINING ASSY
- Remove the 2 sunshade trim holders.
- w/ Erector chromic inner mirror: Remove the inner rear view mirror cover.
- Tear off the tape on the adhered part of the wire harness.
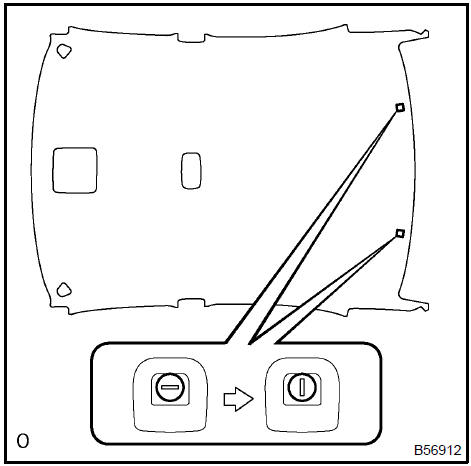
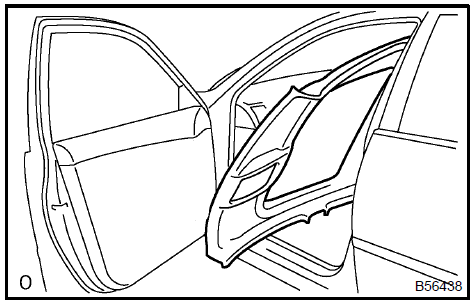
d. Remove the headlining assembly from the passenger’s door.
a. Align the markings, then install the wire harness with tape.
INT: Be careful for dirt or foreign objects not to stick to the adhered part when peeling the double−stick tape.
b. Attach the roof wire harness across the adhered part
NOTICE: Roof wire harness should be attached securely.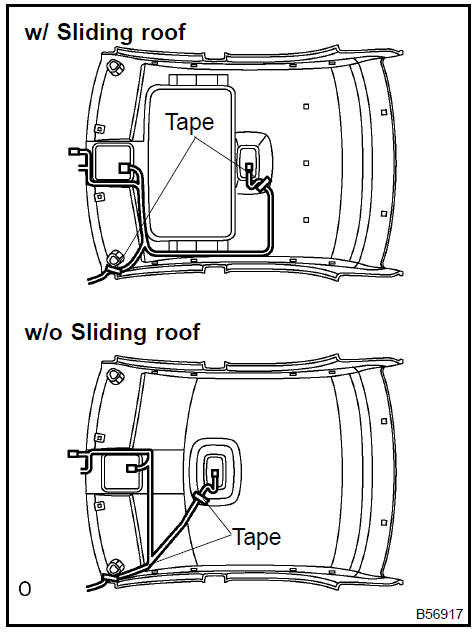
- INSTALL FRONT SEAT ASSEMBLY LH
- INSTALL FRONT SEAT ASSEMBLY RH
Test yourself
A quick Toyota Camry quiz: every answer comes with an explanation and a link to the manual page.