Stabilizer bar rear
HINT: COMPONENTS:
- REMOVE REAR WHEEL
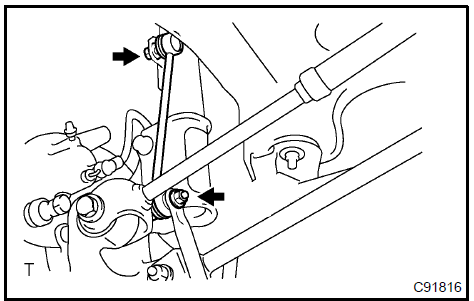
- REMOVE REAR STABILIZER LINK ASSY LH
a. Remove the 2 nuts and stabilizer bar link.
HINT: If the ball joint turns together with the nut, use a hexagon wrench (5 mm) to hold the stud.
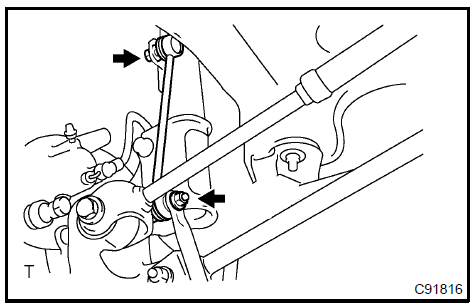 Remove rear stabilizer link assy LH 3. REMOVE REAR STABILIZER LINK ASSY RH
HINT: Remove the RH side by the same procedures with the LH side.
4. INSPECT REAR STABILIZER LINK ASSY LHAs shown in the illustration, flip the ball joint stud back and forth 5 times, before installing the nut.
- Using a torque wrench, turn the nut continuously at a rate of 2 − 4 seconds per 1 turn and take the torque reading on the 5th turn. Turning torque: 0.05 − 1 N·m
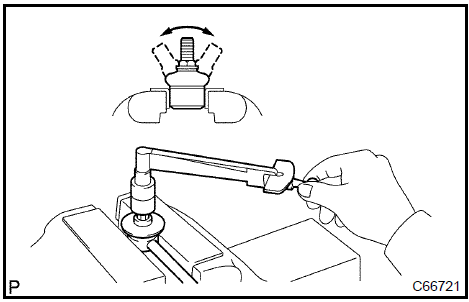 Inspect rear stabilizer link assy LH 5. REMOVE STABILIZER BAR REAR
a. Remove the 8 bolts, 2 No. 1 brackets and 2 bushings.
6. INSTALL STABILIZER BAR REAR a. Install the bushing and bracket with the 4 bolts (LH side).Torque: 19 N·mHINT:
2 types of bolts (A, B) are used, so make sure the correct bolts are installed.
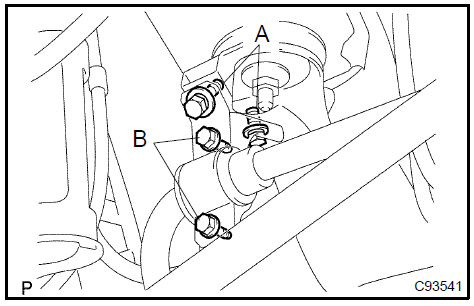
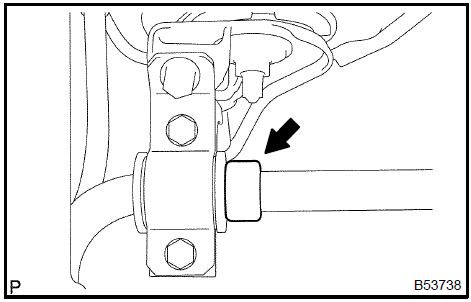
Install the bushing to the inner side of the bushing stopper on the stabilizer bar.
HINT: If the ball joint turns together with the nut, use a hexagon (5 mm) wrench to hold the stud.
 Install rear stabilizer link assy LH 8. INSTALL REAR STABILIZER LINK ASSY RH
HINT: Install the RH side by the same procedures with the LH side.
9. INSTALL REAR WHEEL Torque: 103 N·mTest yourself
A quick Toyota Camry quiz: every answer comes with an explanation and a link to the manual page.