Audio & visual system
Power point socket ASSY RR
In this manual: Audio & visual system
~1min read
REPLACEMENT
HINT:
- COMPONENTS: See page 67-2
- Installation is in the reverse order of removal.
1. REMOVE POWER POINT SOCKET ASSY RR
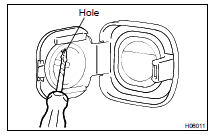
(a) Using a screwdriver, disengage the claw on the power point socket cover from the hole in the power point socket, then pull out the power point socket approx. 10 mm (0.39 in.).
HINT: Tape the screwdriver tip before use.
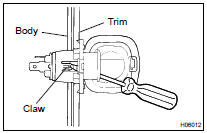
(b) Using a screwdriver, disengage the claw on the power point socket cover from the body and remove the power point socket and cover as a unit.
HINT: Tape the screwdriver tip before use.
(c) Disconnect the connector.(d) Disassemble the power point socket from the socket cover.
2. INSTALL POWER POINT SOCKET ASSY RR
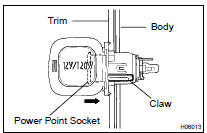
(a) Assemble the power point socket to the power point socket cover at the position 10 mm (0.39 in.) away from full lock position and ensure that they are temporarily locked. (b) Align the cut-out on the body with the claw on the power point socket cover and install the power point socket and cover to the body.
(c) After installing them, push in the power point socket approx. 10 mm (0.39 in.) to lock it.
Was this page helpful?