Brake booster
- Install check valve grommet
- Install the grommet to the booster.
- Install brake vacuum check valve assembly
- Install the check valve to the grommet.
- Install brake booster gasket
- Install a new gasket to the booster.
- Install brake master cylinder push rod clevis
- Install the push rod clevis to the booster.
- Temporarily tighten the push rod clevis lock nut.
The push rod clevis lock nut will be tightened to a torque specification in the "check and adjust brake pedal height" procedures.
- Install brake booster assembly
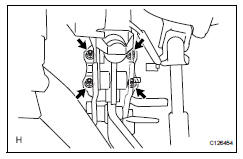
- Install the booster with the 4 nuts.
- Install push rod pin
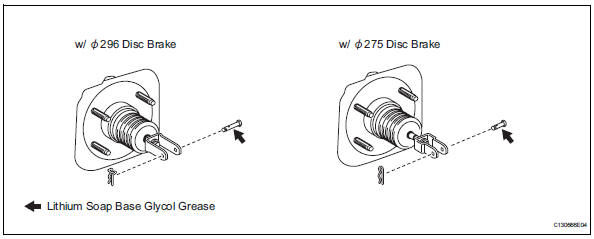
- Apply lithium soap base glycol grease to the push rod pin.
- Install the push rod pin to the push rod clevis.
The push rod pin must be installed as shown in the illustration.
- Install the clip to the push rod pin.
The clip must be installed as shown in the illustration.
- Check and adjust brake booster push rod (see page br-24)
- Connect vacuum hose
- Connect the vacuum hose to the check valve.
- Install brake master cylinder subassembly (see page br-25)
- Install abs and traction actuator assembly with bracket (see page bc-186)
- Connect brake lines (see page bc-187)
- Fill reservoir with brake fluid (see page br- 6)
- Bleed air from brake master cylinder (see page br-7)
- Bleed air from brake line (see page br-7)
- Bleed air from abs and traction actuator assembly (see page br-8)
- Check and adjust brake pedal height (see page br-13)
- Check brake pedal free play (see page br- 14)
- Check brake pedal reserve distance (see page br-14)
- Check brake fluid level in reservoir (see page br-6)
- Check for brake fluid leakage
- Install air cleaner case sub-assembly
- Install the air cleaner case (see page em-105).
Refer to the procedures from the installation of the air cleaner case up until the installation of the purge vsv.
Installation (2006/01- )- Install check valve grommet
- Install the grommet to the booster.
- Install brake vacuum check valve assembly
- Install the check valve to the grommet.
- Install brake booster gasket
- Install a new gasket to the booster.
- Install brake master cylinder push rod clevis
- Install the push rod clevis to the booster.
- Temporarily tighten the push rod clevis lock nut.
The push rod clevis lock nut will be tightened to a torque specification in the "check and adjust brake pedal height" procedures.
- Install brake booster assembly
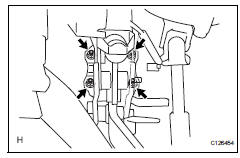
- Install the booster with the 4 nuts.
- Install push rod pin
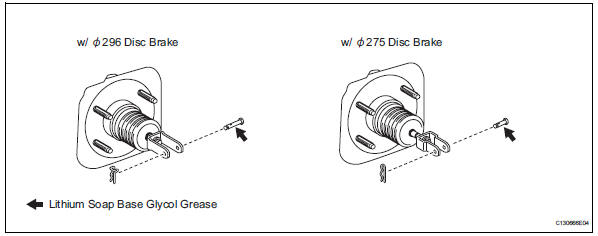
- Apply lithium soap base glycol grease to the push rod pin.
- Install the push rod pin to the push rod clevis.
The push rod pin must be installed as shown in the illustration.
- Install the clip to the push rod pin.
The clip must be installed as shown in the illustration.
- Check and adjust brake booster push rod (see page br-24)
- Connect vacuum hose
- Connect the vacuum hose to the check valve.
- Install brake master cylinder subassembly (see page br-26)
- Install abs and traction actuator assembly with bracket (see page bc-187)
- Connect brake lines (see page bc-188)
- Fill reservoir with brake fluid (see page br- 6)
- Bleed air from brake master cylinder (see page br-7)
- Bleed air from brake line (see page br-7)
- Bleed air from abs and traction actuator assembly (see page br-8)
- Check and adjust brake pedal height (see page br-15)
- Check brake pedal free play (see page br- 15)
- Check brake pedal reserve distance (see page br-16)
- Check brake fluid level in reservoir (see page br-6)
- Check for brake fluid leakage
- Install air cleaner case sub-assembly (for 2az-fe)
- Install the air cleaner case (see page em-105).
Refer to the procedures from the installation of the air cleaner case up until the installation of the purge vsv.
- Install air cleaner case (for 2gr-fe)
- Install the air cleaner case (see page em-31).
Refer to the procedures from the installation of the air cleaner case up until the installation of the air cleaner cap sub-assembly.
Test yourself
A quick Toyota RAV4 quiz: every answer comes with an explanation and a link to the manual page.