Remove propeller shaft with center bearing shaft assembly
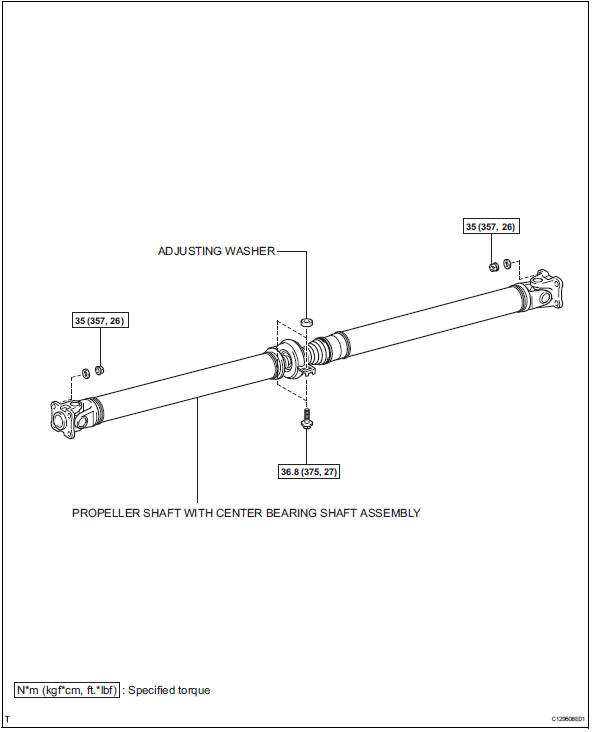
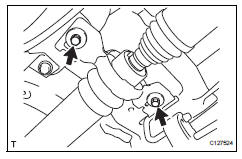
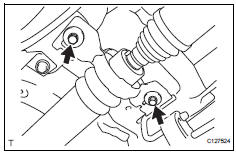
Remove the 2 bolts and 2 adjusting washers, and disconnect the propeller with center bearing shaft.
Notice:
During the removal, do not exert excessive force on the universal joint.
When removing, transporting or storing the propeller with center bearing shaft assembly, do not allow the no. 2 Joint angle to exceed 20Ю
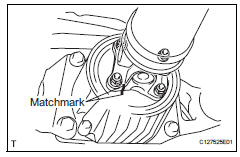
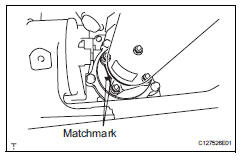
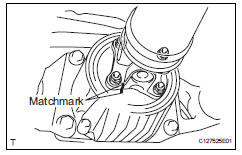
Place matchmarks on the differential carrier and propeller shaft.
Remove the 4 nuts and 4 washers, and disconnect the propeller shaft and differential carrier.
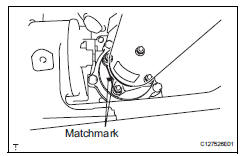
Place matchmarks on the transfer and propeller shaft.
Remove the 4 nuts and 4 washers, and disconnect the propeller shaft from the transfer.
Inspection
Inspect propeller shaft with center bearing shaft assembly
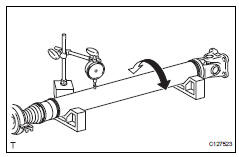
Using a dial indicator, measure the propeller shaft runout for front side.
Maximum runout: 0.4 Mm (0.02 In.)
If the shaft runout is greater than the maximum, replace the propeller shaft.
Notice:
Place the dial indicator on the center of the shaft, and perpendicular to the shaft.
Using a dial indicator, measure the propeller shaft runout for rear side.
Maximum runout: 0.4 Mm (0.02 In.)
If the shaft runout is greater than the maximum, replace the propeller shaft.
Notice:
Place the dial indicator on the center of the shaft, and perpendicular to the shaft.
Inspect joint angle
Before the angle measurement, use procedures like the examples below to stabilize each part.
Rotate the propeller shaft several times by hand.
Set the jack to the differential, and raise and lower it.
Notice:
Perform the measurement with a 4 post lift or pit so that the vehicle condition is as close to a standard ground condition as possible.
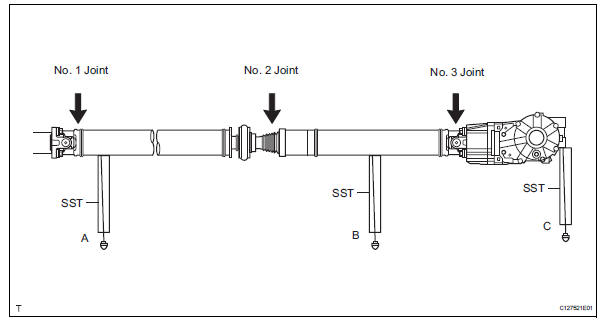
Using sst, measure the installation angle of the propeller shaft for front side (a in illustration).
Sst 09370-50010 standard angle a:-2д9'-3а1' For w/ 3rd seat
Using sst, measure the installation angle of the propeller shaft for front side (a in illustration) and propeller shaft for rear side (b in illustration).
Sst 09370-50010Standard angle a-b: 1г5'
Using sst, measure the installation angle of the propeller shaft for rear side (b in illustration) and differential carrier rear side (c in illustration).
Sst 09370-50010Standard angle b-c: 2а4'
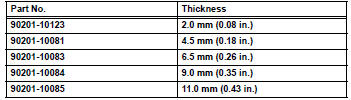
If the result is not as specified, replace the center support bearing adjusting washer with a more appropriate one.
Notice:
Use washers of the same thickness on the left and right sides.
Do not use 2 or more washers stacked together
Standard adjusting washer Installation
Temporarily install propeller shaft with center bearing shaft assembly
Align the matchmarks of the transfer and propeller shaft.
Temporarily install the propeller shaft with center bearing with the 4 nuts and 4 washers.
Align the matchmarks of the differential carrier and propeller shaft.
Temporarily install the propeller shaft with center bearing with the 4 bolts and 4 washers.
Temporarily install the center support bearing and center support bearing washer with the 2 bolts.
Tighten propeller shaft with center bearing shaft assembly
Tighten the 4 nuts of the propeller shaft and transfer to the torque specification.
Torque: 35 n*m (357 kgf*cm, 26 ft.*Lbf)
Tighten the 4 nuts of the propeller shaft and differential carrier to the torque specification.
Torque: 35 n*m (357 kgf*cm, 26 ft.*Lbf)
Check that the center line of the center support bearing housing is perpendicular to the axis of the propeller shaft.
Tighten the 2 bolts of the center support bearing to the torque specification.
Torque: 36.8 N*m (375 kgf*cm, 27 ft.*Lbf)
Inspect joint angle (see page pr-4)
?
Test yourself
A quick Toyota RAV4 quiz: every answer comes with an explanation and a link to the manual page.