Radiator
On-vehicle inspection
- Check radiator reservoir cap subassembly

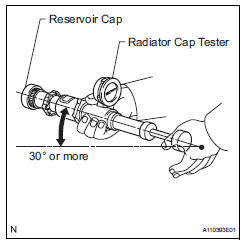
- Measure the valve opening pressure.
- If there are water stains or foreign matter on oring 1, clean it with water and finger scouring.
- Check that o-ring 1 is not deformed, cracked or swollen.
- Apply engine coolant to o-ring 1 and rubber packing 2 before using a radiator cap tester.
- When using the cap tester, tilt it more than 30 degrees.
- Pump the cap tester several times, and check the maximum pressure*.
*: Even if the cap cannot maintain the maximum pressure, it is not a defect.
Judgment criterion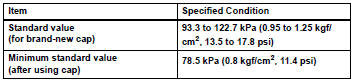
If the maximum pressure is less than the minimum standard value, replace the radiator reservoir cap sub-assembly.
On-vehicle cleaning- Inspect radiator assembly

- Check that the radiator and condenser are not blocked with leaves, dirt, or insects. Clean the hose connections.
If the fins are blocked, wash them with water or a steam cleaner.
Notice:- If the distance between the steam cleaner and core is too close, the fins may be damaged.
- Keep the following injection distance.
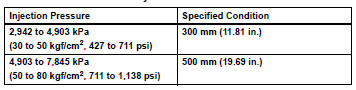
- If the fins are bent, straighten them with a screwdriver or pliers.
- Never apply water directly onto the electronic components.
- Dry the fins with compressed air.
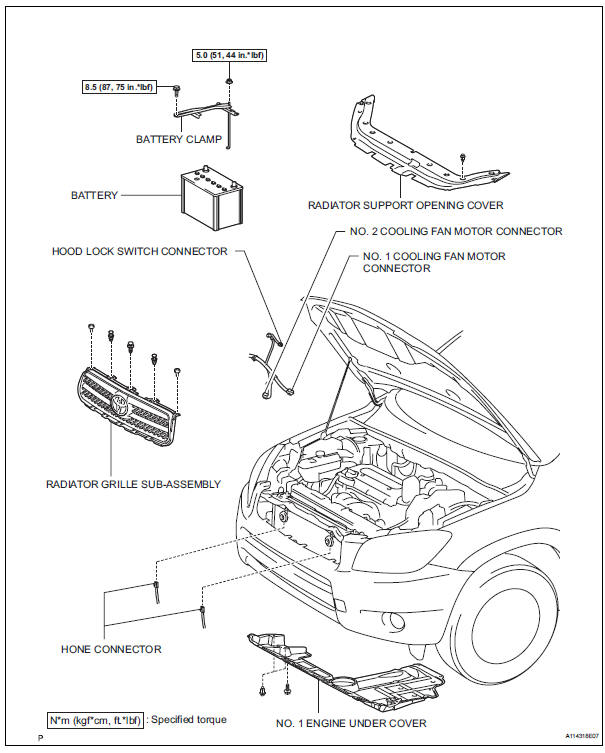
- Disconnect cable from negative battery terminal
- Remove radiator support opening cover
- Remove battery clamp
- Remove the bolt, nut and clamp.
- Remove battery
- Remove no. 1 Engine under cover
- Drain engine coolant (see page co-6)
- Remove radiator grille sub-assembly (see page et-6)
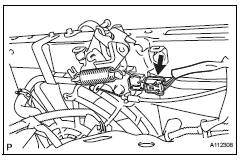
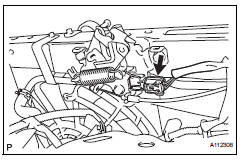
- Disconnect hood lock switch connector
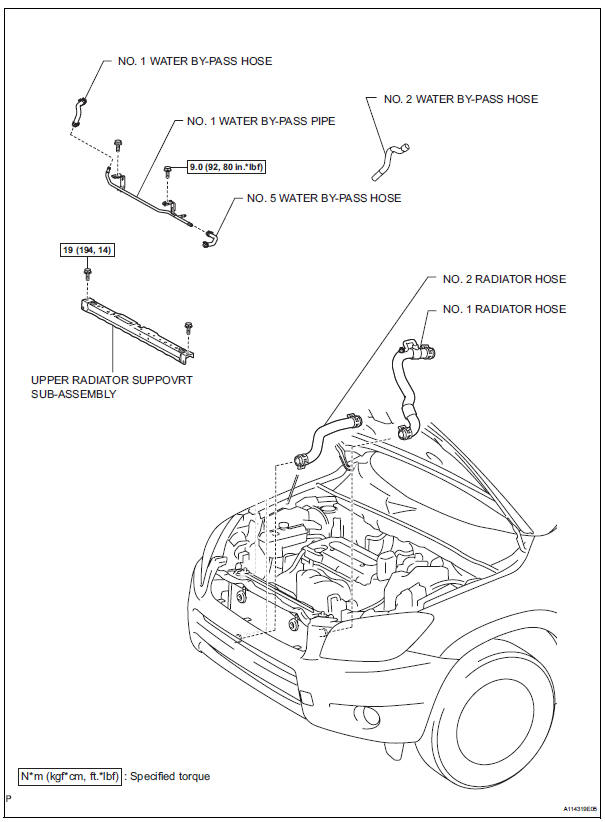
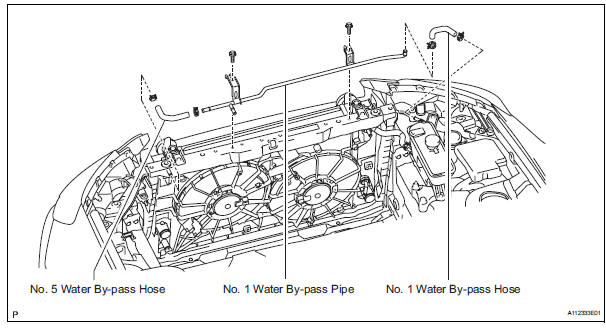
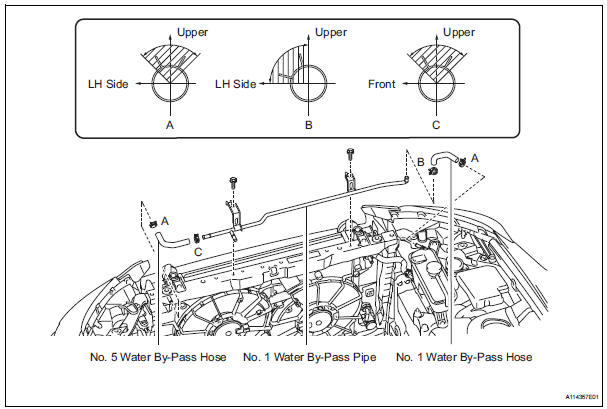
- Disconnect no. 1 Water by-pass hose
- Disconnect the hose from the radiator reservoir.
- Disconnect no. 5 Water by-pass hose
- Disconnect the hose from the radiator.
- Remove no. 1 Water by-pass pipe
- Disconnect the pipe from the no. 1 Radiator hose.
- Remove the 2 bolts and the pipe.
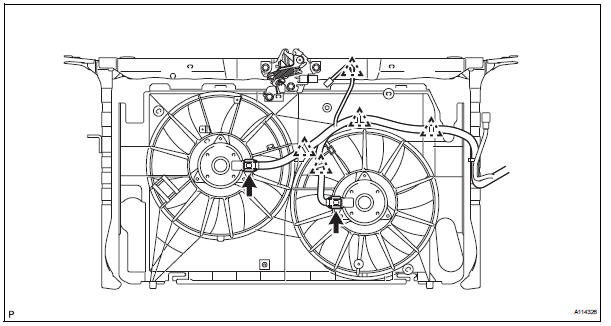
- Disconnect cooling fan motor harness
- Disconnect the 2 fan motor connectors from the 2 fan motors.
- Detach the 5 harness clamps from the fan shroud and upper radiator support.
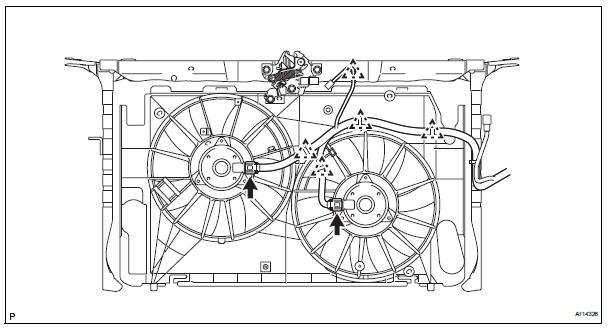
- Disconnect horn connector
- Disconnect the 2 horn connectors.
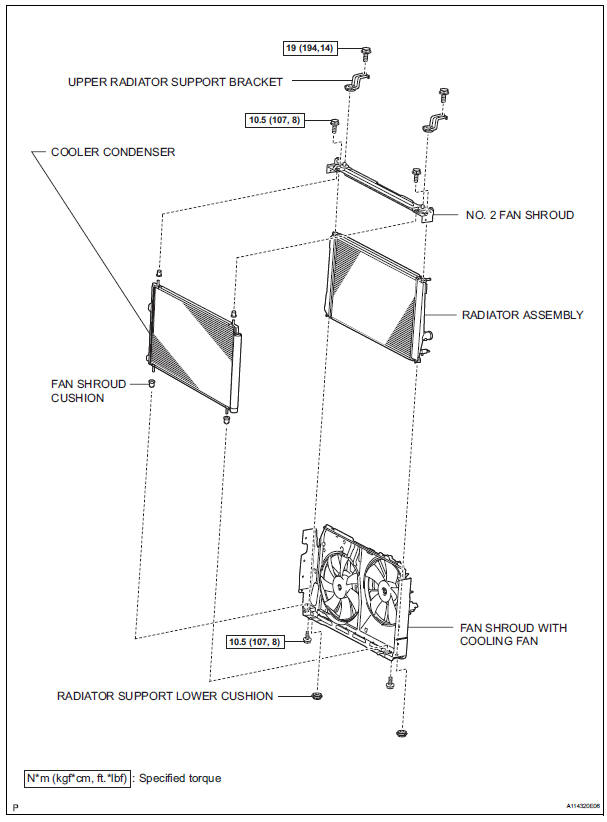
- Remove upper radiator support bracket
- Remove the 2 bolts and the 2 upper radiator support brackets.
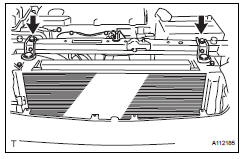
- Remove no. 2 Fan shroud
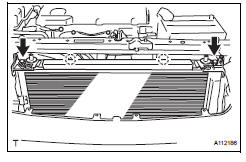
- Remove the 2 bolts.
- Detach the 2 claws and no. 2 Shroud.
- Remove upper radiator support subassembly

- Remove the 4 bolts and upper radiator support with hood lock.
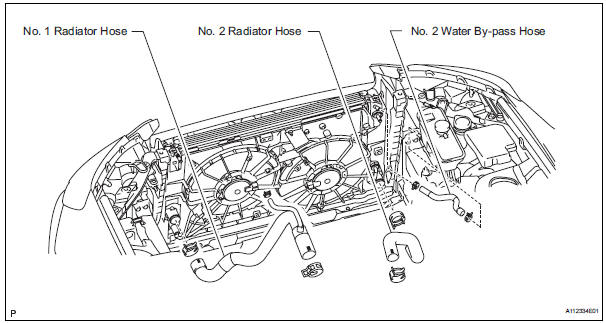
- Disconnect no. 1 Radiator hose
- Disconnect no. 2 Radiator hose
- Disconnect no. 2 Water by-pass hose
Disconnect the by-pass hose from the radiator reservoir and radiator.
- Remove radiator assembly

- Separate the cooler condenser from the radiator.
After detaching the condenser, make sure that all 4 fan shroud cushions are present
- Remove the radiator with the 2 radiator support lowers.
After detaching the radiator, make sure that both radiator support lowers are present.
- Remove fan shroud with cooling fan
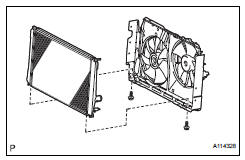
- Remove the 2 bolts and radiator from the fan shroud.
- Install fan shroud with cooling fan
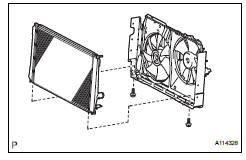
- Install the fan shroud with cooling fan with the 2 bolts to the radiator.
- Install radiator assembly
- Install the 4 fan shroud cushions to the cooler condenser.
- Set the cooler condenser to the fan shroud.
- Install the 2 radiator support lower cushions to the fan shroud.
- Install the radiator with cooler condenser and fan shroud to the radiator support lower.

- Install upper radiator support subassembly
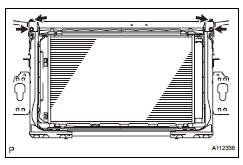
- Install the upper radiator support with the 4 bolts.
- Install no. 2 Fan shroud
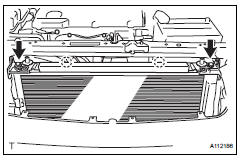
- Attach the 2 claws to install the no. 2 Fan shroud and install the 2 bolts.
- Install upper radiator support bracket
- Install the bracket with the 2 bolts.
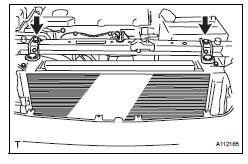
- Connect horn connector
- Connect the 2 horn connectors.
- Connect no. 2 Water by-pass hose
- Connect the by-pass hose to the radiator and radiator reservoir.
The direction of the hose clamp is indicated in the illustration.
- Connect no. 2 Radiator hose
The direction of the hose clamp is indicated in the illustration.
- Connect no. 1 Radiator hose
The direction of the hose clamp is indicated in the illustration.

- Connect cooling fan motor harness
- Attach the harness with the 5 clamps.
- Connect the 2 fan motor connectors.
- Install no. 1 Water by-pass pipe
- Install the by-pass pipe with the 2 bolts to the upper radiator support.
- Connect the no. 1 Radiator hose to the pipe.
The direction of the hose clamp is indicated in the lustration.
- Connect no. 5 Water by-pass hose
- Connect the by-pass hose to the radiator.
The direction of the hose clamp is indicated in the lustration.
- Connect no. 1 Water by-pass hose
- Connect the by-pass hose to the radiator and radiator reservoir.
The direction of the hose clamp is indicated in the illustration.
- Connect hood lock switch connector
- Install radiator grille sub-assembly (see page et-10)
- Install battery
- Install battery clamp
- Attach the hook of the battery clamp to the battery bracket.
- Temporarily tighten the nut and install the bolt.
- Adjust the battery clamp's position.
- Fully tighten the bolt and nut.
- Connect cable to negative battery terminal
- Add engine coolant (see page co-6)
- Check for engine coolant leaks (see page co-1)
- Install radiator support opening cover
Test yourself
A quick Toyota RAV4 quiz: every answer comes with an explanation and a link to the manual page.