Air Conditioning Panel
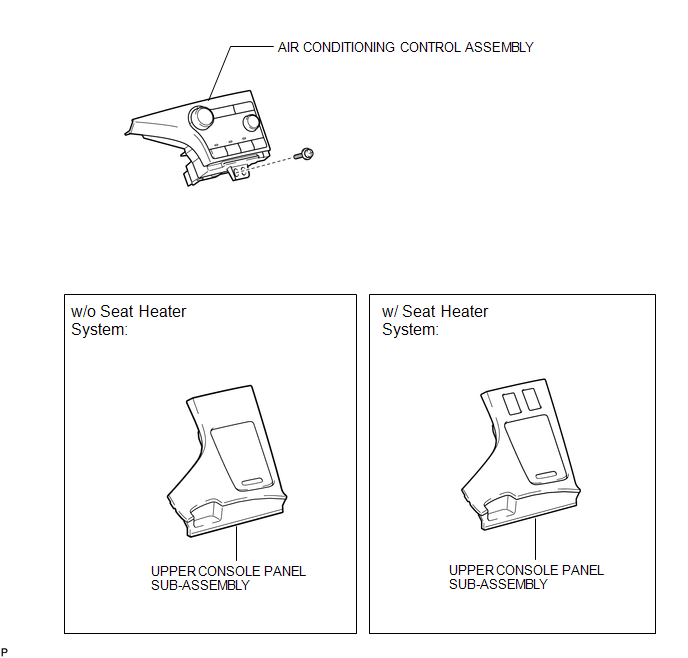
Installation INSTALLATION PROCEDURE
1. INSTALL AIR CONDITIONING CONTROL ASSEMBLY
(a) Connect the connector.
(b) Engage the 2 clips and 4 guides. |
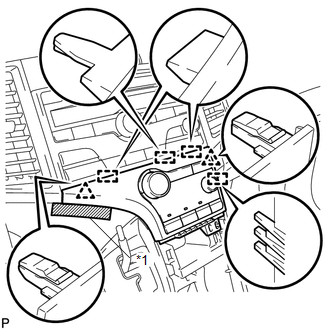 |
(c) Remove the protective tape.
Text in Illustration*1 |
Protective Tape |
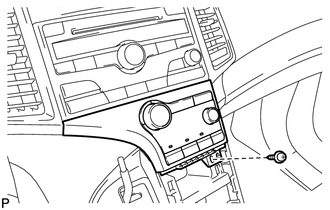
(d) Install the air conditioning control assembly with the screw. |
 |
2. INSTALL UPPER CONSOLE PANEL SUB-ASSEMBLY (w/o Seat Heater System)

3. INSTALL UPPER CONSOLE PANEL SUB-ASSEMBLY (w/ Seat Heater System)
4. CONNECT CABLE TO NEGATIVE BATTERY TERMINAL
NOTICE:
When disconnecting the cable, some systems need to be initialized after the cable is reconnected (See page ).
Removal REMOVAL PROCEDURE
1. DISCONNECT CABLE FROM NEGATIVE BATTERY TERMINAL
NOTICE:
When disconnecting the cable, some systems need to be initialized after the cable is reconnected (See page  ).
2. REMOVE UPPER CONSOLE PANEL SUB-ASSEMBLY (w/o Seat Heater System)
3. REMOVE UPPER CONSOLE PANEL SUB-ASSEMBLY (w/ Seat Heater System)
4. REMOVE AIR CONDITIONING CONTROL ASSEMBLY
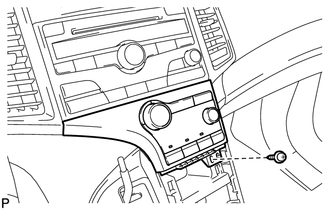
(a) Remove the screw. |
 |
(b) Apply protective tape to the area shown in the illustration. Text in Illustration
|
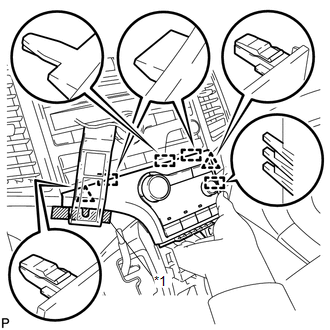 |
(c) Using a moulding remover, disengage the 2 clips and 4 guides as shown in the illustration.
(d) Disconnect the connector and remove the air conditioning control assembly.
Test yourself
A quick Toyota Venza quiz: every answer comes with an explanation and a link to the manual page.