Solar Sensor
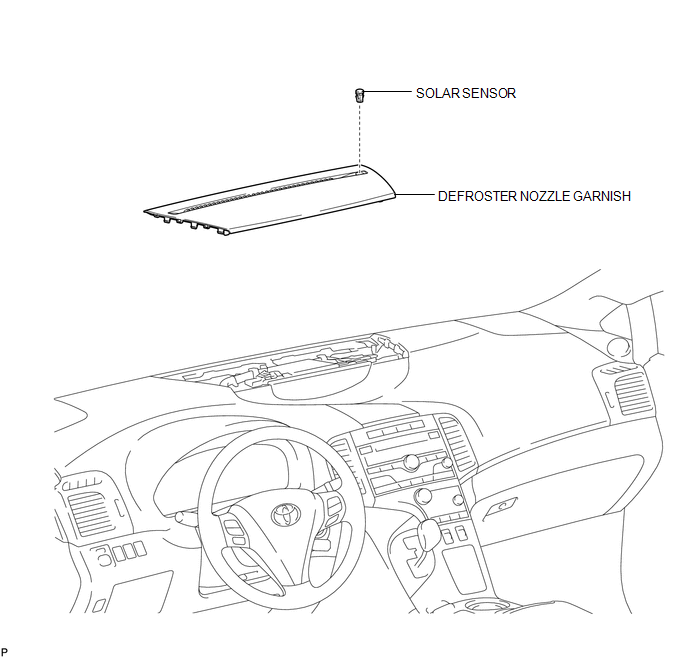
On-vehicle Inspection ON-VEHICLE INSPECTION PROCEDURE
1. INSPECT SOLAR SENSOR
(a) Disconnect the solar sensor connector. |
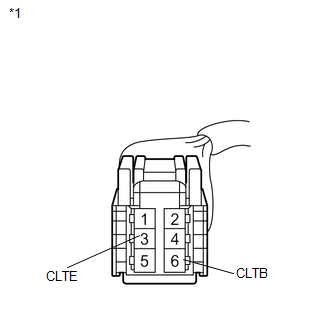 |
(b) Measure the voltage according to the value(s) in the table below.
Standard Voltage:
Tester Connection | Condition | Specified Condition |
|---|---|---|
6 (CLTB) - 3 (CLTE) |
Engine switch off |
Below 1 V |
6 (CLTB) - 3 (CLTE) |
Engine switch on (IG) |
11 to 14 V |
If the voltage is not as specified, repair or replace the wire harness or connector.
(c) Reconnect the solar sensor connector. |
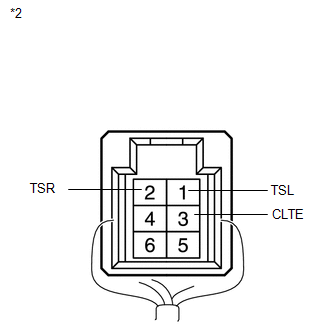 |
(d) Turn the engine switch on (IG).
(e) Measure the voltage according to the value(s) in the table below.
Standard Voltage:
Tester Connection | Condition | Specified Condition |
|---|---|---|
1 (TSL) - 3 (CLTE) |
Sensor is subjected to electric light |
0.8 to 4.3 V |
1 (TSL) - 3 (CLTE) |
Sensor is covered by a cloth |
Below 0.8 V |
2 (TSR) - 3 (CLTE) |
Sensor is subjected to electric light |
0.8 to 4.3 V |
2 (TSR) - 3 (CLTE) |
Sensor is covered by a cloth |
Below 0.8 V |
NOTICE:
- The connection procedure for using a digital tester such as a TOYOTA electrical tester is shown above. When using an analog tester, connect the positive (+) lead to terminal 6 and the negative (-) lead to terminal 2 (1) of the solar sensor.
- While using the battery during inspection, do not bring the positive and negative tester probes too close to each other as a short circuit may occur.
HINT:
- Use an incandescent light for inspection. Bring it within about 30 cm (11.8 in.) of the solar sensor.
- As the inspection light is moved away from the sensor, the voltage decreases.
If the voltage is not as specified, replace the solar sensor.
Text in Illustration*1 |
Front view of wire harness connector (to Solar Sensor) |
*2 |
Component with harness connected (Solar Sensor) |
1. DISCONNECT CABLE FROM NEGATIVE BATTERY TERMINAL
NOTICE:
When disconnecting the cable, some systems need to be initialized after the cable is reconnected (See page  ).
2. REMOVE DEFROSTER NOZZLE GARNISH
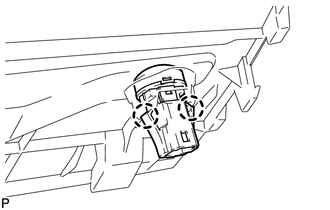
3. REMOVE SOLAR SENSOR
(a) Disengage the 2 claws and remove the solar sensor. |
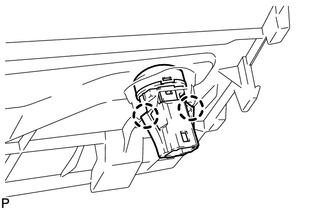 |
1. INSTALL SOLAR SENSOR
(a) Engage the 2 claws to install the solar sensor. |
 |
2. INSTALL DEFROSTER NOZZLE GARNISH

3. CONNECT CABLE TO NEGATIVE BATTERY TERMINAL
NOTICE:
When disconnecting the cable, some systems need to be initialized after the cable is reconnected (See page ).
Test yourself
A quick Toyota Venza quiz: every answer comes with an explanation and a link to the manual page.