Installation
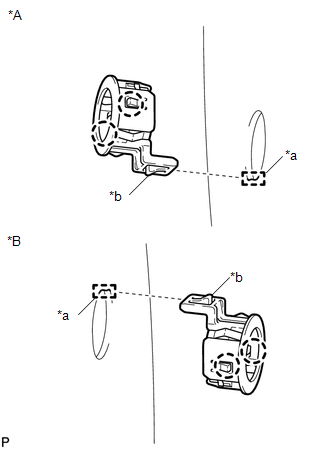
1. INSTALL NO. 1 ULTRASONIC SENSOR RETAINER
(a) Engage the 2 claws to install the No. 1 ultrasonic sensor retainer to the rear bumper assembly. Text in Illustration
NOTICE:
HINT:
|
 |
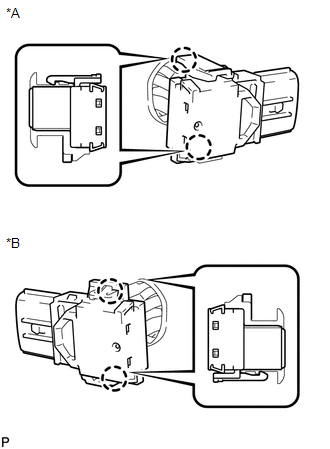
2. INSTALL NO. 1 ULTRASONIC SENSOR
(a) Engage the 2 claws to install the No. 1 ultrasonic sensor to the No. 1 ultrasonic sensor retainer. Text in Illustration
NOTICE: Push the No. 1 ultrasonic sensor retainer from the outside of the rear bumper assembly when there is a gap between the No. 1 ultrasonic sensor retainer and the rear bumper assembly surface. In this case, do not push on the No .1 ultrasonic sensor. |
 |
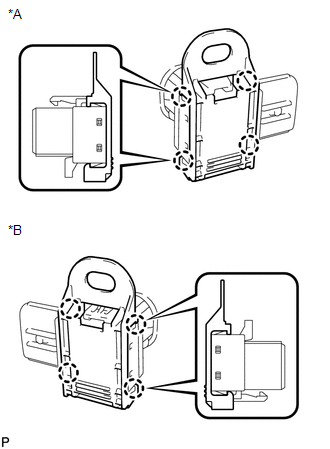
3. INSTALL ULTRASONIC SENSOR CLIP
(a) Engage the 4 claws to install the ultrasonic sensor clip. Text in Illustration
|
 |
(b) Engage the clamp. Text in Illustration
|
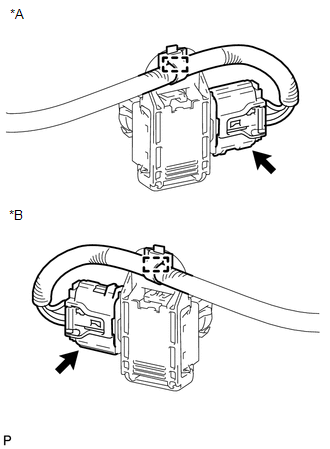 |
(c) Connect the connector.
4. INSTALL REAR BUMPER ASSEMBLY
(See page  )
Test yourself
A quick Toyota Venza quiz: every answer comes with an explanation and a link to the manual page.