Power Back Door Control Switch
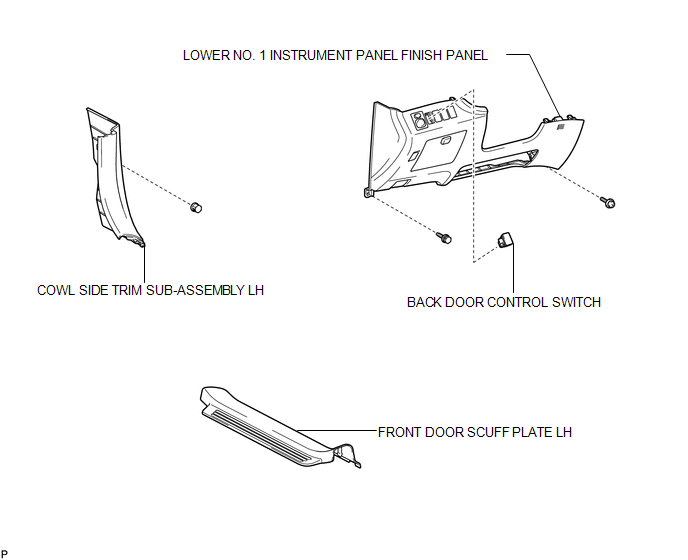
Inspection INSPECTION PROCEDURE
1. INSPECT POWER BACK DOOR OPENER / CLOSER SWITCH
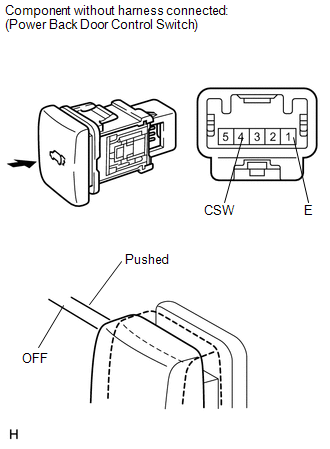
(a) Measure the resistance of the switch.
Standard resistance:
Tester Connection | Condition | Specified Condition |
|---|---|---|
1(E) - 4(CSW) |
Pushed (ON) |
Below 1 Ω |
1(E) - 4(CSW) |
Free (OFF) |
10 kΩ or higher |
If the result is not as specified, replace the switch.
(b) Check that the switch illuminates.
Standard resistance:
Measurement Condition | Specified Condition |
|---|---|
Battery positive (+) → 3 (ILL+) Battery negative (-) → 2 (ILL-) |
Illuminates |
If the result is not as specified, replace the switch.
Removal REMOVAL PROCEDURE1. REMOVE FRONT DOOR SCUFF PLATE LH

2. REMOVE COWL SIDE TRIM SUB-ASSEMBLY LH
3. REMOVE LOWER NO. 1 INSTRUMENT PANEL FINISH PANEL
4. REMOVE BACK DOOR CONTROL SWITCH
(a) Disengage the 2 claws and remove the back door control switch. |
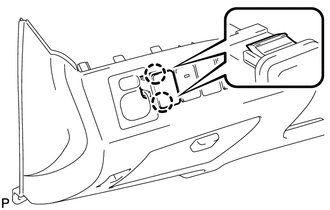 |
1. INSTALL BACK DOOR CONTROL SWITCH
(a) Engage the 2 claws to install the back door control switch. |
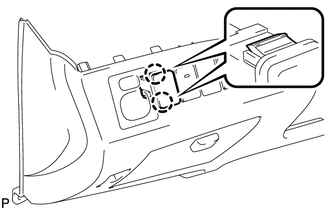 |
2. INSTALL LOWER NO. 1 INSTRUMENT PANEL FINISH PANEL

3. INSTALL COWL SIDE TRIM SUB-ASSEMBLY LH
4. INSTALL FRONT DOOR SCUFF PLATE LH
Test yourself
A quick Toyota Venza quiz: every answer comes with an explanation and a link to the manual page.