General body repairs, exterior
Adjusting door
In this manual: General body repairs, exterior
~2min read
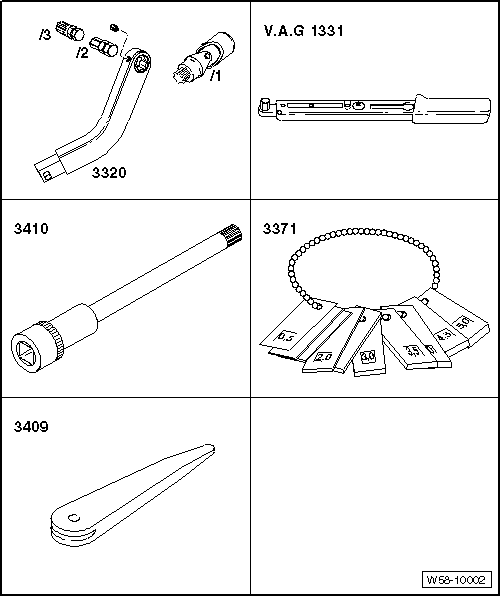
Special tools and workshop equipment required
|
|
 Note
- Only the adjustment for the left front door is described. The adjustment of the right front door is similar
- Vehicle must be standing on its wheels when front door adjustment is performed
- The front door is correctly adjusted when all shut lines are even when closed. it is not protruding too far inwards or outwards, and when the contours are flush with each other.
- For checking gaps/shut lines refer to → Rep. gr.00
- After installing or alignment, carry out corrosion protection measures on hinges and screws/bolts.
Adjusting shut lines
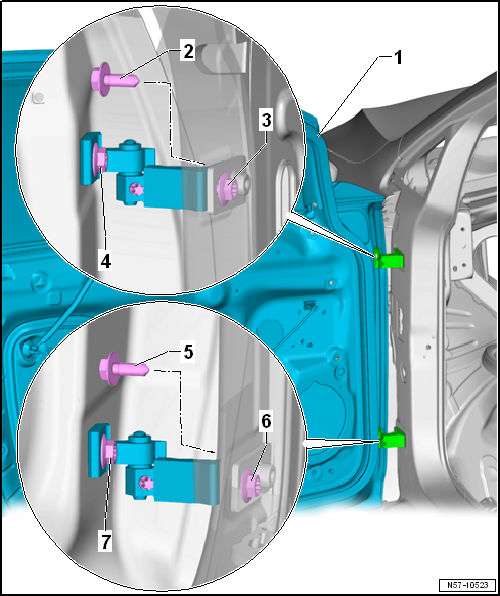
To be able to adjust shut lines correctly, bolts -2-, -3-, -6-and -7- in A-pillar must be loosened.- In order to gain access to bolt -3- on driver side, detach fuse box, and lower it → Electrical system; Rep. gr.97.
- In order to gain access to bolt -3- on front passenger side, remove glove compartment → General body repairs, interior; Rep. gr.68.
- For loosening bolt -6-, lower A-pillar trim must be removed → General body repairs, interior; Rep. gr.70.
Adjusting for flush fitting
In order to adjust flushness correctly, bolts -5- and -9- must be loosened.
Use door alignment tool -3320- with appropriate bit for this.
Note Other measures, such as raising the front door, will prove pointless. Subsequent pressure from above will cause the door to sack again at the front. Adjusting striker pin → Chapter.
Note After renewal of A-pillar the specified torque changes → Chapter „Assembly overview - door“. Specified torques
Hinges → Chapter „Assembly overview - door“
Test yourself
A quick Volkswagen Golf quiz: every answer comes with an explanation and a link to the manual page.
Was this page helpful?