Heating, air conditioning
Removing and installing right temperature flap control motor -V159-, RHD vehicles
In this manual: Heating, air conditioning
~2min read
Special tools and workshop equipment requiredVehicle diagnostic testerBit ratchetFirst carry out the following work:
Removing Note Evaporator temperature sensor -V159- is accessible from footwell.The illustration shows a left-hand drive vehicle. However, the procedure is analogous.The bolts can be accessed with a small commercially available bit ratchet.Pyrotechnic components may trigger unintentionally.Risk of injury.Discharge any static charge accumulated in your body by briefly touching striker plate for door. |
|
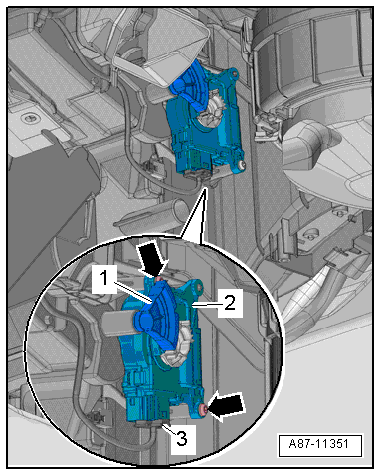 |
InstallingInstallation is carried out in the reverse order. When installing, note the following: Note
Check operation of flaps and hinge mechanism before fitting.Make sure levers and shafts are properly fitted in the mounts.
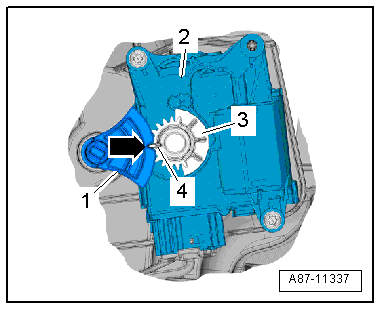
The long tooth -4- must engage in recess -arrow- on actuating lever. Note If the gear wheels on the control motor and temperature flap lever do not align, rotate the receptacle in the control motor. If the bolts cannot be fitted, the control motor is not completely seated on the housing.
Note Rotate control motor until it reaches a convenient position for installation. The direction of rotation can be changed by changing polarities.
Specified torque→ Chapter „Assembly overview - heater and air conditioning unit“ |
 |
Test yourself
A quick Volkswagen Golf quiz: every answer comes with an explanation and a link to the manual page.
Was this page helpful?