Hood
Assembly Overview - Hood
Assembly Overview - Hood
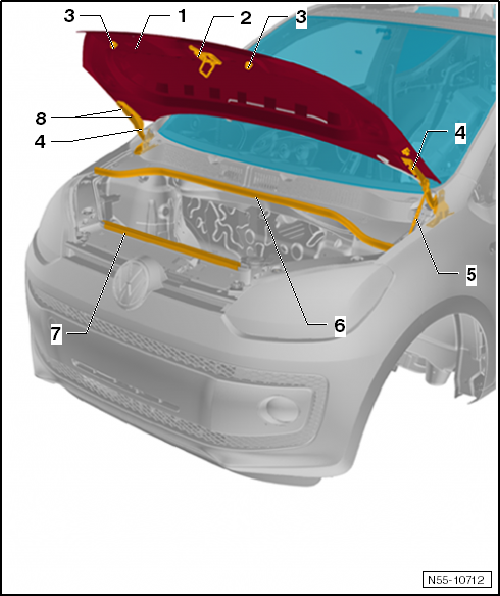
- Hood
- Remove and install
- adjust
- Striker
- Remove and install
- adjust
- Adjustment buffer
- 2 pieces
- Hinge
- Remove and install
- adjust
- Support rod
- Remove and install
- Gasket
- on the cowl
- Gasket
- slipped onto the lock carrier
- Hex nut
- 2 pieces per side
- 20 N·m
Assembly Overview - Locking and Unlocking Components, Hood
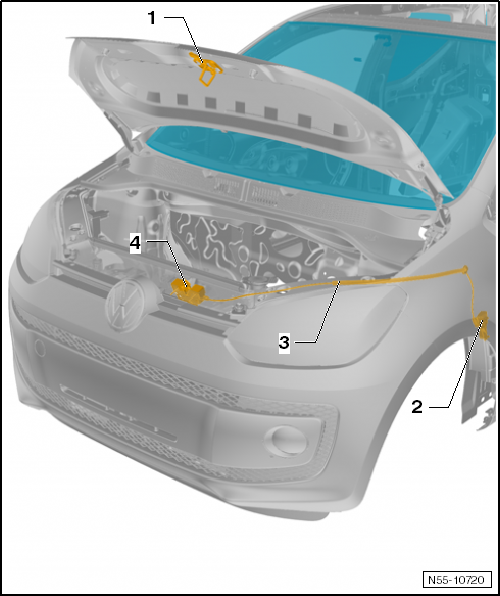
- Striker
- Remove and install
- adjust
- Release lever
- Remove and install
- Cable
- from release lever -2- to hood lock -4-
- Remove and install
- Hood lock
- Removing and Installing Hood Lock
- adjust
Assembly Overview - Release Lever and Bearing Bracket
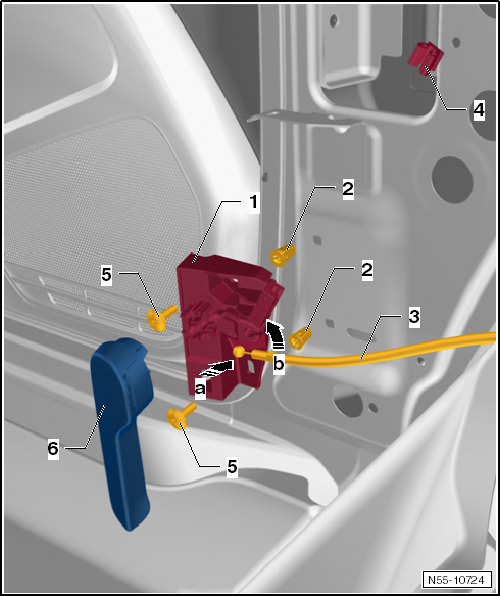
- Bearing bracket
- Expansion nut
- 2 pieces
- Cable
- Installing:
- Insert the ball of the cable into the holder on the bearing bracket -arrow a-.
- Swing the cable up and engage it in bearing bracket -6- -arrow b-.
- Installing:
- Clip
- Bolt
- 2 pieces
- Tightening torque: 1.5 N·m
- Release lever
- Remove and install
Removing and Installing Hood
Required Special Tools, Test and Measuring Equipment and Auxiliary Items
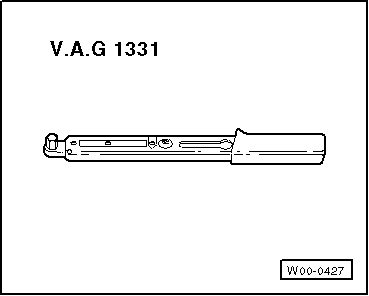
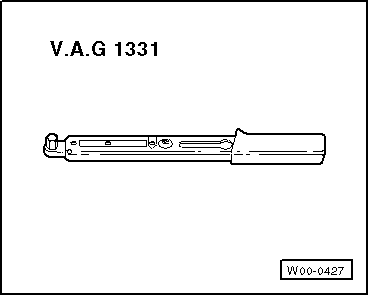
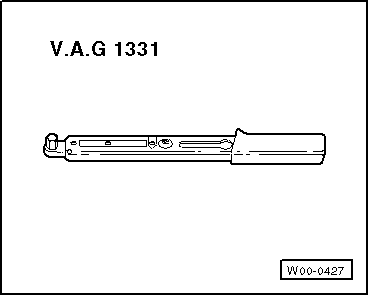
- Torque Wrench -V.A.G 1331-
Removing and Installing Hood
Removing

Carry out the following work:
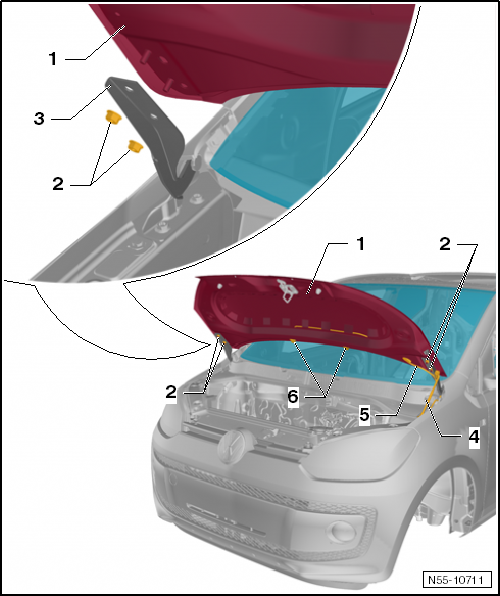
- Remove washer nozzles -6- → Electrical System.
- Pull line -5- out of the opening in hood -1-.
- Loosen hex nuts -2- on the left and right of hinge -3- (do not unscrew).
Further removal is only possible with a second mechanic.
- Fold support rod -4- in.
- Only now unscrew hex nuts -2- and lift hood -1- off hinges -3-.
Installing
Carry out the following work:
Install hood -1- in the reverse order of removal.

Note
Route line -5- in a loop. If the line is installed twisted, it will kink.
- Adjust hood -1-.
Tightening torque
Tightening torque hex nuts -2- "Assembly Overview - Hood".
Removing and Installing Striker
Removing
Carry out the following work:
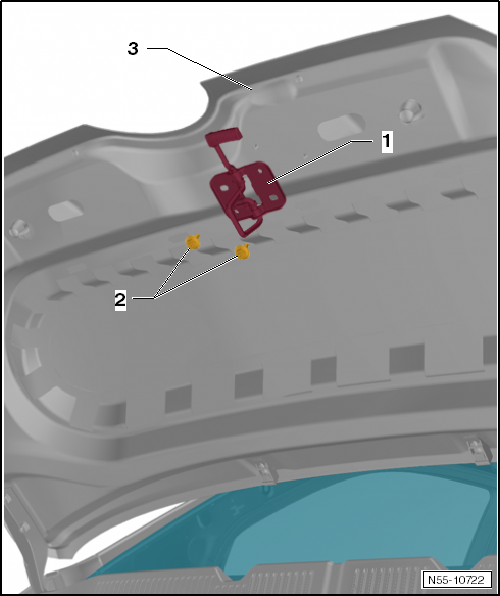
- Open hood -3-.
- Unscrew bolts -2-.
- Remove striker -1- from hood -3-.
Installing
Carry out the following work:
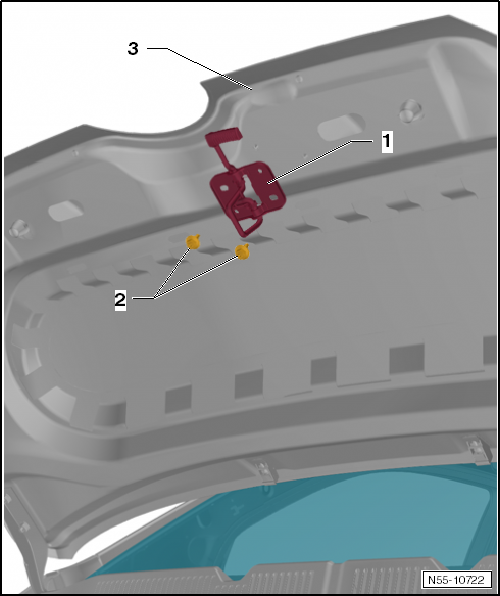
Install striker -1- in the reverse order of removal.
Tightening torque bolts -2-: 12 N·m.
Adjusting the Hood
Adjusting the Hood
Required Special Tools, Test and Measuring Equipment and Auxiliary Items
- Torque Wrench -V.A.G 1331-

Note
- To adjust the hood, the vehicle must be standing on its wheels.
- The adjusting buffers -2- on the left and right are not used for adjustment. They stabilize and dampen the hood.
- The hood is correctly adjusted when the gap is even all around in the closed position. The hood must not sit too far inward or outward. The contours must also be flush.
- The hood must engage in the hood latch without excessive force.
- The bolts -4- are not removed, only loosened.
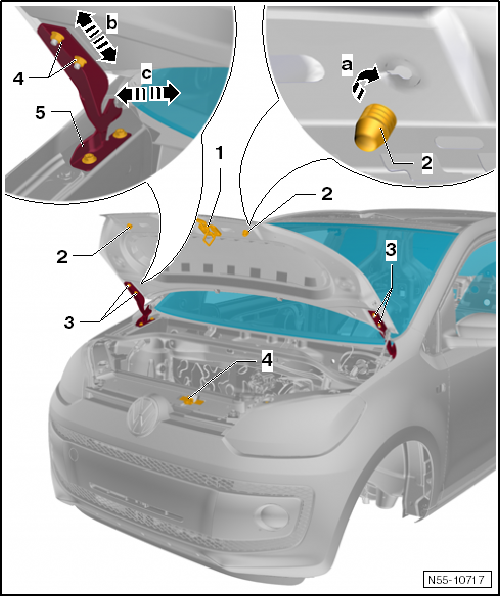
Carry out the following work:
- Remove striker -1-.
- By loosening bolts -3- on the left and right hood hinges -5-, the hood can be centered between the fenders.
- Make sure the gaps are even.
- After adjustment work, apply corrosion protection to the hood hinges -5- and bolts -3-.
- Adjust adjusting buffers -2- by turning them -arrow a-.
- After adjusting the hood, install and adjust striker -1-.
- The hood latch -4- can be used to adjust the height of the front of the hood relative to the fenders.
Adjusting the hood latch
Required Special Tools, Test and Measuring Equipment and Auxiliary Items
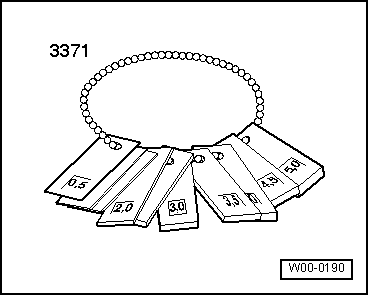
- Adjustment gauge -3371-
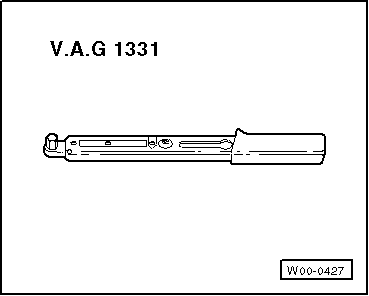
- Torque Wrench -V.A.G 1331-

Note
New bolts are used when adjusting the hood latch.

Carry out the following work:
- When bolts -2- are loosened, the hood latch -1- can be adjusted sideways -arrow b- and in height -arrows a- relative to the hood.
Tightening torque bolts -2-: 12 N·m.
Adjusting the striker
Required Special Tools, Test and Measuring Equipment and Auxiliary Items
- Torque Wrench -V.A.G 1331-
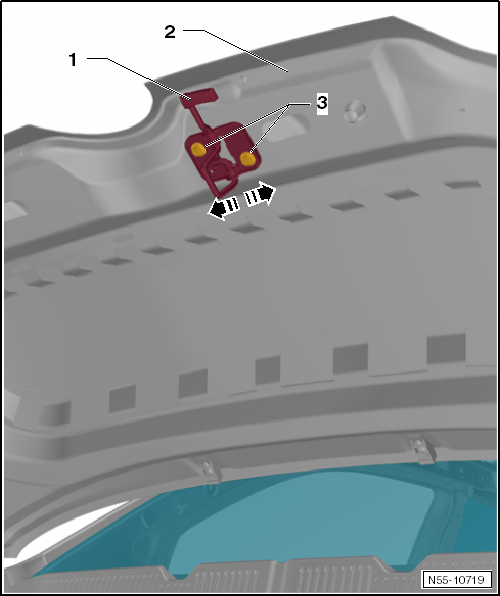
Carry out the following work:
- Loosen bolts -3-.
- The striker -1- can now be adjusted on hood -2- using the oversize holes.
Tightening torque, bolts -3-: 12 N·m.
Removing and installing hinges
Required Special Tools, Test and Measuring Equipment and Auxiliary Items
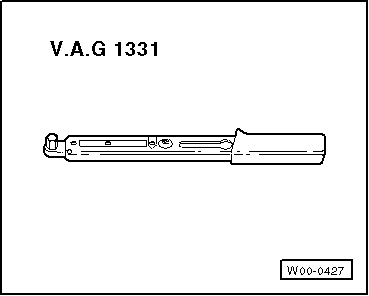
- Torque Wrench -V.A.G 1331-

Note
Removal and installation are described for the right hinge only. The left hinge is removed and installed accordingly.
Removing
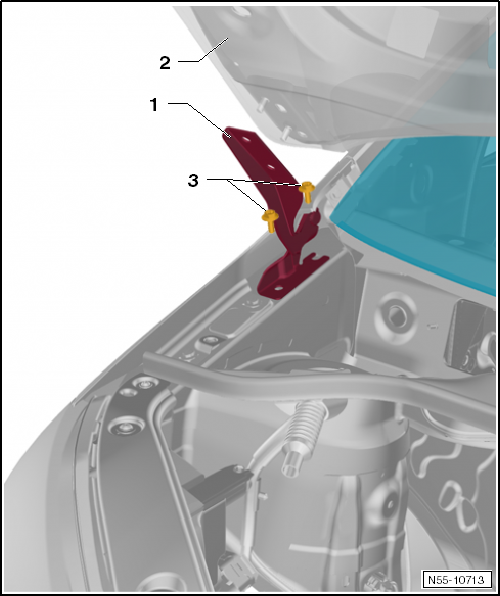
Carry out the following work:
- Remove hood -2-.
- Remove cowl cover.
- Unscrew bolts -3-.
- Remove hinge -1-.
Installing

Carry out the following work:
Install hinge -1- in the reverse order of removal.
Tightening torque, bolts -3-: 20 N·m.
- Install hood -2-.
Removing and installing support rod
Removing
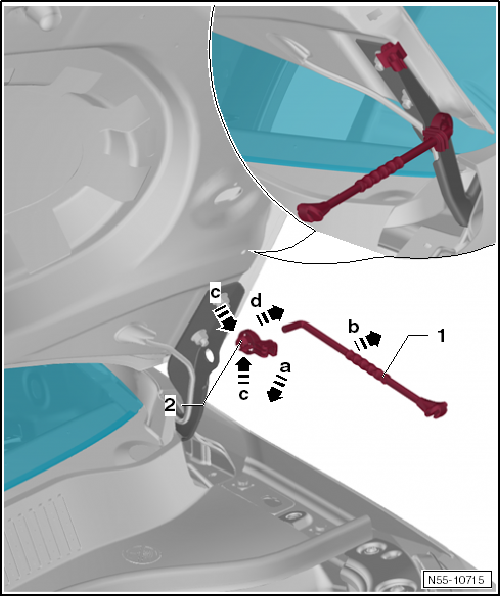
Carry out the following work:
- Support the hood.
- Swivel support rod -1- out of the mount in clip -2- -arrow a-.
- Pull support rod -1- out of clip -2- -arrow b-.
The clip can also be removed.
- Press the locking tabs together -arrows c- and pull the clip out of the hood -arrow d-.
Installing
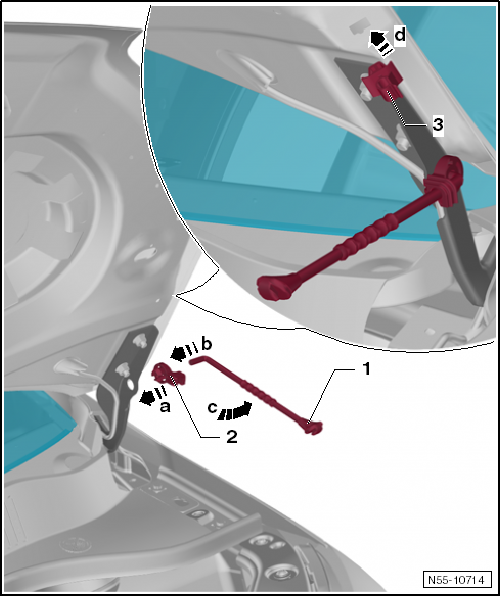
Carry out the following work:
- Check clip -2- for damage and replace if necessary.
- Insert clip -2- into the hinge -arrow a-.
- Insert support rod into clip -arrow b- and swivel it into the mount in the clip -arrow c-.
- Check mount -3- for damage and replace if necessary.
- Insert mount -3- into the opening in the hood and slide it -arrow d-.
Removing and installing hood seals
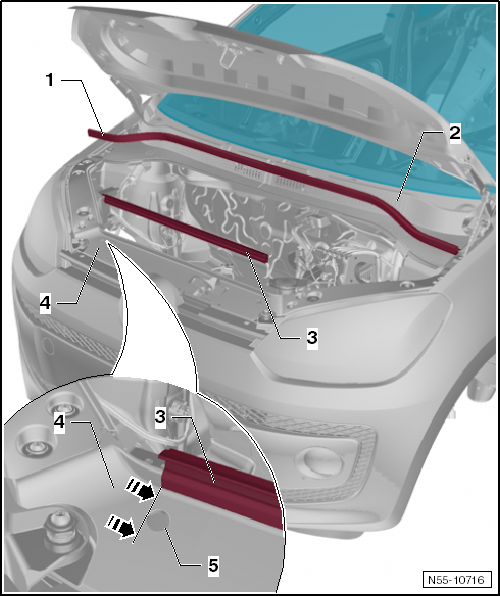
Seal -1- is attached to cowl cover -2-.
- Removing: pull seal off the cowl cover.
- Installing: slide seal onto the cowl cover.
Seal -3- is attached to lock carrier -4-.
- Removing: pull seal off the lock carrier.
- Installing: slide seal onto the lock carrier.

Note
Align seal -3- with hole -5- in the lock carrier -arrows-.
Removing and Installing Hood Lock
Removing and Installing Hood Lock
Required Special Tools, Test and Measuring Equipment and Auxiliary Items
- Torque Wrench -V.A.G 1331-
Removing
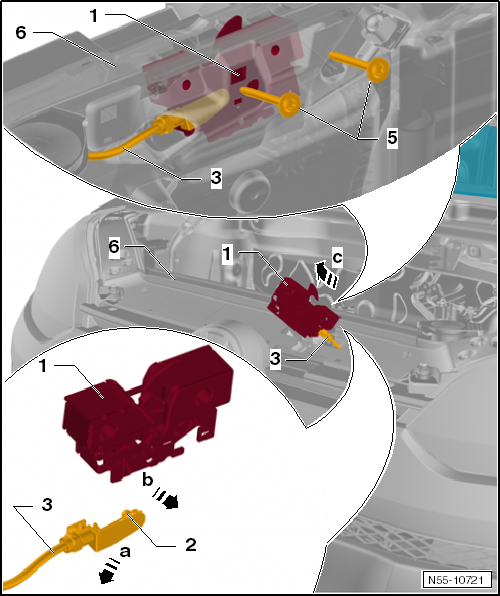
Carry out the following work:
- Detach coolant expansion tank from lock carrier, refer to → Engine.
- Detach release cable bracket from lock carrier.
- If equipped, disconnect the plug connector for the anti-theft alarm system on the right headlight.
- Unscrew bolts -5- on lock carrier and remove hood latch -1- upwards -arrow c-.
- Unclip bracket -3- from hood latch.
- Pull bracket -3- slightly away from hood latch -1- -arrow b- and unhook release cable -arrow a-.
Installing
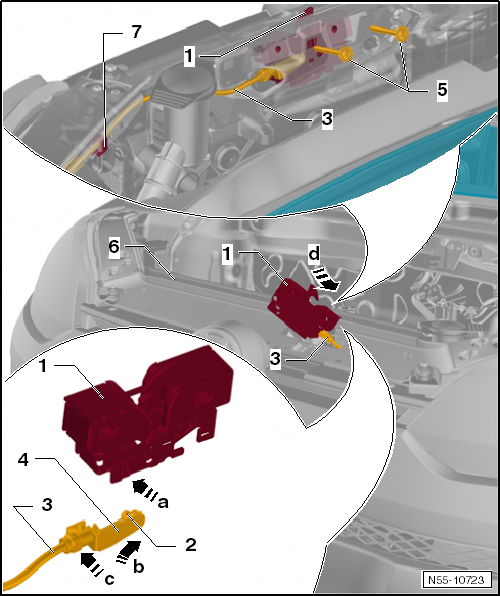
Carry out the following work:
- Hook release cable -2- in -arrow a- and clip bracket -3- into hood latch -1- -arrow c-.
- Guide hood latch -1- into lock carrier -arrow d-.
- Screw in bolts -3-.
Tightening torque, bolts -4-: 12 N·m.
- Adjust hood latch.
- Before closing the hood, perform a functional check of the release lever and release cable.
Routing the hood release cable
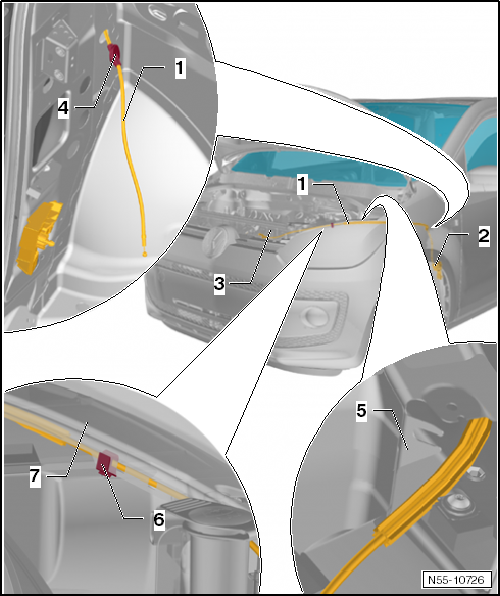
Release cable -1- is hooked into bearing bracket -2- and routed through grommet -4- into the A-pillar.
At the top of the side member, release cable -1- is secured in bracket -5-.
On lock carrier -7-, release cable -1- is secured with bracket -6-.
The other end of release cable -1- is hooked into hood latch -3-.
Removing and installing hood release lever
Removing
Carry out the following work:
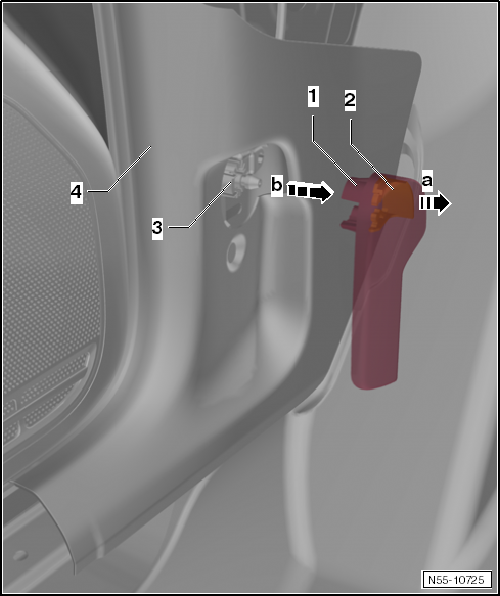
- Pull release lever -1- and unlock the hood.
- Insert a small screwdriver into the gap between release lever -1- and retaining clip -2-.
- Pry retaining clip -2- out of release lever -1- -arrow a- and pull release lever off bearing bracket -3- -arrow b-.
For further work on bearing bracket -3-, remove the lower A-pillar trim -4-, refer to → Body assembly work interior.
Installing
Carry out the following work:
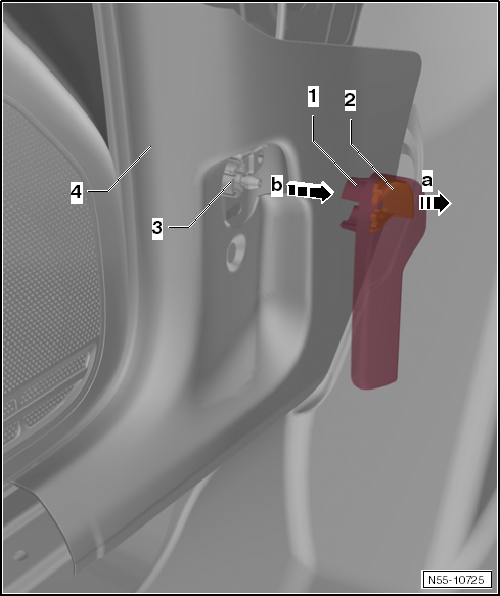
- Lower A-pillar trim -4- is installed.
- Slide retaining clip -2- into release lever -1-.
- Press release lever -1- onto bearing bracket -3-.
- Before closing the hood, perform a functional check of the release lever and release cable.