Tailgate
Assembly overview - Tailgate
Assembly overview - Tailgate
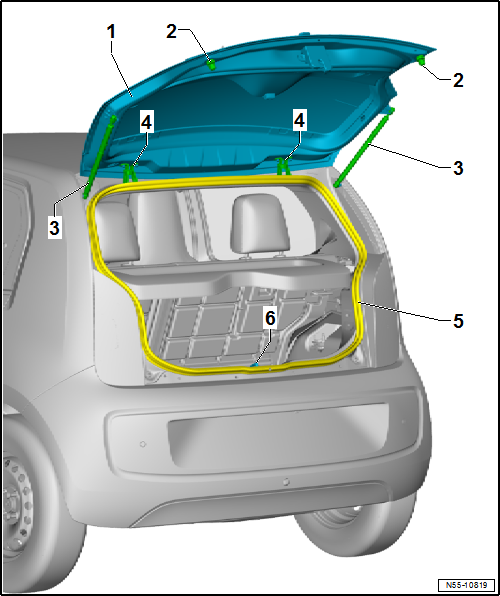
- Tailgate
- Remove and install
- adjust
- Adjustment buffer
- left and right
- adjust
- Remove and install
- gas strut
- Remove and install
- depressurize
- Hinge
- left and right
- Remove and install
- Gasket
- Remove and install
- Striker
- Remove and install
- adjust
Assembly overview - gas strut
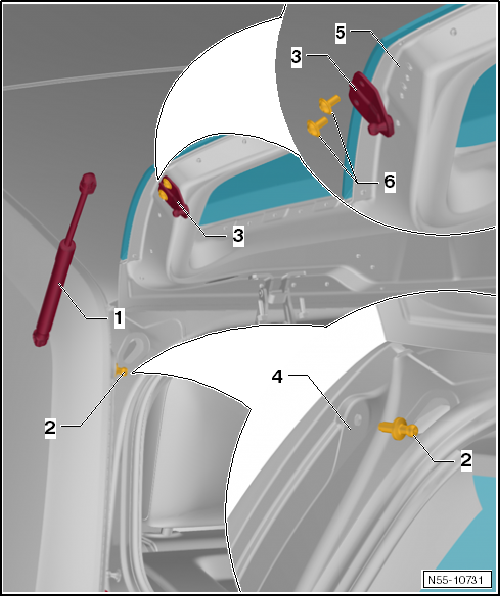
- gas strut
- Remove and install
- depressurize
- ball stud
- Bolted to the side panel.
- Tightening torque: 20 N·m +45º
- Retaining bracket with ball stud
- Bolted to the tailgate.
- Side panel
- Tailgate
- Bolt
- Tightening torque: 10 N·m +45º
Assembly overview - locking and unlocking components
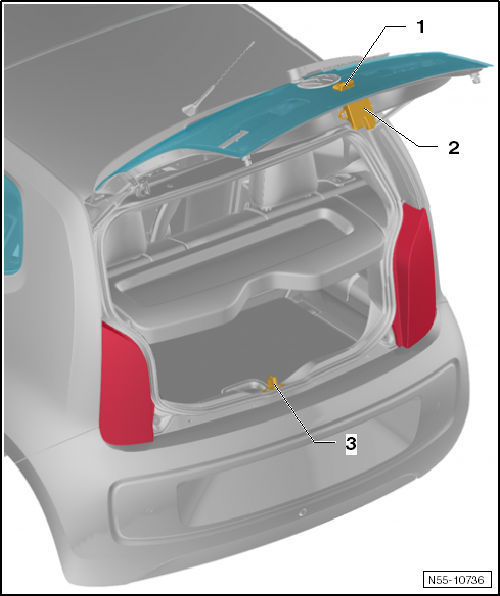
- Tailgate unlock button
- Remove and install
- Hood lock
- with emergency release → Owner's manual
- Remove and install
- Striker
- Remove and install
- adjust
Removing and installing tailgate
Required Special Tools, Test and Measuring Equipment and Auxiliary Items
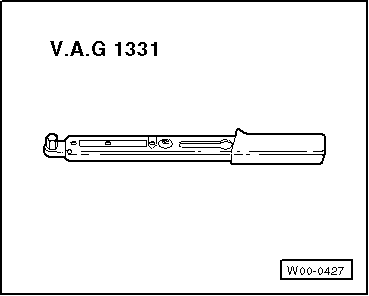
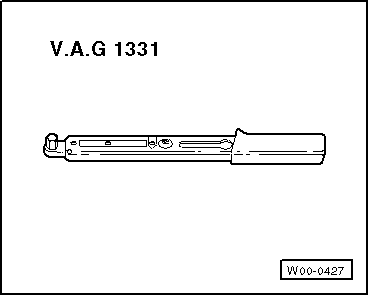
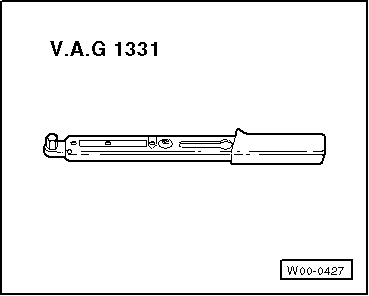
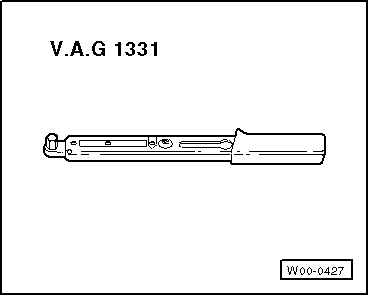
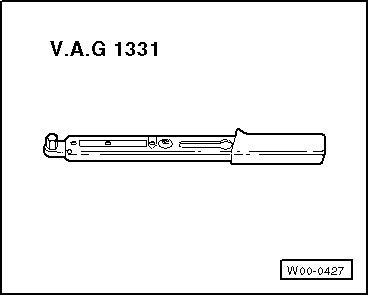
- Torque Wrench -V.A.G 1331-
Removing
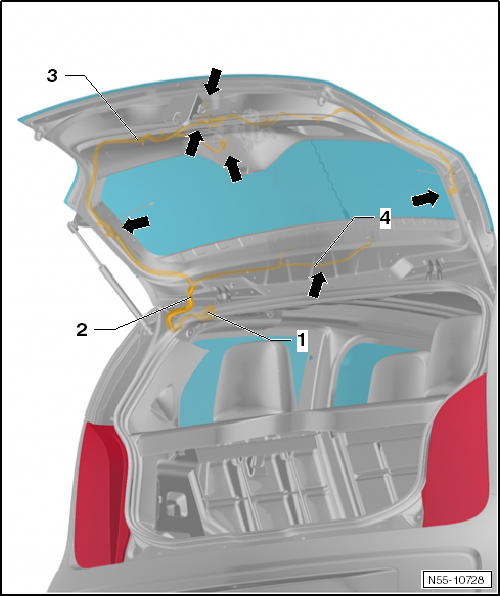
Carry out the following work:
- Remove tailgate trim panel → Body assembly work, interior.
- Disconnect the plug connectors of the existing electrical components -arrows-.
- Thread the electrical wires -3 and 4- out of the tailgate through rubber grommet -2-.

Note
The plug connectors -1- for the electrical wires -3 and 4- are located on the left C-pillar.
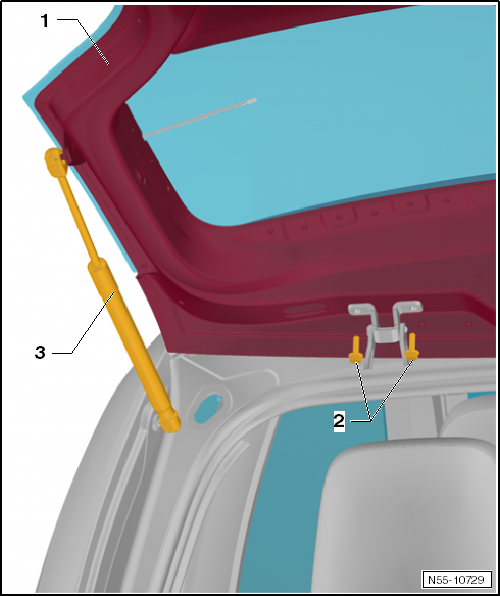
- Loosen bolts -2- on the hinges -4- left and right, but do not remove them yet.
Further removal is only possible with a second mechanic.
- Remove gas springs -3-.
- Only now unscrew bolts -2- and lift off tailgate -1-.
Installing
- Before closing the tailgate, perform a functional check of the unlocking components.
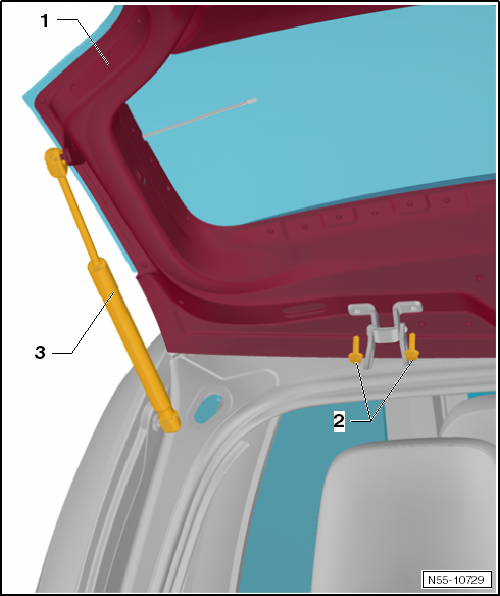
Carry out the following work:
- Install tailgate -1- with a second mechanic.
Tightening torque of bolts -2-: 12 N·m.
- Install gas springs -3-.
- Thread the electrical wires into the tailgate and secure the rubber grommet.
- Connect the plug connectors of the existing electrical components.
Installation is carried out in reverse order.
- Adjust tailgate.
Adjusting tailgate
Required Special Tools, Test and Measuring Equipment and Auxiliary Items
- Torque Wrench -V.A.G 1331-
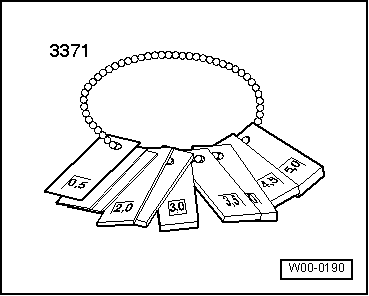
- Adjustment gauge -3371-
Adjusting tailgate

Note
- The vehicle must be standing on its wheels to adjust the tailgate.
- The tailgate lock -3- is bolted directly to the tailgate -4-. The tailgate lock cannot be adjusted.
- The adjustment buffers -1- on the left and right are not used for adjustment. Their function is to stabilize and dampen the tailgate.
- The tailgate is correctly adjusted when the gap is even all around in the closed position, the tailgate does not protrude too far inward or outward, and the contours are aligned.
- The tailgate must engage in the striker without requiring excessive force.
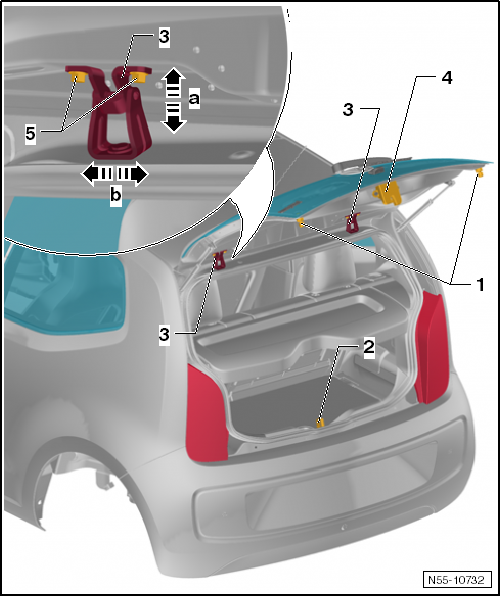
Carry out the following work:
Use gap gauge -3371- to adjust or check the gaps.
- Loosen the striker and adjust it after the hinge and adjustment buffer adjustments are complete.
- By loosening bolts -5- on the left and right, the tailgate -1- can be adjusted in the oversized holes in hinge -3- -arrows a- and -arrows b-.
Tightening torque of bolt -4-: 10 N·m.
- After adjustment, apply corrosion protection to hinge -3- and bolts -5-.
- Readjust adjustment buffers.
Adjusting adjustment buffers

Note
- Only the right adjustment buffer is adjusted. The left adjustment buffer is adjusted in the same way.
- For removal or installation, turn the complete adjustment buffer -1- by 90º.
- Replace adjustment buffer if necessary
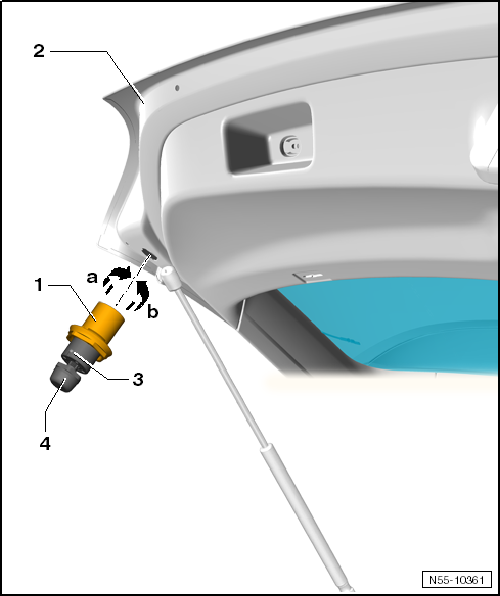
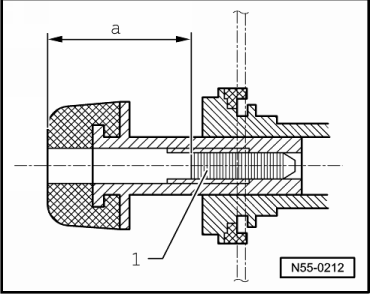
- Loosen clamping screw -4- until it is visible in the rubber buffer.
- Pull locking slider -3- out of adjustment buffer -1-.
- Set locking slider to dimension -a- = 12.5 mm.
- Close tailgate with light pressure past the center into the pre-latch position.
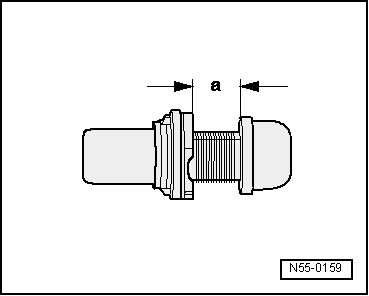
- Open tailgate again.
- Screw clamping screw -1- of the adjustment buffer in to a depth of dimension -a- = 20 mm.
- Check adjustment.
Replacing adjustment buffer
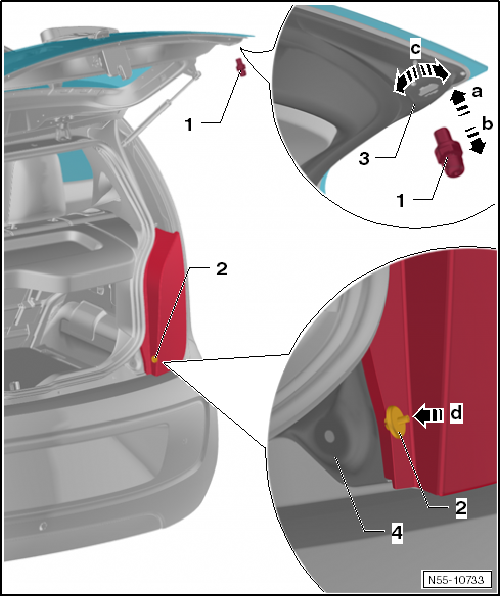
Removing
- To remove the adjustment buffer, turn the entire buffer -1- by 90º -arrow c-.
- Remove buffer from tailgate -3- -arrow b-.
Installing
- Check the correct seating of stop -2- in side panel -4- carefully.
- To install, insert the complete buffer -1- at a right angle into the tailgate -arrow a-.
- Turn buffer -1- by 90º -arrow c-.
- Adjust adjustment buffer -1-
Adjusting the striker
Required Special Tools, Test and Measuring Equipment and Auxiliary Items
- Torque Wrench -V.A.G 1331-

Note
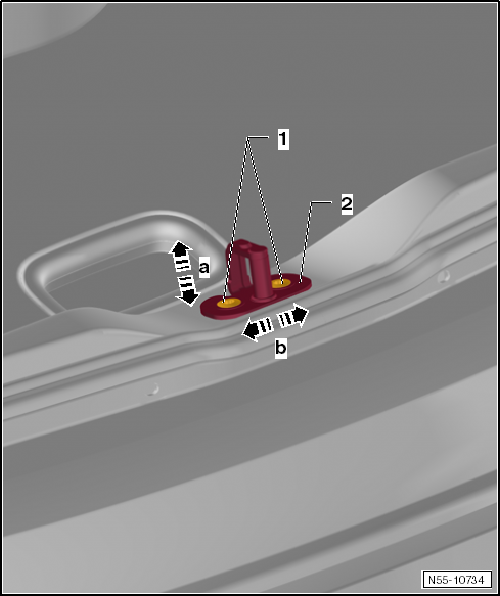
- By loosening bolts -1-, striker -2- can be moved in the oversized holes -arrows a- and -arrows b-.
- Adjust striker -2- so that the recess of the tailgate lock engages the latch centered on striker -2-.
Carry out the following work:
- Loosen bolts -1-.
- Move striker -2- to the upper position and tighten bolts -1-.
- Close tailgate and check adjustment.
Tightening torque of bolts -1-: 20 N·m
Removing and installing hinges
Required Special Tools, Test and Measuring Equipment and Auxiliary Items
- Torque Wrench -V.A.G 1331-

Note
Removal and installation are described only for the left hinge. The right hinge is removed and installed in the same way.
Removing
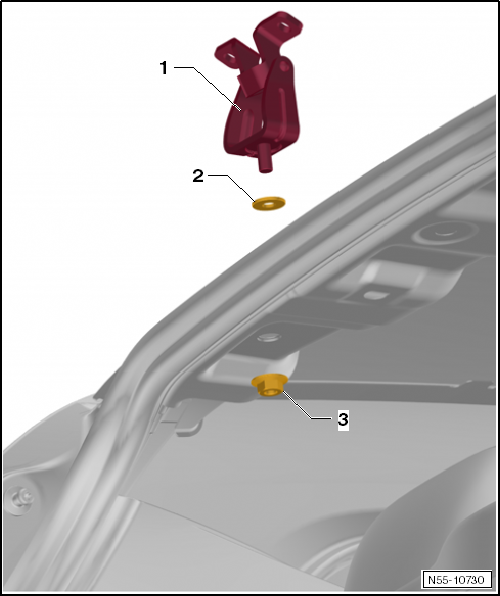
Carry out the following work:
- Remove tailgate.
- Lower headliner in the area of the hinge mounting -> Body assembly work, interior.
- The headliner can now be lowered far enough to unscrew the hex nut without damaging the headliner.
- Unscrew hex nut -3- and remove hinge -1-.
Installing
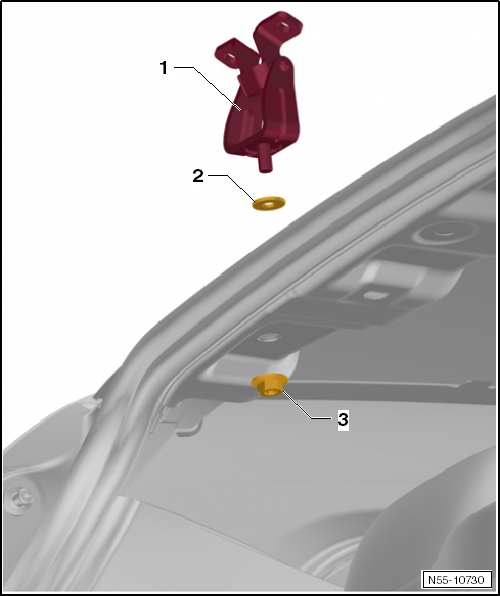
Carry out the following work:
Install hinge -2- in the reverse order of removal.

Note
- Make sure washer -2- is seated correctly.
- Restore any sealing measures that were found in place.
Tightening torque, bolts -3-: 24 N·m.
- Before closing the tailgate, perform a functional check of the unlocking components.
Removing and installing gas spring
Removing and installing gas spring
Removing

Note
When removing a gas spring, the tailgate must be supported. A gas spring alone does not hold the tailgate open.

WARNING!
When reusing the gas spring, proceed carefully. Do not pry the spring clip completely out of the ball socket, otherwise it will be damaged. The gas spring will then pop out of its seat, which can cause damage or injury to the operator.
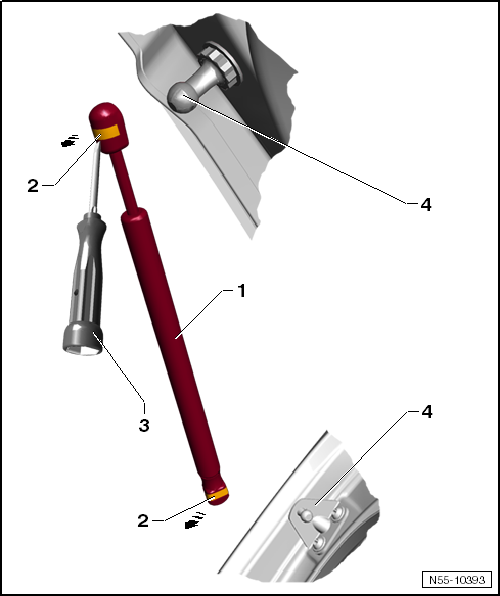
Carry out the following work:
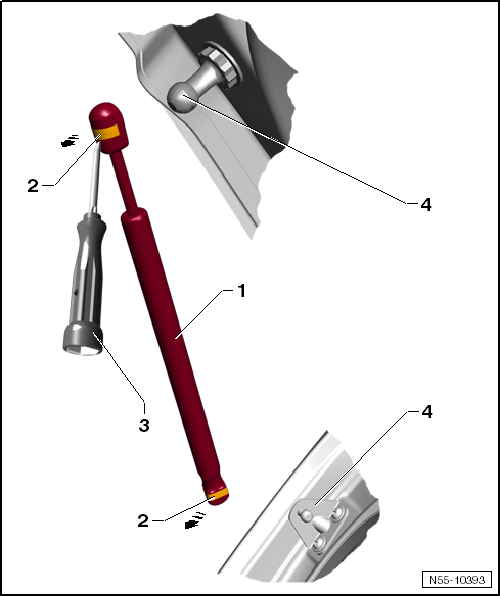
- Open tailgate and support it.
- Use a small screwdriver -3- to reach under spring clips -2-.
- Lift spring clips -2- just enough to allow them to slide over the ball sockets.
- Pull gas spring -1- off ball studs -4-.
After removing the gas spring, immediately slide spring clips -2- back into place.

WARNING!
When reusing the gas spring, proceed carefully. Do not pry the spring clip completely out of the ball socket, otherwise it will be damaged. The gas spring will then pop out of its seat, which can cause damage or injury to the operator.

Note
- Tightening torque of bolts on the retaining bracket for the ball stud: 10 N·m + 45º.
- Depressurize gas spring.
Installing
Carry out the following work:

WARNING!
When reusing the gas spring, proceed carefully. Do not pry the spring clip completely out of the ball socket, otherwise the spring clip will be damaged and the gas spring will pop out of its seat. This can cause damage or injury to the operator.
- Spring clips -2- are slid over the ball sockets of gas spring -1-.
- Press ball sockets of gas spring -1- onto ball studs -4- until the ball sockets audibly snap onto the ball studs.
Depressurizing the gas spring
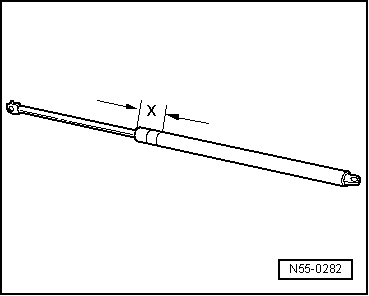
- Clamp the gas spring in a vise in the area x = 50 mm.

WARNING!
The gas spring may only be clamped in this area -x-. Otherwise there is a risk of injury!
- Saw through the gas spring cylinder within the first third of the total cylinder length, measured from the reference edge on the piston rod side.

Note
- Wear safety goggles during the sawing process.
- Cover the area of the saw cut with a rag.
- Dispose of the oil and rags through the existing disposal route.
Removing and installing the actuator
Required Special Tools, Test and Measuring Equipment and Auxiliary Items
- Torque Wrench -V.A.G 1331-

Removing
Carry out the following work:
- Remove tailgate trim panel → Body assembly work, interior.
- Remove the tailgate lock.
- Disconnect connector -2- at the connection of the switch -1-.
- Unscrew bolt -3-.
- Remove switch -1- from the tailgate.
In the event of an electrical fault, the tailgate can be opened using the emergency release of the tailgate lock. The emergency release is accessed through an opening in the tailgate trim.
Installing
Carry out the following work:
Installation is performed in the reverse order.
Tightening torque for bolt -1-: 5 N·m.
- Before closing the tailgate, perform a functional check of the unlocking components.
Removing and Installing Hood Lock
Required Special Tools, Test and Measuring Equipment and Auxiliary Items
- Torque Wrench -V.A.G 1331-
Removing and Installing Hood Lock
Removing
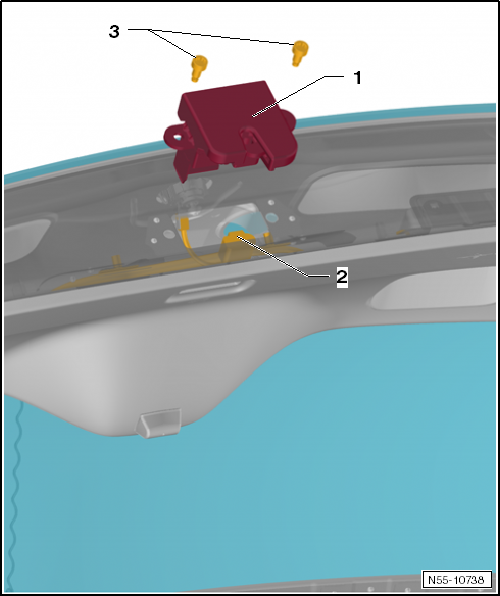

Note
If the tailgate does not open, it can be opened manually using the emergency release -5- through the tailgate trim → Owner's Manual.
Carry out the following work:
- Disconnect connector -2- at the tailgate lock -1-.
- Unscrew bolts -3- and remove tailgate lock -1- from the tailgate.
Installing
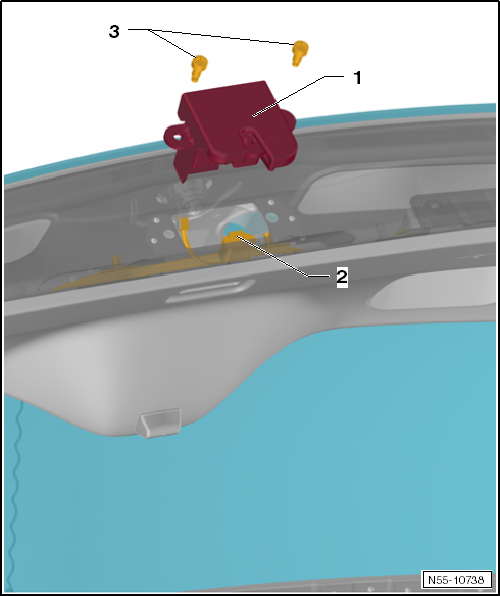
Carry out the following work:
- Position tailgate lock -1- on the tailgate and tighten bolts -3-.
Tightening torque, bolts -3-: 20 N·m.
- Connect connector -2- at the tailgate lock -1-.
- Before closing the tailgate, perform a functional check of the unlocking components.
Removing and Installing Striker
Required Special Tools, Test and Measuring Equipment and Auxiliary Items
- Torque Wrench -V.A.G 1331-
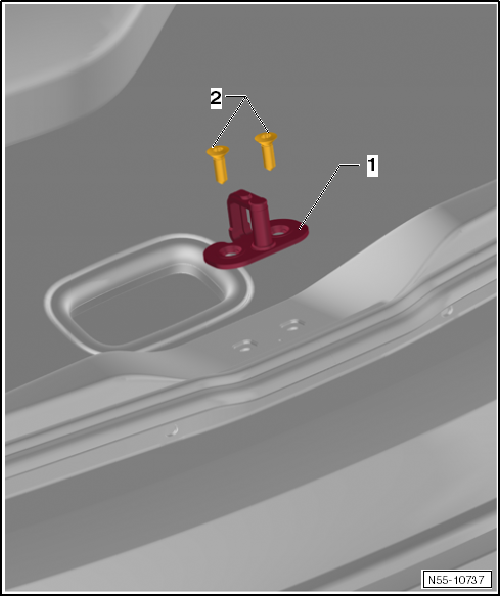
Removing
- Unscrew bolts -2- and remove striker -1- from the lock carrier.
Installing
- Install striker -1- on the lock carrier with bolts -2-.
Tightening torque for bolts -2-: 20 N·m
- Adjust the striker.
Removing and installing the seal
During series production, the tailgate seal is applied with sealing compound, slipped onto the body flange and then rolled on.

Note
- If the seal is removed, the sealing compound on the inside of the seal is spread out and the flanks are slightly bent open. When the seal is reinstalled, sealing and secure fit are no longer guaranteed.
- For this reason, replace any seal that has been completely removed with a so-called "hammer-in seal".
- For seals that have been partially pulled off, compress the flanks of the seal before installation.
Removing
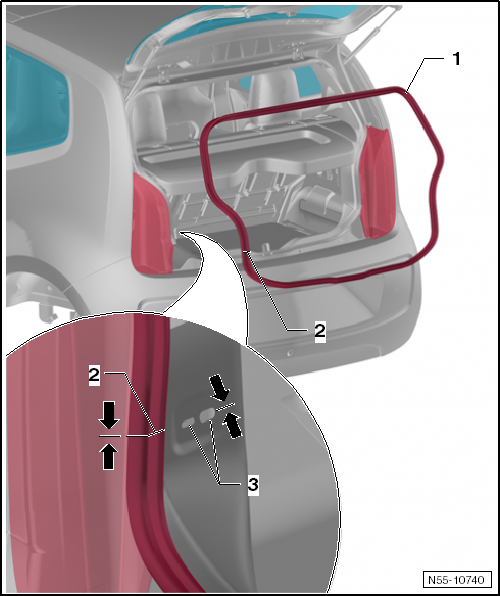
Carry out the following work:
- Pull seal -1- off the body flange.
Installing

Carry out the following work:
- Align seal -1- with the vulcanized joint -2- to the holes in the side panel -3-.
- Press seal -1- evenly onto the body flange by hand.