Interior mirror
Assembly overview - Interior mirror
Assembly overview - Interior mirror, vehicles without emergency braking function
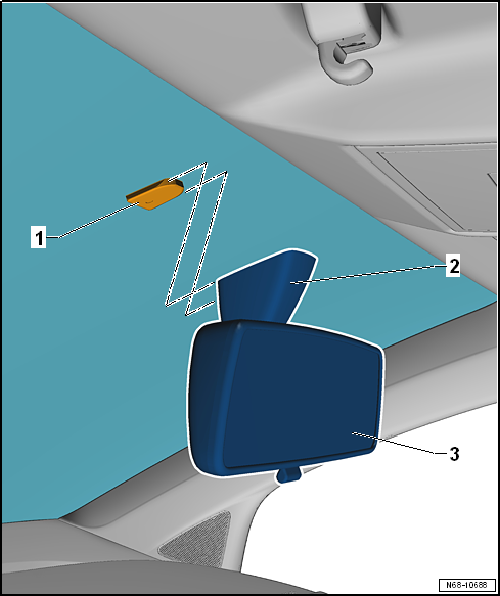
- Retaining plate
- for mirror base
- bonded to windshield
- Bonding retaining plate for interior mirror
- Mirror base
- Interior mirror
- Remove and install
Assembly overview - Interior mirror, vehicles with emergency braking function
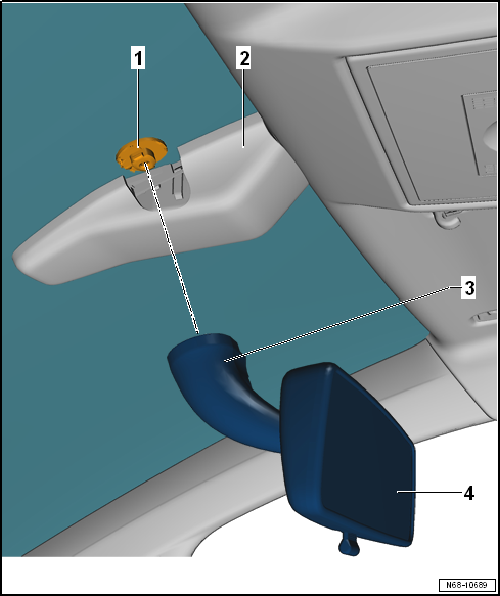
- Retaining plate
- for mirror base
- bonded to windshield
- Bonding retaining plate for interior mirror
- Cover cap
- clipped onto sensor unit for emergency braking function -J939-
- Removing and installing sensor unit for emergency braking function -J939- → Electrical system
- Mirror base
- Interior mirror
- Remove and install
Removing and installing interior mirror
Removing and installing interior mirror, vehicles without emergency braking function
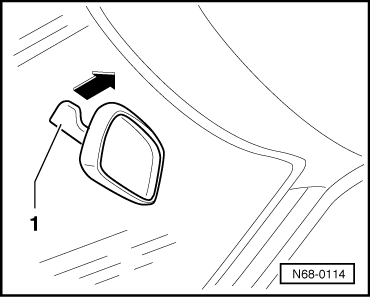
Removing
- Push the interior mirror -1- upward at an angle -arrow- off the mounting plate.
Installing
- Installation is carried out in reverse order.
Remove and install interior mirror, vehicles with emergency braking function
Removing
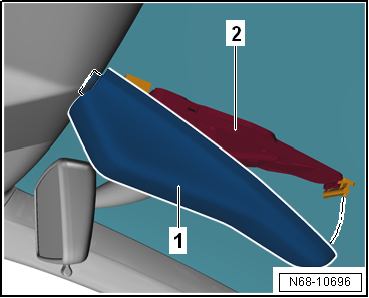
- Unclip cover cap -1- for sensor unit for emergency braking function -J939--2- at the lower area.
- Pull cover cap -1- for sensor unit for emergency braking function -J939--2- out from between the headliner and windshield and remove.
- Remove sensor unit for emergency braking function -J939- → Electrical system.
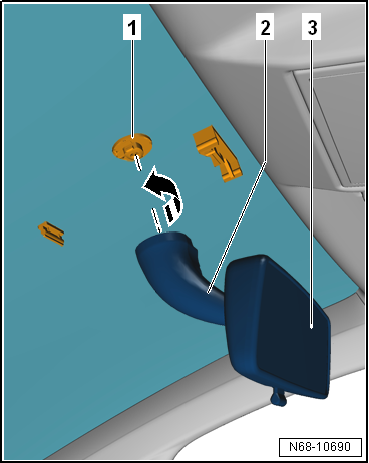
- Turn interior mirror -3- on mirror base -2- by 90º counterclockwise -arrow- and remove from mounting plate -1-.
Installing
Installation is performed in the reverse order of removal, observing the following:
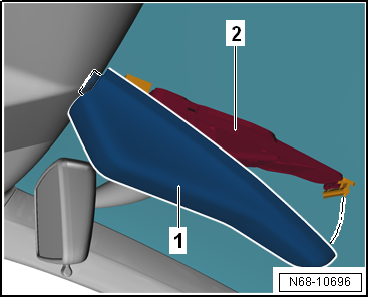
- Insert cover cap -1- for sensor unit for emergency braking function -J939--2- between the headliner and windshield first, then engage it at the lower area.
Bonding retaining plate for interior mirror
Required special tools, testers and equipment, and auxiliary items
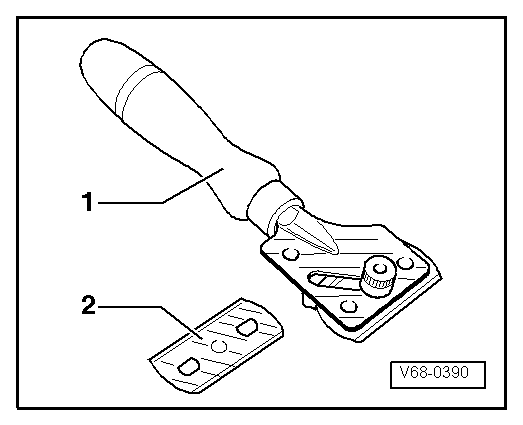
- Glass scraper (commercially available) -1-
- Blade (commercially available) -2-
- Glass-to-metal adhesive kit -D 000 703 A1-
- Adhesive remover -D 002 000 10- or cleaning solution -D 009 401 04-
Bonding
- Remove mounting plate from mirror base.
- Remove PUR adhesive sealant from mounting plate using a wire brush.
- Grind down the 3 spacer nubs on the bonding surface. For this, place abrasive paper (360/400 grit) on a flat surface.
- Keep the ground surface free of dirt and grease.
- Scrape PUR adhesive sealant and glass/paint primer off the windshield with a glass scraper, down to the ceramic frit layer.
- Clean the bonding surface with adhesive remover -D 002 000 10- or cleaning solution -D 009 401 04-.

WARNING!
Do not damage the ceramic frit layer. Scratches will always remain visible.
- Cut nylon mesh fabric to the exact size of the mounting plate.

Note
Hand protection (rubber gloves) should be worn.
- Apply adhesive evenly to the mounting plate.
- Place nylon mesh fabric onto the mounting plate.
- Dab the nylon mesh fabric with the tube while continuing to apply adhesive.

Note
From placing the nylon mesh fabric on the adhesive until pressing it against the windshield, 30 seconds are available.
- Press mounting plate firmly against the windshield for 15 seconds (do not use force).
- Remove excess adhesive with a cloth.

Note
After 15 minutes, the interior mirror can be installed.