Chassis, Axles, Steering
Assembly overview - steering column
In this manual: Chassis, Axles, Steering
26steps
~156min
4/5difficulty
Done 0 of 26
Assembly overview - steering column, electric steering column, left-hand drive, up!

Note
- Welding and straightening work on load-bearing and wheel-guiding components of the wheel suspension is not permitted.
- Always replace self-locking nuts.
- Always replace corroded bolts/nuts.
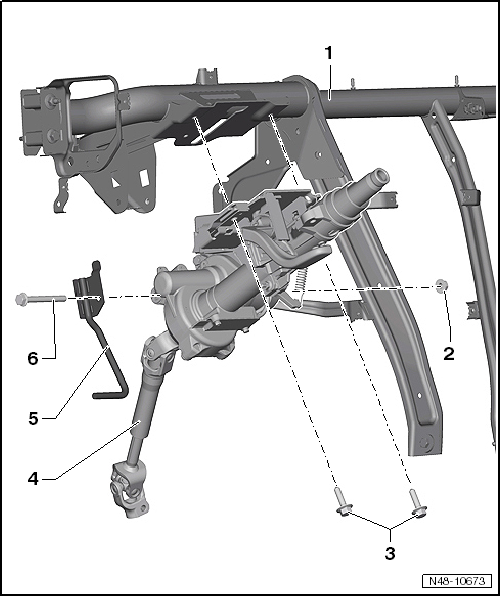
- Instrument panel centre tube
- Nut
- Bolt
- 20 N·m
- Observe the tightening sequence.
- Steering column
- Remove and install
- can be checked in Guided Fault Finding with the → Vehicle diagnostic tester

Note
Before replacing the steering column or the steering column electronics control unit -J500-, any existing fault memory entries must be erased → Vehicle diagnostic tester.
- Crash brace
- Assignment → Electronic Parts Catalogue "ETKA"
- Bolt
- 20 N·m
- Observe the tightening sequence.
Assembly overview - steering column, electric steering column, right-hand drive

Note
- Welding and straightening work on load-bearing and wheel-guiding components of the wheel suspension is not permitted.
- Always replace self-locking nuts.
- Always replace corroded bolts/nuts.

- Instrument panel centre tube
- Bolt
- 20 N·m
- Observe the tightening sequence.
- Steering column
- Remove and install
- can be checked in Guided Fault Finding with the → Vehicle diagnostic tester

Note
Before replacing the steering column or the steering column electronics control unit -J500-, any existing fault memory entries must be erased → Vehicle diagnostic tester.
- Bolt
- 20 N·m
- Observe the tightening sequence.
- Crash brace
- Assignment → Electronic Parts Catalogue "ETKA"
Assembly overview - steering column, steel steering column

Note
- Welding and straightening work on load-bearing and wheel-guiding components of the wheel suspension is not permitted.
- Always replace self-locking nuts.
- Always replace corroded bolts/nuts.
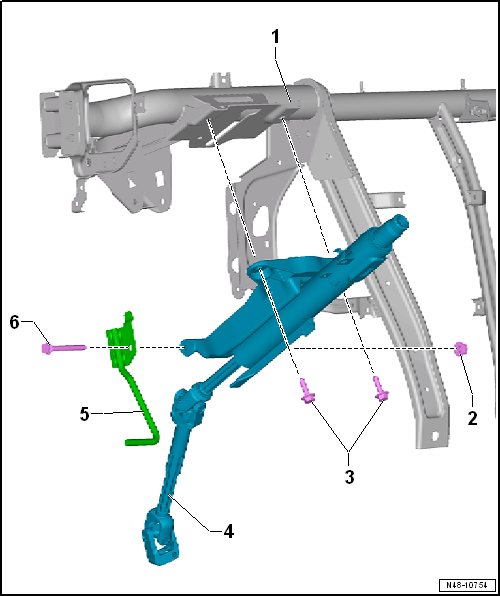
- Instrument panel centre tube
- Nut
- Bolt
- 20 N·m
- Observe the tightening sequence.
- Steering column
- Remove and install
- Crash brace
- Assignment → Electronic Parts Catalogue "ETKA"
- Bolt
- 20 N·m
- Observe the tightening sequence.
Assembly overview - steering column, electric steering column, repair
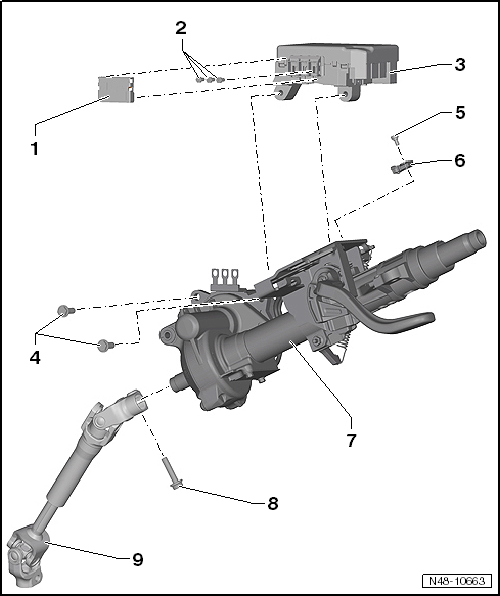
- Cap
- Bolt
- 4 N·m
- replace after every removal
- Control unit for steering column electronics -J500-
- Remove and install
- Bolt
- 20 N·m
- replace after every removal
- Bolt
- 2 N·m
- replace after every removal
- Installation aid
- Remove and install
- Steering column
- Remove and install
- Bolt
- Turn a further 180º after 20 N·m
- replace after every removal
- Driveshaft
- Remove and install
Replacing installation aid
Required special tools, testers and equipment, and auxiliary items
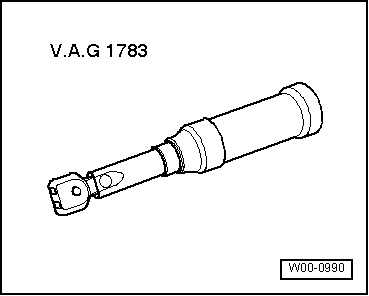
- Torque wrench -V.A.G 1783-
Carry out the following work:
Removing
- Remove steering column.
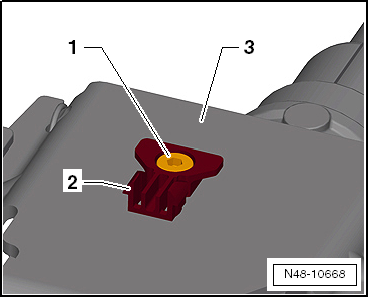
- Unscrew bolt -1- and remove installation aid -2- from the steering column.
Installing
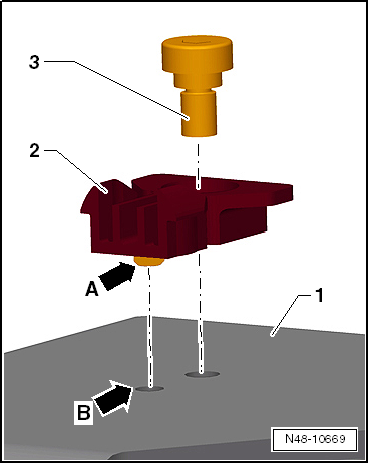
- Insert the lug -arrow A- of the installation aid -1- into the bore -arrow B- of the steering column -2-.

Note
The bore in the installation aid -1- must point towards the splines of the steering column -2-.
- Screw in bolts -3- and tighten to the specified torque.
Tightening torques

Was this page helpful?