Setting the diagnostic mode
1. Set the main switch to "OFF" and the engine stop switch to "  ".
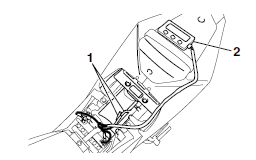
2. Disconnect the self-diagnosis signal connector "1", and then connect the FI diagnostic tool "2" as shown.
3. Disconnect the fuel pump coupler.
4. While pressing the "MODE" button, set the main switch to "ON".
NOTE:
- "DIAG" appears on the LCD of the FI diagnostic tool.
- "POWER" LED (Green) comes on.
5. Press the "UP" button to select the CO adjustment mode "CO" or the diagnostic mode "DIAG".
6. After selecting "DIAG", press the "MODE" button.
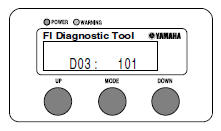
7. Select the diagnostic code number corresponding to the fault code number by pressing the "UP" and "DOWN" buttons.
NOTE:
- The diagnostic code number appears on the LCD (01-70).
- To decrease the selected diagnostic code number, press the "DOWN" button. Press the "DOWN" button for 1 second or longer to automatically decrease the diagnostic code numbers.
- To increase the selected diagnostic code number, press the "UP" button. Press the "UP" button for 1 second or longer to automatically increase the diagnostic code numbers.
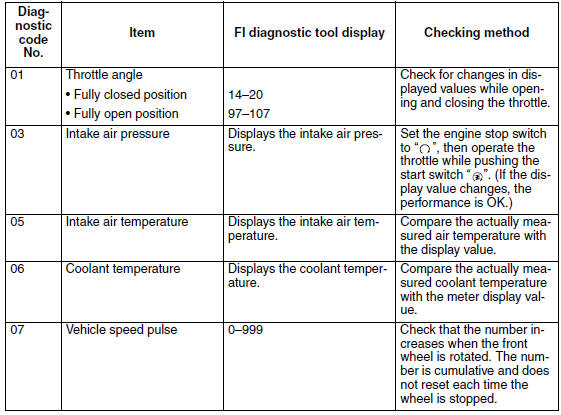
8. Verify the operation of the sensor or actuator.
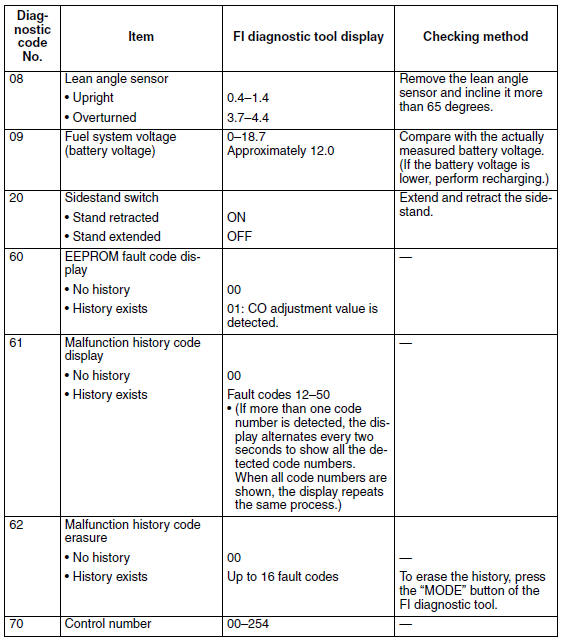
- Sensor operation The data representing the operating conditions of the sensor appear on the LCD.
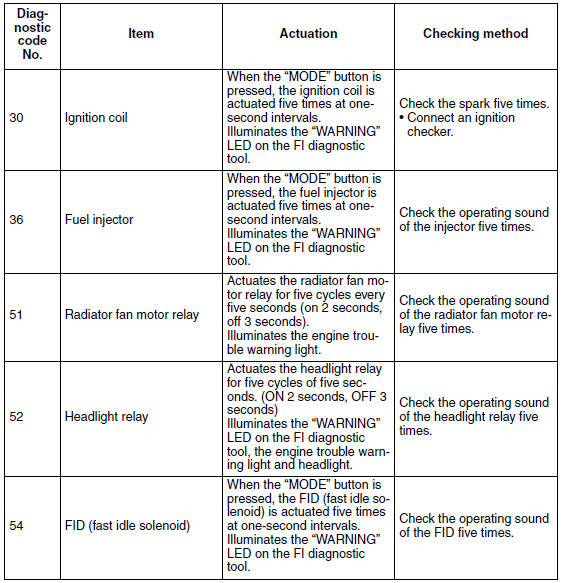
- Actuator operation Press the "MODE" button.
9. Set the main switch to "OFF" to cancel the diagnostic mode.
10.Disconnect the FI diagnostic tool and connect the self-diagnosis signal connector.
Diagnostic code table
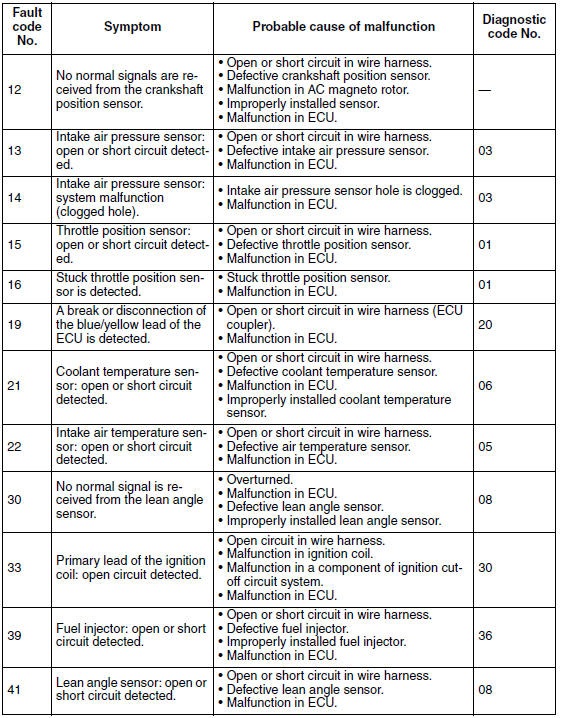

Sensor operation table
Actuator operation table
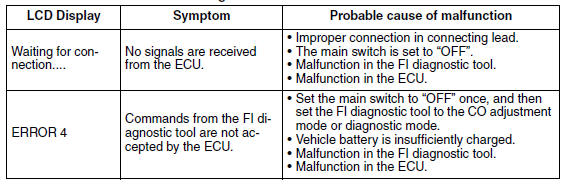
Communication error with the FI diagnostic tool
Test yourself
A quick Yamaha YZF-R125 quiz: every answer comes with an explanation and a link to the manual page.