Aus- und Einbau der Gelenkwelle
AUSBAU
1. Fahrzeug anheben und auf Stützen abstellen.
2. Abgasanlage ausbauen.
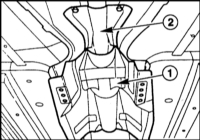
3. Befestigungsschrauben lösen und die Hitzeschutzbleche (1), (2) vom Unterboden abnehmen.
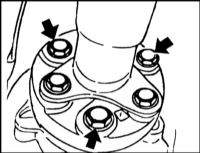
4. Befestigungsschrauben lösen und den Gelenkflansch am Getriebe abnehmen. Dabei die Welle mit einer üblichen Bandklemme gegen Verdrehen sichern.
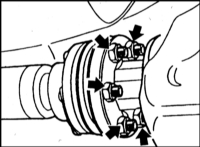
5. Befestigungsmuttern der Gelenkwelle am Flansch des Achsantriebs der Hinterachse lösen.
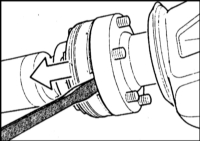
6. Das Gleichlaufgelenk am Flansch mit einem Schraubendreher aus den Nuten herausdrücken.
* Die Gelenkwelle nicht in das Gleichlaufgelenk verschieben. Dies kann zum Quetschen der Schutzmanschette des Gleichlaufgelenks führen.
7. Mittellager festhalten und die Muttern lösen.
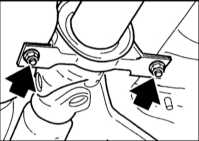
8. Lower the driveshaft at the center bearing and pull it out of the centering pin at the manual transmission.
* Cover the constant velocity joint with a plastic bag to protect it from contamination.
Installation
If vibration and noise come from the driveshaft, it must be balanced.
* The driveshaft is balanced over its entire length. It may only be replaced as a complete assembly.
INSTALLATION
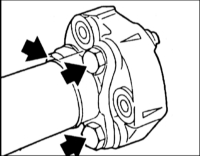
1. Replace the shaft flange if it is worn. To do so, remove the bolts (arrows in the accompanying illustration). Install the new flange so that the arrows marked on the circumference point in the direction of the flange spokes.
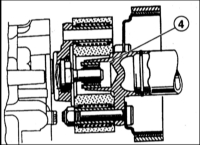
2. Before installation, inspect the centering element (4) on the driveshaft flange. If necessary, lubricate the element with “Molykote Longtherm 2” grease. Replace a damaged centering element with a new one.
3. Push the constant velocity joint (1) together to the stop. If there is no grease in the joint, fill it with grease. Use only the grease recommended by BMW.
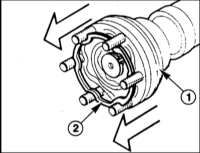
4. Replace the O-ring (2). First clean the grease from the sealing surfaces of the joint and the drive flange with alcohol.
5. Install the driveshaft, with the joint extended, onto the final drive flange of the rear axle.
* Do not slide the constant velocity joint during assembly, as the grease may push out the O-ring and the joint will leak.
Pull the shaft toward the final drive flange. Install new self-locking nuts and tighten them to 70 N·m.
6. Tighten the flange bolts. Tightening torque: M8 bolts 45 N·m, M10 - 70 N·m, M12 - 80 N·m.
7. Tighten the center bearing bolts to 22 N·m.
8. Install the heat shield.
9. Install the exhaust system. Refer to the section Fuel System Cleanliness Rules.
10. Lower the vehicle to the ground.
Testen Sie sich
Ein kurzes Quiz zum BMW 1: Zu jeder Antwort gibt es eine Erklärung und einen Link zur Handbuchseite.