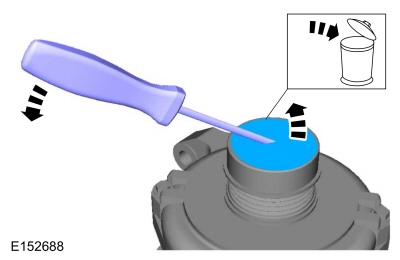
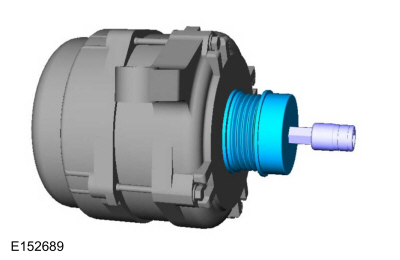
Verify the customer concern by operating the charging system.
Before diagnosing or repairing the charging system, check the following:
Check the battery for loose, damaged or corroded connections.
Check the alternator for loose, damaged or corroded connections.
Check the engine and battery ground connections for loose, damaged or corroded connections.
Check the high-current BJB for loose or corroded connections.
Check the fuses or fusible links.
Inspect the wiring, terminals and connectors.
Inspect the FEAD system. For the 1.5 L EcoBoost, REFER TO: Accessory Drive (303-05A Accessory Drive – 1.5 L EcoBoost (118 kW/160 L PS) – I4, Diagnosis and Testing). For the 2 L EcoBoost, REFER TO: Accessory Drive (303-05B Accessory Drive – 2 L EcoBoost (184 kW/250 L PS) – MI4, Diagnosis and Testing). For the 2.5 L Duratec, REFER TO: Accessory Drive (303-05C Accessory Drive – 2.5 L Duratec (125 kW/170 L PS), Diagnosis and Testing). For the 2.7 L EcoBoost, REFER TO: Accessory Drive (303-05D Accessory Drive – 2.7 L EcoBoost (238 kW/324 L PS), Diagnosis and Testing).
Check the battery condition and state of charge. Refer to: Battery (414-01 Battery, Mounting and Cables, Diagnosis and Testing).
Check for abnormal current draw with the ignition off. Refer to: Battery Drain Test (414-01 Battery, Mounting and Cables, General Procedures).
If an obvious cause for an observed or reported concern is found, correct it (if possible) before proceeding.
Using the diagnostic scan tool, retrieve all Diagnostic Trouble Codes (DTCs). Refer to the appropriate DTC chart in this section.
Diagnostic Trouble Code Charts
The diagnosis in this manual assumes a certain level of skill and knowledge of Ford-approved diagnostic procedures. REFER TO: Diagnostic Methods (100-00 General Information, Description and Operation).
PCM Diagnostic Trouble Code Chart
Trouble Code
Description
Action
P0562
Low system voltage
GO to Pinpoint Test B
P0563
System Voltage High
GO to Pinpoint Test A
P0620
Generator Control Circuit
GO to Pinpoint Test H
P0625
Generator Field Terminal Circuit Low
GO to Pinpoint Test I
P0626
Generator Field Terminal Circuit High
GO to Pinpoint Test I
P065B
Generator Control Circuit Range/Performance
GO to Pinpoint Test H
P0A5A
Generator Current Sensor Circuit Range/Performance
GO to Pinpoint Test G
P0A5B
Generator Current Sensor Circuit Low
GO to Pinpoint Test G
P0A5C
Generator Current Sensor Circuit High
GO to Pinpoint Test G
P1397
System Voltage Out of Self-Test Range
If accompanied by P0562, GO to Pinpoint Test B. If accompanied by P0563, GO to Pinpoint Test A.
All other Diagnostic Trouble Codes
—
For the 1.5 L EcoBoost, for the 2 L EcoBoost, REFER TO: Engine Control Modules (303-14B Engine Control Modules – 2 L EcoBoost (184 kW/250 L PS) – MI4, Diagnosis and Testing). For the 2.5 L Duratec, REFER TO: Engine Control Modules (303-14C Engine Control Modules – 2.5 L Duratec (125 kW/170 L PS), Diagnosis and Testing). For the 2.7 L EcoBoost, REFER TO: Engine Control Modules (303-14D Engine Control Modules – 2.7 L EcoBoost (238 kW/324 L PS), Diagnosis and Testing).
BCM Diagnostic Trouble Code Chart
Trouble Code
Description
Action
B11DB:02
Battery Monitoring Module "A" General Signal Failure
GO to Pinpoint Test F
B11DB:08
Battery Monitoring Module "A" Signal/Message Bus Failure
GO to Pinpoint Test F
B11DB:11
Battery Monitoring Module "A" Circuit Short to Ground
GO to Pinpoint Test F
B11DB:49
Battery Monitoring Module "A" Internal Electronic Failure
CLEAR the diagnostic trouble codes (DTCs). RERUN the BCM self-test. If DTC B11DB:49 is present, INSTALL a new battery monitoring sensor. REFER TO: Battery Monitoring Sensor (414-01 Battery, Mounting and Cables, Removal and Installation).
B11DB:55
Battery Monitoring Module "A" Not Configured
CHECK the vehicle service history for recent service actions involving this module. This DTC is set due to an incomplete or incorrect PMI procedure. INSTALL the calibration data from the Professional Technician Society (PTS), following the diagnostic scan tool instructions in the module Programming > How To Embedded.
B11DB:9A
Battery Monitoring Module "A" Component or System Operating Conditions
GO to Pinpoint Test F
B130K:12
Load Shed Control Circuit Short to Battery
GO to Pinpoint Test E
B130K:14
Load Shed Control Circuit Short to Ground or Open
GO to Pinpoint Test E
B1438:03
Battery Current Sensor Malfunction FM/PWM
GO to Pinpoint Test E
B1489:11
Battery Monitoring System (BMS) Sensor Power Circuit Short to Ground
GO to Pinpoint Test F
U1007:31
Battery Monitoring Sensor "A" Communication Lost: No Signal
GO to Pinpoint Test F
All other Diagnostic Trouble Codes
—
REFER TO: Body Control Module (BCM) (419-10 Multifunction Electronic Modules, Diagnosis and Testing).
Symptom Chart
Symptom Chart: Charging System
The diagnosis in this manual assumes a certain level of skill and knowledge of Ford-approved diagnostic procedures. REFER TO: Diagnostic Methods (100-00 General Information, Description and Operation).
Symptom Chart
Condition
Possible Sources
Action
System voltage is high.
Refer to Pinpoint Test
GO to Pinpoint Test A
System voltage is low or battery is discharged.
Refer to Pinpoint Test
GO to Pinpoint Test B
Generator is noisy.
Refer to Pinpoint Test
GO to Pinpoint Test C
Radio interference.
Refer to Pinpoint Test
GO to Pinpoint Test D
Charging system warning indicator never illuminates or is always illuminated.
Wiring, Terminals or Connectors
PCM
Generator
PCM
RETRIEVE Diagnostic Trouble Codes (DTCs) from all modules. If any DTCs are present, refer to the DTC chart in this section. If no DTCs are present, Refer to: Instrument Cluster, Message Center and Warning Chimes (413-01 Instrument Cluster, Message Center and Warning Chimes, Diagnosis and Testing).
Load Shed Messages Displayed in IPC Message Center and/or Center Stack Infotainment Display
Refer to Pinpoint Test
GO to Pinpoint Test J
Battery Charge Conservation – System Off messages displayed on center stack infotainment display
Refer to Pinpoint Test
GO to Pinpoint Test J
Pinpoint Tests
System Voltage High
For circuit and connector information, refer to Section 12 Wiring Diagrams.
Normal Operation and Fault Symptoms
With the engine running, the charging system supplies voltage to the battery and the vehicle electrical system through the high-current BJB and battery cable B+. The voltage supplied to the vehicle electrical system is used to operate various vehicle systems and modules. Many modules monitor this voltage and, if it rises above or falls below their calibrated thresholds, a DTC is set.
This DTC is set in the PCM when the PCM detects charging system voltage above 15.9 V at vehicle speeds above 8 km/h.
P1397
System Voltage Out of Self-Test Range
If the voltage rises above or falls below the calibrated set point, the PCM sets this DTC. This DTC may also be set if the vehicle was recently started from an external power source or the battery was discharged.
Possible Sources
Battery
Generator
Engine, Generator or Battery Ground
PCM
Wiring, Terminals or Connectors
Visual Inspection and Preliminary Diagnosis
Inspect the high-current BJB for loose or corroded connections.
DIAGNOSTIC TEST A: HIGH SYSTEM VOLTAGE
NOTE: Make sure the battery voltage is above 12.2 V before and during this precise test.
NOTE: Do not connect a battery charger during vehicle testing.
A1 INSPECT AND VERIFY CONCERN
Perform the Inspection and Verification procedure in this section.
Was an obvious cause for the observed or reported concern found?
Yes
REPAIR the cause if necessary.
No
GO to A2
A2 RETRIEVE THE PCM (POWERTRAIN CONTROL MODULE) DIAGNOSTIC TROUBLE CODES (DTCS)
The ignition is on.
Using the diagnostic scan tool, perform a PCM self-test.
Is DTC P0620, P0625 or P0626 present?
Yes
If DTC P0620, GO to Pinpoint Test H. For DTCs P0625 and P0626, GO to Pinpoint Test I.
No
GO to A3
A3 COMPARE THE GENERATOR VOLTAGE DESIRED (GENVDSD) PID (PARAMETER IDENTIFICATION) TO BATTERY VOLTAGE
With the engine running at idle, measure and record:
Positive lead
Measurement/Action
Negative lead
Using a diagnostic scan tool, view the PCM GENVDSD PID.
Is the recorded battery voltage within ±0.5 V of the PID?
Yes
GO to A6
No
GO to A4
A4 MEASURE SENSOR "A" VOLTAGE
Ignition OFF.
Disconnect the generator C1558A (for the 2 L EcoBoost or 2.5 L Duratec).
Disconnect the generator C102A (all other engines).
The ignition is on.
Measure and record:
Positive lead
Measurement/Action
Negative lead
For the 2.0L EcoBoost or 2.5L Duratec, measure: Click to display connectors
Positive lead
Measurement/Action
Negative lead
C1558A-3
Ground
For all other engines, measure: Click to display connectors
Positive lead
Measurement/Action
Negative lead
C102A-3
Ground
Does sensor "A" voltage match the recorded battery voltage?
Yes
GO to A5
No
CHECK the high-current BJB fuse 55 (10A) for proper operation. If OK, REPAIR the circuit. If not OK, REFER to the Wiring Diagrams Manual to determine the possible causes of the short circuit.
A5 SENSOR "A" CIRCUIT LOAD TEST
NOTICE: The following step uses a test light to simulate normal circuit loads. Use only the test light recommended in the Special Service Tools table at the beginning of this section. To avoid damaging connector terminals, use the Flex Probe Kit to connect the test light probe to the vehicle. Do not use the test light probe directly on any connector.
The ignition is on.
Measure and record:
Positive lead
Measurement/Action
Negative lead
For the 2.0L EcoBoost or 2.5L Duratec, install the test lamp between: Click to display connectors
Positive lead
Measurement/Action
Negative lead
C1558A-3
Ground
For all other engines, install the test lamp between: Click to display connectors
Positive lead
Measurement/Action
Negative lead
C102A-3
Ground
For the 2.0L EcoBoost or 2.5L Duratec, measure: Click to display connectors
Positive lead
Measurement/Action
Negative lead
C1558A-3
Ground
For all other engines, measure: Click to display connectors
Positive lead
Measurement/Action
Negative lead
C102A-3
Ground
Is the measured "A" voltage within ±0.5 V of the recorded battery voltage?
Yes
GO to A6
No
CHECK the BJB fuse F55 (10A) for proper operation. If OK, REPAIR the circuit. If not OK, REFER to the Wiring Diagrams Manual to determine the possible causes of the short circuit.
A6 CHECK THE REGULATOR CIRCUIT FOR AN OPEN
Connect the generator C1558A (2 L EcoBoost or 2.5 L Duratec).
Connect the generator C102A (for all other engines).
Start the engine.
With the engine running at idle, headlamps on and the heater blower on high, measure:
Positive lead
Measurement/Action
Negative lead
Perform a wiggle test on the generator harness and the following connections while monitoring the voltage:
Generator C1558A (2 L EcoBoost or 2.5 L Duratec)
Generator C102A (All other engines)
In-line C146
Does the battery voltage change by more than 0.5 volts?
Yes
CHECK and REPAIR any corrosion in the generator B+ circuit or the positive battery cable and the C1558A (2 L EcoBoost or 2.5 L Duratec) or C102A (all other engines).
No
GO to A7
A7 CHECK THE VEHICLE GROUND VOLTAGE DROP
Connect the generator C1558A (2 L EcoBoost or 2.5 L Duratec).
Connect the generator C102A (for all other engines).
Start the engine.
With the engine running at idle, headlamps on and the heater blower on high, measure:
Positive lead
Measurement/Action
Negative lead
Generator Housing
Is the voltage drop less than 0.5 volts?
Yes
GO to A8
No
CHECK and REPAIR the engine, generator or battery ground for corrosion.
A8 GENERATOR COMMAND (GENCMD), GENERATOR MONITOR (GENMON) AND GENERATOR VOLTAGE DESIRED (GENVDSD) PIDS CHECK
Ignition OFF.
Disconnect the generator C1558A (for the 2 L EcoBoost or 2.5 L Duratec).
Disconnect the generator C102A (all other engines).
For the 2.0L EcoBoost or 2.5L Duratec, connect the fused jumper: Click to display connectors
Positive lead
Measurement/Action
Negative lead
C1558A-1
C1558A-2
For all other engines, connect the fused jumper: Click to display connectors
Positive lead
Measurement/Action
Negative lead
C102A-1
C102A-2
Start the engine.
Using a diagnostic scan tool, view the PCM Parameter Identifications (PIDs).
Using the Active Command, set the GENVDSD PID to 14 volts.
Monitor the PCM Parameter Identifications (PIDs) GENMON and GENVDSD.
Are the Parameter Identifications (PIDs) read within 5% of each other?
Yes
GO to A9
No
GO to A12
A9 COMPARE PCM (POWERTRAIN CONTROL MODULE) POWER SUPPLY VOLTAGE (VPWR) PID TO BATTERY VOLTAGE
With the engine running at idle, measure and record:
Positive lead
Measurement/Action
Negative lead
Using a diagnostic scan tool, view the PCM Parameter Identifications (PIDs).
Monitor the PCM PID VPWR.
Does the VPWR PID indicate battery voltage within ±0.5 V of the recorded battery voltage?
Yes
The system is currently operating correctly. The concern may have been caused by a loose or corroded connector. ADDRESS the root cause of any connector or pin issues.
No
GO to A10
A10 CHECK THE PCM (POWERTRAIN CONTROL MODULE) POWER SUPPLY CIRCUITS
Ignition OFF.
Disconnect the BJB PCM power relay.
Disconnect the PCM C1915B (1.5 L EcoBoost).
Disconnect the PCM C1381B (2 L EcoBoost).
Disconnect the PCM C1551B (2.5 L Duratec).
Disconnect the PCM C1231B (2.7 L EcoBoost).
Connect the fused jumper:
Positive lead
Measurement/Action
Negative lead
BJB PCM relay pin 3
BJB PCM relay pin 5
Measure and record:
Positive lead
Measurement/Action
Negative lead
NOTE: The next step is a circuit load test. A headlamp bulb will be used as the effective load. To avoid damaging the connector terminals, use the Flex Probe Kit for connector connections. Connect the load to a suitable ground.
For the 1.5L EcoBoost, connect the load to each circuit and measure: Click to display connectors
Positive lead
Measurement/Action
Negative lead
C1915B-101
Ground
C1915B-102
Ground
C1915B-103
Ground
For the 2.0L EcoBoost, connect the load to each circuit and measure: Click to display connectors
Positive lead
Measurement/Action
Negative lead
C1381B-101
Ground
C1381B-102
Ground
C1381B-103
Ground
For the 2.5L Duratec, connect the load to each circuit and measure: Click to display connectors
Positive lead
Measurement/Action
Negative lead
C1551B-97
Ground
C1551B-99
Ground
For the 2.7L EcoBoost, connect the load to each circuit and measure: Click to display connectors
Positive lead
Measurement/Action
Negative lead
C1231B-101
Ground
C1231B-102
Ground
C1231B-103
Ground
Are the voltages within 0.5 volts of the recorded battery voltage?
Yes
REMOVE the fused jumper. GO to A11
No
REPAIR the faulty circuit(s).
A11 CHECK THE PCM (POWERTRAIN CONTROL MODULE) GROUND FOR HIGH RESISTANCE
Connect the load to a suitable 12V power connector.
For the 1.5L EcoBoost, connect the load to each circuit and measure: Click to display connectors
Positive lead
Measurement/Action
Negative lead
C1915B-96
Ground
C1915B-97
Ground
C1915B-98
Ground
C1915B-99
Ground
For the 2.0L EcoBoost, connect the load to each circuit and measure: Click to display connectors
Positive lead
Measurement/Action
Negative lead
C1381B-96
Ground
C1381B-97
Ground
C1381B-98
Ground
C1381B-99
Ground
For the 2.5L Duratec, connect the load to each circuit and measure: Click to display connectors
Positive lead
Measurement/Action
Negative lead
C1551B-5
Ground
C1551B-100
Ground
C1551B-102
Ground
C1551B-103
Ground
For the 2.7L EcoBoost, connect the load to each circuit and measure: Click to display connectors
Positive lead
Measurement/Action
Negative lead
C1231B-96
Ground
C1231B-97
Ground
C1231B-98
Ground
C1231B-99
Ground
Is the voltage drop less than 0.5 volts?
Yes
GO to A12
No
REPAIR the faulty circuit(s).
A12 CHECK THE PCM (POWERTRAIN CONTROL MODULE) FOR PROPER OPERATION
Ignition OFF.
Disconnect and inspect all PCM connectors.
Repair:
corrosion (install new connector or terminals - clean module pins)
damaged or bent pins - install new terminals/pins
backed-out pins - install new pins as necessary
Connect the PCM connectors. Make sure they are fully seated and locked.
Operate the system and determine if the concern is still present.
Is the concern still present?
Yes
CHECK in OASIS for any applicable Technical Service Bulletins (TSBs). If a TSB exists for this concern, STOP this test and FOLLOW the TSB instructions. If no TSBs apply to this concern, Click here to access the guided routine (PCM). Internet Explorer version 11 or later is required to perform this Pinpoint test.
No
The system is currently operating correctly. The concern may have been caused by module connections. ADDRESS the root cause of any connector or terminal issues.
Low system voltage or discharged battery
For circuit and connector information, refer to Section 12 Wiring Diagrams.
Normal Operation and Fault Symptoms
With the engine running, the charging system supplies voltage to the battery and the vehicle electrical system through the battery B+ cable. The PCM monitors this B+ voltage through the VPWR or FPPWR circuits. If the charging system voltage drops 1.5 volts or more below the Generator Voltage Desired (GENVDSD), a DTC is set and the Charging System indicator illuminates after 30 seconds.
If the voltage is 1.5 V or more below the required alternator voltage (calculated by the powertrain control module), this DTC is set after 30 seconds.
P1397
System Voltage Out of Self-Test Range
If the voltage rises above or falls below the calibrated set point, the PCM sets this DTC. This DTC may also be set if the vehicle was recently started from an external power source or the battery was discharged.
Possible Sources
Battery
Fuses or fusible links
Generator
PCM
High-current BJB
Wiring, Terminals or Connectors
Visual Inspection and Preliminary Diagnosis
Check for abnormal current draw with the ignition off.
Inspect the battery.
Inspect the high-current BJB for loose or corroded connections.
Inspect the generator drive belt.
Inspect the FEAD system.
PINPOINT TEST B: LOW SYSTEM VOLTAGE OR BATTERY DISCHARGED
NOTE: Make sure the battery voltage is above 12.2 V before and during this precise test.
NOTE: Do not connect a battery charger during vehicle testing.
B1 PERFORM INSPECTION AND VERIFICATION
Perform the Inspection and Verification procedure in this section.
Was an obvious cause for the observed or reported concern found?
Yes
REPAIR the cause if necessary.
No
GO to B2
B2 RETRIEVE DIAGNOSTIC TROUBLE CODES (DTCS)
Using the diagnostic scan tool, perform a PCM self-test.
Is DTC P0620, P0625 or P0626 present?
Yes
If DTC P0620, GO to Pinpoint Test H. For DTCs P0625 and P0626, GO to Pinpoint Test I.
No
GO to B3
B3 CHECK GENERATOR CONNECTIONS
Ignition OFF.
Disconnect all generator connectors and inspect:
corrosion (install new connector or terminals - clean module pins)
damaged or bent pins - install new terminals/pins
backed-out pins - install new pins as necessary
Connect the generator connectors. Make sure they are fully seated and locked.
Measure and record:
Positive lead
Measurement/Action
Negative lead
Action: Click to display the connectors
Positive lead
Measurement/Action
Negative lead
C102C-1
Ground
Is the voltage within 0.5 V of the recorded battery voltage?
Yes
GO to B4
No
TIGHTEN or INSTALL a new generator B+ nut as necessary. For 1.5 L EcoBoost, REFER to: Generator - 1.5 L EcoBoost (118 kW/160 L hp) - I4 (414-02 Generator and Regulator, Removal and Installation). For 2 L EcoBoost, REFER to: Generator - 2 L EcoBoost (184 kW/250 L hp) - MI4 (414-02 Generator and Regulator, Removal and Installation). For 2.5 L Duratec, REFER to: Generator - 2.5 L Duratec (125 kW/170 L hp) (414-02 Generator and Regulator, Removal and Installation). For 2.7 L EcoBoost, REFER to: Generator - 2.7 L EcoBoost (238 kW/324 L hp) (414-02 Generator and Regulator, Removal and Installation). CHECK the high-current BJB MEGA 8 fuse (275A) for proper operation. If OK, REPAIR the circuit. If not OK, REFER to the Wiring Diagrams Manual to determine the possible causes of the short circuit.
B4 CHECK GENERATOR B+ CIRCUIT VOLTAGE DROP
Start the engine.
With the engine running at idle, headlamps on and blower motor on high, measure: Click to display connectors
Positive lead
Measurement/Action
Negative lead
C102C-1
Perform a wiggle test on the generator wiring and connections while measuring the voltage drop.
Is the voltage drop less than 0.5 volts?
Yes
GO to B5
No
CHECK and REPAIR any corrosion in the generator B+ circuit or battery positive cable connections.
B5 CHECK VEHICLE GROUND VOLTAGE DROP
With the engine running at idle, headlamps on and the heater blower on high, measure:
Positive lead
Measurement/Action
Negative lead
Generator Housing
Is the voltage drop less than 0.5 volts?
Yes
GO to B6
No
CHECK and REPAIR the engine, generator or battery ground for corrosion.
B6 MONITOR REQUIRED GENERATOR VOLTAGE (GENVDSD) PID (PARAMETER IDENTIFICATION) DURING COMMAND
Using the diagnostic scan tool, view the PCM GENVDSD PID.
Using the diagnostic scan tool commanded function, set the PCM GENVDSD PID to 14 volts.
With the engine running at idle, measure the battery and record:
Positive lead
Measurement/Action
Negative lead
Is the recorded battery voltage within ±0.5 V of the PID?
Yes
GO to B7
No
GO TO B16
B7 COMPARE PCM (POWERTRAIN CONTROL MODULE) POWER SUPPLY VOLTAGE (VPWR) PID TO BATTERY VOLTAGE
With the engine running at idle, headlamps on and blower motor on high speed, measure and record:
Positive lead
Measurement/Action
Negative lead
Using the diagnostic scan tool, view the PCM PID VPWR.
Does the VPWR PID indicate battery voltage within ±0.5 V of the recorded battery voltage?
Yes
GO to B8
No
REPAIR high resistance or loose connections in the faulty PCM power supply circuits.
B8 PCM (POWERTRAIN CONTROL MODULE) POWER SUPPLY VOLTAGE CIRCUITS COMPARISON
Ignition OFF.
Disconnect the BJB PCM power relay.
Disconnect the PCM C1915B (1.5 L EcoBoost).
Disconnect the PCM C1381B (2 L EcoBoost).
Disconnect the PCM C1551B (2.5 L Duratec).
Disconnect the PCM C1231B (2.7 L EcoBoost).
Connect a fused jumper wire: Click to display connectors
Positive lead
Measurement/Action
Negative lead
BJB PCM Power Relay Pin 3
BJB PCM Power Relay Pin 5
Measure and record:
Positive lead
Measurement/Action
Negative lead
NOTE: The next step is a circuit load test. A headlamp bulb will be used as the effective load. To avoid damaging the connector terminals, use the Flex Probe Kit for connector connections. Connect the load to a suitable ground.
The ignition is on.
For the 1.5L EcoBoost, connect the load to each circuit and measure: Click to display connectors
Positive lead
Measurement/Action
Negative lead
C1915B-101
Ground
C1915B-102
Ground
C1915B-103
Ground
For the 2.0L EcoBoost, connect the load to each circuit and measure: Click to display connectors
Positive lead
Measurement/Action
Negative lead
C1381B-101
Ground
C1381B-102
Ground
C1381B-103
Ground
For the 2.5L Duratec, connect the load to each circuit and measure: Click to display connectors
Positive lead
Measurement/Action
Negative lead
C1551B-97
Ground
C1551B-99
Ground
For the 2.7L EcoBoost, connect the load to each circuit and measure: Click to display connectors
Positive lead
Measurement/Action
Negative lead
C1231B-101
Ground
C1231B-102
Ground
C1231B-103
Ground
Are the voltages within 0.5 volts of the recorded battery voltage?
Yes
REMOVE the fuse jumper and INSTALL the BJB PCM power relay. GO to B9.
No
REPAIR the faulty circuit(s).
B9 CHECK PCM (POWERTRAIN CONTROL MODULE) GROUND FOR HIGH RESISTANCE
Ignition OFF.
Remove the fused jumper wire.
Connect the load to a suitable 12V power connector.
For the 1.5L EcoBoost, connect the load to each circuit and measure: Click to display connectors
Positive lead
Measurement/Action
Negative lead
C1915B-96
Ground
C1915B-97
Ground
C1915B-98
Ground
C1915B-99
Ground
For the 2.0L EcoBoost, connect the load to each circuit and measure: Click to display connectors
Positive lead
Measurement/Action
Negative lead
C1381B-96
Ground
C1381B-97
Ground
C1381B-98
Ground
C1381B-99
Ground
For the 2.5L Duratec, connect the load to each circuit and measure: Click to display connectors
Positive lead
Measurement/Action
Negative lead
C1551B-5
Ground
C1551B-100
Ground
C1551B-102
Ground
C1551B-103
Ground
For the 2.7L EcoBoost, connect the load to each circuit and measure: Click to display connectors
Positive lead
Measurement/Action
Negative lead
C1231B-96
Ground
C1231B-97
Ground
C1231B-98
Ground
C1231B-99
Ground
Is the voltage drop less than 0.5 volts?
Yes
GO to B10
No
REPAIR the faulty circuit(s).
B10 BCM VOLTAGE SUPPLY CIRCUITS COMPARISON
Ignition OFF.
Disconnect all BCM connectors.
Measure and record:
Positive lead
Measurement/Action
Negative lead
NOTE: The next step is a circuit load test. A headlamp bulb will be used as the effective load. To avoid damaging the connector terminals, use the Flex Probe Kit for connector connections. Connect the load to a suitable ground.
Connect a load to each circuit and measure: Click to display connectors
Positive lead
Measurement/Action
Negative lead
C2280A-1
Ground
C2280B-17
Ground
C2280C-21
Ground
C2280C-22
Ground
Are the voltages within 0.5 volts of the recorded battery voltage?
Yes
GO to B11
No
REPAIR the faulty circuit(s).
B11 CHECK BCM GROUND FOR HIGH RESISTANCE
Connect the load to a suitable 12V power connector.
Connect a load to each circuit and measure: Click to display connectors
Positive lead
Measurement/Action
Negative lead
C2280F-6
Ground
C2280F-7
Ground
Is the voltage drop less than 0.5 volts?
Yes
GO to B12
No
REPAIR the faulty circuit(s).
B12 SUPPLY VOLTAGE (VPWR) PID (PARAMETER IDENTIFICATION) CHECK
Start the engine.
Measure and record:
Positive lead
Measurement/Action
Negative lead
Using the diagnostic scan tool, view the PCM PID VPWR and record.
Briefly accelerate the engine to wide open throttle (WOT) and release. Repeat this step 4-5 times while continuing to monitor the PID.
Does the PID remain within 0.5 volts of the recorded battery voltage when engine speed (RPM) increases?
Yes
With 2.5 L Duratec GO to B13. For all other engines the system is operating correctly at this time. The concern may have been caused by a loose or corroded connector. INSPECT and REPAIR any connector or terminal concerns found. If no connector or terminal concerns are found, perform the battery drain test. REFER TO: Battery Drain Test (414-01 Battery, Mounting and Cables, General Procedures).
No
GO TO B16
B13 CHECK INJPWR_M PID (PARAMETER IDENTIFICATION)
Using a diagnostic scan tool, view the PCM Parameter Identifications (PIDs).
Monitor the INJPWR_M PID.
Does the PID show more than 0.5 volts?
Yes
GO to B14
No
CHECK that the BJB fuse F29 (5A) is good. If OK, REFER to the Electrical Circuit Diagrams and REPAIR the open circuit. If not OK, REFER to the Wiring Diagrams Manual to identify possible causes of the short circuit.
B14 INJPWR_M PID (PARAMETER IDENTIFICATION) BATTERY VOLTAGE COMPARISON
With the engine still idling, measure and record the battery voltage.
Monitor the INJPWR_M PID.
Does the VPWR PID indicate battery voltage within ±0.5 V of the recorded battery voltage?
Replace the BJB fuel pump relay with a known good relay.
Start the engine.
With the engine idling, measure and record the battery voltage.
Monitor the INJPWR_M PID.
Does the VPWR PID indicate battery voltage within ±0.5 V of the recorded battery voltage?
Yes
REPLACE the BJB fuel pump relay.
No
REFER to the Electrical Circuit Diagrams and REPAIR circuit CBB29 for high resistance.
B16 CHECK ALTERNATOR DECOUPLER OPERATION
Ignition OFF.
Perform the alternator decoupler component check. GO to Pinpoint Test K.
Is the alternator decoupler pulley OK?
Yes
INSTALL a new alternator. For 1.5 L EcoBoost, REFER TO: Alternator - 1.5 L EcoBoost (118 kW/160 L PS) - I4 (414-02 Alternator and Regulator, Removal and Installation). For 2 L EcoBoost REFER TO: Alternator - 2 L EcoBoost (184 kW/250 L PS) - MI4 (414-02 Alternator and Regulator, Removal and Installation). For 2.5 L Duratec, REFER TO: Alternator - 2.5 L Duratec (125 kW/170 L PS) (414-02 Alternator and Regulator, Removal and Installation). For 2.7 L EcoBoost REFER TO: Alternator - 2.7 L EcoBoost (238 kW/324 L PS) (414-02 Alternator and Regulator, Removal and Installation).
No
INSTALL a new generator clutch. Refer to: Generator Pulley (414-02 Generator and Regulator, Removal and Installation).
B17 CHECK PCM (POWERTRAIN CONTROL MODULE) OPERATION
Ignition OFF.
Disconnect and inspect all PCM connectors.
Repair:
corrosion (install new connector or terminals - clean module pins)
damaged or bent pins - install new terminals/pins
backed-out pins - install new pins as necessary
Connect the PCM connectors. Make sure they are fully seated and locked.
Operate the system and determine if the concern is still present.
Is the concern still present?
Yes
CHECK in OASIS for any applicable Technical Service Bulletins (TSBs). If a TSB exists for this concern, STOP this test and FOLLOW the TSB instructions. If no TSBs apply to this concern, Click here to access the guided routine (PCM). Internet Explorer version 11 or later is required to perform this Pinpoint Test. CLEAR all diagnostic trouble codes (DTCs) in all modules.
No
The system is currently operating correctly. The concern may have been caused by a loose or corroded connector. ADDRESS the root cause of any connector or pin issues.
Generator Noise or Mechanical Condition
Normal Operation and Fault Symptoms
The alternator is belt driven from the engine accessory drive belt system. There are several sources of alternator noise, including bearing noise, electrical fault noise, alternator or pulley misalignment. Alternators with certain diode or stator failures can also produce audible noise.
Possible Sources
FEAD belt
Loose bolts/brackets
Generator/pulleys
Visual Inspection and Preliminary Diagnosis
Inspect the FEAD belt.
Inspect the bolts/brackets for loose bolts.
Inspect the generator/pulley.
DIAGNOSTIC TEST C: GENERATOR NOISE OR MECHANICAL CONDITION
C1 CHECK FOR ACCESSORY DRIVE BELT NOISE AND LOOSE BRACKET MOUNTING
Ignition OFF.
Inspect the FEAD belt and tensioner for damage and correct installation. For 1.5 L EcoBoost, REFER TO: Accessory Drive (303-05A Accessory Drive - 1.5 L EcoBoost (118 kW/160 L PS) - I4, Diagnosis and Testing). For 2 L EcoBoost REFER TO: Accessory Drive (303-05B Accessory Drive - 2 L EcoBoost (184 kW/250 L PS) - MI4, Diagnosis and Testing). For 2.5 L Duratec REFER TO: Accessory Drive (303-05C Accessory Drive - 2.5 L Duratec (125 kW/170 L PS), Diagnosis and Testing). For 2.7 L EcoBoost REFER TO: Accessory Drive (303-05D Accessory Drive - 2.7 L EcoBoost (238 kW/324 L PS), Diagnosis and Testing).
Is the accessory drive OK?
Yes
GO to C2
No
REPAIR as necessary.
C2 CHECK THE GENERATOR MOUNTING
Check the generator mounting for loose bolts or misalignment.
Is the generator installed correctly?
Yes
GO to C3
No
REPAIR as necessary.
C3 CHECK THE GENERATOR FOR NOISE
Start the engine.
With the engine running, use a stethoscope or equivalent listening device to check the generator and accessory drive area for abnormal mechanical noise.
Is the generator the source of the noise?
Yes
GO TO C4
No
REFER TO: Engine (303-00 Engine System - General Information, Diagnosis and Testing). Diagnose the source of the engine noise.
C4 CHECK ALTERNATOR DECOUPLER PULLEY OPERATION
Ignition OFF.
Perform the alternator decoupler component check. GO to Pinpoint Test K.
Is the alternator decoupler pulley OK?
Yes
INSTALL a new alternator. For 1.5 L EcoBoost, REFER TO: Alternator - 1.5 L EcoBoost (118 kW/160 L PS) - I4 (414-02 Alternator and Regulator, Removal and Installation). For 2 L EcoBoost REFER TO: Alternator - 2 L EcoBoost (184 kW/250 L PS) - MI4 (414-02 Alternator and Regulator, Removal and Installation). For 2.5 L Duratec, REFER TO: Alternator - 2.5 L Duratec (125 kW/170 L PS) (414-02 Alternator and Regulator, Removal and Installation). For 2.7 L EcoBoost REFER TO: Alternator - 2.7 L EcoBoost (238 kW/324 L PS) (414-02 Alternator and Regulator, Removal and Installation).
No
INSTALL a new generator clutch. Refer to: Generator Pulley (414-02 Generator and Regulator, Removal and Installation).
Radio interference.
For circuit and connector information, refer to Section 12 Wiring Diagrams.
Normal Operation and Fault Symptoms
The generator radio interference suppression equipment reduces conducted interference through the vehicle's electrical system speakers.
Possible Sources
Generator
Vehicle entertainment system
Wiring, Terminals or Connectors
Visual Inspection and Preliminary Diagnosis
Inspect the generator.
Inspect the vehicle entertainment system.
DIAGNOSTIC TEST D: RADIO INTERFERENCE
D1 DETERMINE IF THE GENERATOR IS THE SOURCE OF AUDIO SYSTEM INTERFERENCE
Start the engine.
Allow the engine to idle.
Tune the audio system to a station where interference is present.
Ignition OFF.
Disconnect alternator C102C.
Start the engine.
Allow the engine to idle.
Is interference present with the generator disconnected?
Yes
REFER TO: Information and Entertainment System (415-00 Information and Entertainment System - General Information). (Sony Sound) or REFER TO: Information and Entertainment System (415-00 Information and Entertainment System - General Information). (Base), or REFER TO: Information and Entertainment System (415-00 Information and Entertainment System - General Information). (Premium)
No
INSTALL a new alternator. For 1.5 L EcoBoost, REFER TO: Alternator - 1.5 L EcoBoost (118 kW/160 L PS) - I4 (414-02 Alternator and Regulator, Removal and Installation). For 2 L EcoBoost REFER TO: Alternator - 2 L EcoBoost (184 kW/250 L PS) - MI4 (414-02 Alternator and Regulator, Removal and Installation). For 2.5 L Duratec, REFER TO: Alternator - 2.5 L Duratec (125 kW/170 L PS) (414-02 Alternator and Regulator, Removal and Installation). For 2.7 L EcoBoost REFER TO: Alternator - 2.7 L EcoBoost (238 kW/324 L PS) (414-02 Alternator and Regulator, Removal and Installation).
Battery Current Sensor Faults
For circuit and connector information, refer to Section 12 Wiring Diagrams.
Normal Operation and Fault Symptoms
For battery current sensor information, REFER TO: Charging System - System Operation and Component Description (414-00 Charging System - General Information, Description and Operation).
This DTC sets in the BCM when the BCM detects a short circuit in the battery current sensor control circuit.
B130K:14
Load Shed Control Circuit Short to Ground or Open
This DTC sets in the BCM when the BCM detects an open or ground in the battery current sensor control circuit.
B1438:03
Battery Current Sensor Failure FM (Frequency Modulated) / PWM (Pulse Width Modulated)
This DTC is set in the BCM when the BCM does not receive current data from the battery current sensor.
Possible Sources
Battery Current Sensor
Wiring, Terminals or Connectors
Visual Inspection and Preliminary Diagnosis
Inspect the battery current sensor
Inspect the battery current sensor connector.
PINPOINT TEST E: BATTERY CURRENT SENSOR MALFUNCTION
NOTE: Make sure the battery voltage is above 12.2 V before and during this precise test.
NOTE: Do not connect a battery charger during vehicle testing.
E1 CHECK BATTERY CURRENT SENSOR CONNECTION
Inspect the battery current sensor for the following:
physical damage
corrosion
disconnected electrical connector
battery ground cable routed through the battery current sensor
debris between the battery current sensor and the battery ground cable
Were any of these conditions found during the inspection?
Yes
REPAIR as necessary. GO to E13.
No
GO to E2
E2 BATTERY CURRENT SENSOR REFERENCE VOLTAGE CIRCUIT CHECK
Ignition OFF.
Disconnect battery current sensor C1646.
The ignition is on.
Action: Click to display the connectors
Positive lead
Measurement/Action
Negative lead
C1646-1
Ground
Is the voltage between 4.8 and 5.2 volts?
Yes
GO to E6
No
If the voltage is below 4.8 V, GO to E4. If the voltage is above 5.2 V, GO to E3.
E3 CHECK BATTERY CURRENT SENSOR REFERENCE VOLTAGE CIRCUIT FOR SHORT TO VOLTAGE
Ignition OFF.
Disconnect C2280C.
Using the battery terminal removal kit, release and temporarily remove the BCM. C2280C-3.
Connect C2280C.
The ignition is on.
Action: Click to display the connectors
Positive lead
Measurement/Action
Negative lead
C1646-1
Ground
Is there voltage present?
Yes
REPAIR the circuit.
No
INSTALL C2280C-3 and GO to E14
E4 CHECK THE BATTERY CURRENT SENSOR REFERENCE VOLTAGE CIRCUIT FOR A SHORT TO GROUND
Ignition OFF.
Disconnect C2280C.
Action: Click to display the connectors
Positive lead
Measurement/Action
Negative lead
C1646-1
Ground
Is the resistance greater than 10000 Ohms?
Yes
GO to E5
No
REPAIR the circuit.
E5 CHECK THE BATTERY CURRENT SENSOR REFERENCE VOLTAGE CIRCUIT FOR AN OPEN
Action: Click to display the connectors
Positive lead
Measurement/Action
Negative lead
C1646-1
C2280C-3
Is the resistance less than 3 ohms?
Yes
GO to E13
No
REPAIR the circuit.
E6 CHECK THE BATTERY CURRENT SENSOR SIGNAL RETURN CIRCUIT
Action: Click to display the connectors
Positive lead
Measurement/Action
Negative lead
C1646-1
C1646-2
Is the voltage between 4.8 and 5.2 volts?
Yes
GO to E9
No
GO to E7
E7 CHECK THE BATTERY CURRENT SENSOR SIGNAL RETURN CIRCUIT VOLTAGE
Action: Click to display the connectors
Positive lead
Measurement/Action
Negative lead
C1646-2
Ground
Is there voltage present?
Yes
REPAIR the circuit.
No
GO to E8
E8 CHECK THE BATTERY CURRENT SENSOR SIGNAL RETURN CIRCUIT FOR AN OPEN
Ignition OFF.
Disconnect C2280C.
Action: Click to display the connectors
Positive lead
Measurement/Action
Negative lead
C1646-2
C2280C-19
Is the resistance less than 3 ohms?
Yes
GO to E13
No
REPAIR the circuit.
E9 CHECK THE BATTERY CURRENT SENSOR FEEDBACK CIRCUIT FOR A SHORT TO VOLTAGE
Disconnect C2280C.
The ignition is on.
Action: Click to display the connectors
Positive lead
Measurement/Action
Negative lead
C1646-3
Ground
Is there voltage present?
Yes
REPAIR the circuit.
No
GO to E10
E10 CHECK THE BATTERY CURRENT SENSOR FEEDBACK CIRCUIT FOR A SHORT TO GROUND
Ignition OFF.
Action: Click to display the connectors
Positive lead
Measurement/Action
Negative lead
C1646-3
Ground
Is the resistance greater than 10000 Ohms?
Yes
GO to E11
No
REPAIR the circuit.
E11 CHECK THE BATTERY CURRENT SENSOR FEEDBACK CIRCUIT FOR AN OPEN
Action: Click to display the connectors
Positive lead
Measurement/Action
Negative lead
C1646-3
C2280C-8
Is the resistance less than 3 ohms?
Yes
GO to E12
No
REPAIR the circuit.
E12 CHECK THE BATTERY CURRENT SENSOR FEEDBACK CIRCUIT FOR A SHORT TO THE SIGNAL CIRCUIT OR REFERENCE CIRCUIT
Action: Click to display the connectors
Positive lead
Measurement/Action
Negative lead
C1646-3
C1646-1
C1646-3
C1646-2
Is the resistance greater than 10000 ohms?
Yes
GO to E13
No
REPAIR the faulty circuit.
E13 CHECK THE BATTERY CURRENT SENSOR CONNECTION
Ignition OFF.
If necessary, disconnect the battery current sensor C1646.
Inspect the battery current sensor connector for:
corrosion (install new connector or terminals - clean module pins)
damaged or bent pins - install new terminals/pins
backed-out pins - install new pins as necessary
Connect the battery current sensor C1646.
Connect C2280C.
The ignition is on.
Using a diagnostic scan tool, clear all diagnostic trouble codes (DTCs) from all modules.
Using a scan tool, perform the BCM self-test.
Did the DTC return?
Yes
REPAIR as necessary or INSTALL a new battery current sensor. REFER TO: Battery Current Sensor (414-01 Battery, Mounting and Cables, Removal and Installation). CLEAR the Diagnostic Trouble Codes (DTCs). RERUN the Self-Test. If the DTC returns, GO to E14.
No
The system is currently operating correctly. The concern may have been caused by module connections. ADDRESS the root cause of any connector or terminal issues.
E14 CHECK BCM (BODY CONTROL MODULE) OPERATION
Ignition OFF.
Disconnect and inspect all BCM connectors.
Repair:
corrosion (install new connector or terminals - clean module pins)
damaged or bent pins - install new terminals/pins
backed-out pins - install new pins as necessary
Reconnect the BCM connectors. Make sure they are fully seated and locked.
Operate the system and determine if the concern is still present.
Is the concern still present?
Yes
CHECK in OASIS for any applicable Technical Service Bulletins (TSBs). If a TSB exists for this concern, STOP this test and FOLLOW the TSB instructions. If no TSBs apply to this concern, Click here to access the guided procedure (BCM). Internet Explorer version 11 or later is required to perform this Pinpoint Test. CLEAR all diagnostic trouble codes (DTCs) in all modules.
No
The system is currently operating correctly. The concern may have been caused by module connections. ADDRESS the root cause of any connector or terminal issues.
Battery Monitor Sensor Faults
For circuit and connector information, refer to Section 12 Wiring Diagrams.
Normal Operation and Fault Symptoms
The BCM monitors the battery charge state using the Battery Monitor Sensor attached to the negative battery cable. Battery voltage is hard-wired to the Battery Monitor Sensor, and data is transmitted from the Battery Monitor Sensor to the BCM through the LIN circuit.
Battery Monitoring Module "A" General Signal Failure
This DTC sets if the BCM receives corrupted data from the Battery Monitor Sensor over LIN.
B11DB:08
Battery Monitoring Module "A" Signal/Message Bus Failure
This DTC sets if the BCM receives corrupted data from the Battery Monitor Sensor over LIN.
B11DB:11
Battery Monitoring Module "A" Circuit Short to Ground
This DTC sets if the BCM detects low voltage on the Battery Monitor Sensor LIN.
B11DB:9A
Battery Monitoring Module "A" Component or System Operating Conditions
This DTC sets if the BCM receives corrupted data from the Battery Monitor Sensor over LIN.
B1489:11
Battery Monitoring System (BMS) Sensor Power Circuit Short to Ground
This DTC sets when the BCM does not receive data from the battery monitoring sensor over the LIN.
U1007:31
Lost communication with Battery Monitoring Sensor "A": no sub-type information
This DTC sets when the BCM does not detect communication over the LIN circuit. This may be the result of an open or short in the LIN circuit or the power supply circuit.
Possible Sources
Battery Monitor Sensor
Wiring, Terminals or Connectors
Visual Inspection and Preliminary Diagnosis
Inspect the battery monitor sensor
Inspect the battery monitor sensor connector.
PINPOINT TEST F: BATTERY MONITORING SENSOR MALFUNCTIONS
NOTE: Make sure the battery voltage is above 12.2 V before and during this precise test.
NOTE: Do not connect a battery charger during vehicle testing.
F1 CHECK THE ELECTRICAL CONNECTOR CONDITION
Disconnect the battery monitor sensor C1689.
Check the electrical connections of the battery monitor sensor for security, damage and corrosion.
Check the battery cable connections.
Connect the battery monitor sensor C1689.
Are all connectors clean and properly connected?
Yes
GO to F2
No
CLEAN corrosion from the battery cable connections. REPAIR any damaged, bent or pushed-out pins.
F2 RETRIEVE BCM (BODY CONTROL MODULE) DIAGNOSTIC TROUBLE CODES (DTCS)
The ignition is on.
Using a diagnostic scan tool, clear all diagnostic trouble codes (DTCs) from all modules.
Using a scan tool, perform the BCM self-test.
Did the DTC return?
Yes
GO to F3
No
For any PCM or BCM DTCs, refer to the wiring diagram in this section. The concern may have been caused by a loose or corroded connector. REPAIR the root cause of any connector or pin concern.
F3 CHECK THE BATTERY MONITOR SENSOR VOLTAGE
Ignition OFF.
Disconnect the battery monitor sensor C1689.
Measure and record:
Positive lead
Measurement/Action
Negative lead
Action: Click to display the connectors
Positive lead
Measurement/Action
Negative lead
C1689-2
Ground
Is the voltage within 0.5 V of the recorded battery voltage?
Yes
GO to F4
No
REPAIR the circuit.
F4 CHECK THE BATTERY MONITORING SENSOR LIN (LOCAL INTERCONNECT NETWORK) CIRCUIT FOR A SHORT TO VOLTAGE
Disconnect C2280C.
The ignition is on.
Action: Click to display the connectors
Positive lead
Measurement/Action
Negative lead
C1689-1
Ground
Is there voltage present?
Yes
REPAIR the circuit.
No
GO to F5
F5 CHECK THE BATTERY MONITORING SENSOR LIN (LOCAL INTERCONNECT NETWORK) CIRCUIT FOR A SHORT TO GROUND
Ignition OFF.
Action: Click to display the connectors
Positive lead
Measurement/Action
Negative lead
C1689-1
Ground
Is the resistance greater than 10000 Ohms?
Yes
GO to F6
No
REPAIR the circuit.
F6 CHECK THE BATTERY MONITORING SENSOR LIN (LOCAL INTERCONNECT NETWORK) CIRCUIT FOR AN OPEN
Action: Click to display the connectors
Positive lead
Measurement/Action
Negative lead
C1689-1
C2280C-4
Is the resistance less than 3 ohms?
Yes
INSTALL a new battery monitoring sensor. REFER TO: Battery Monitoring Sensor (414-01 Battery, Mounting and Cables, Removal and Installation).
No
REPAIR the circuit. GO to F7
F7 CLEAR THE DIAGNOSTIC TROUBLE CODES (DTCS)
Connect the battery monitor sensor C1689.
Connect C2280C.
The ignition is on.
Using a diagnostic scan tool, clear all diagnostic trouble codes (DTCs) from all modules.
Enter the following diagnostic mode: BCM Self-Test.
Is DTC B11DB:02, B11DB:08, B11DB:11, B11DB:49 or B11DB:9A present?
Yes
GO to F8
No
For all other BCM Diagnostic Trouble Codes (DTCs), refer to the DTC charts in this section.
F8 CHECK BCM (BODY CONTROL MODULE) OPERATION
Ignition OFF.
Disconnect and inspect all BCM connectors.
Repair:
corrosion (install new connector or terminals - clean module pins)
damaged or bent pins - install new terminals/pins
backed-out pins - install new pins as necessary
Reconnect the BCM connectors. Make sure they are fully seated and locked.
Operate the system and determine if the concern is still present.
Is the concern still present?
Yes
CHECK in OASIS for any applicable Technical Service Bulletins (TSBs). If a TSB exists for this concern, STOP this test and FOLLOW the TSB instructions. If no TSBs apply to this concern, Click here to access the guided procedure (BCM). Internet Explorer version 11 or later is required to perform this Pinpoint Test. CLEAR all diagnostic trouble codes (DTCs) in all modules.
No
The system is currently operating correctly. The concern may have been caused by module connections. ADDRESS the root cause of any connector or terminal issues.
Generator Current Sensor Faults
For wiring diagrams and connector information, refer to Wiring Diagrams, Cell 13.
Normal Operation and Fault Symptoms
The generator current sensor is a Hall-effect sensor attached to the generator B+ cable. It receives a 5 V reference voltage and ground from the PCM. The PCM reads the generator current sensor feedback voltage to determine the current flowing through the generator B+ cable.
Generator Current Sensor Circuit Range/Performance
Set in the PCM when the PCM does not detect current through the alternator current sensor and there is no alternator current sensor circuit DTC set.
P0A5B
Generator Current Sensor Circuit Low
Set when the PCM detects a lower than expected voltage on the generator current sensor feedback circuit, indicating an open or a short to ground.
P0A5C
Generator Current Sensor Circuit High
Set when the PCM detects a higher than expected voltage on the generator current sensor feedback circuit, indicating a short to voltage.
Possible Sources
Generator Current Sensor
PCM
Wiring, Terminals or Connectors
Visual Inspection and Preliminary Diagnosis
Inspect the generator current sensor.
Inspect the generator current sensor connector.
PINPOINT TEST G: GENERATOR CURRENT SENSOR MALFUNCTION
NOTE: Make sure the battery voltage is above 12.2 V before and during this precise test.
NOTE: Do not connect a battery charger during vehicle testing.
G1 RETRIEVE DIAGNOSTIC TROUBLE CODES (DTCS)
The ignition is on.
Using the diagnostic scan tool, perform a PCM self-test.
Is DTC P0562 present?
Yes
GO to Pinpoint Test B
No
For DTC P0A5A GO to G2 For DTC P0A5B GO to G3 For DTC P0A5C GO to G6.
G2 CHECK THE GENERATOR CURRENT SENSOR
Ignition OFF.
Inspect the generator current sensor for the following:
physical damage
corrosion
disconnected electrical connector
generator B+ cable routed through the generator current sensor
debris between the generator current sensor and the generator B+ cable
Were any of these conditions found during the inspection?
Yes
REPAIR as necessary or INSTALL a new generator current sensor. REFER TO: Generator Current Sensor (414-01 Battery, Mounting and Cables, Removal and Installation).
No
GO to G9
G3 CHECK THE GENERATOR CURRENT SENSOR REFERENCE VOLTAGE CIRCUIT FOR AN OPEN
Ignition OFF.
Disconnect the generator current sensor C1645.
The ignition is on.
Action: Click to display the connectors
Positive lead
Measurement/Action
Negative lead
C1645-1
Ground
Is the voltage between 4.8 and 5.2 volts?
Yes
GO to G4
No
If the voltage is less than 4.8 V, REPAIR the circuit for an open or high resistance. If the voltage is greater than 5.2 V, REPAIR the circuit for a short to the supply voltage.
G4 CHECK THE GENERATOR CURRENT SENSOR SIGNAL RETURN CIRCUIT FOR AN OPEN
Action: Click to display the connectors
Positive lead
Measurement/Action
Negative lead
C1645-1
C1645-2
Is the voltage between 4.8 and 5.2 volts?
Yes
GO to G5
No
REPAIR the circuit for an open or high resistance.
G5 CHECK THE GENERATOR CURRENT SENSOR FEEDBACK CIRCUIT FOR A SHORT TO GROUND
Ignition OFF.
Disconnect the PCM C1915B (1.5 L EcoBoost).
Disconnect the PCM C1381B (2 L EcoBoost).
Disconnect the PCM C1551B (2.5 L Duratec).
Disconnect the PCM C1231B (2.7 L EcoBoost).
Action: Click to display the connectors
Positive lead
Measurement/Action
Negative lead
C1645-3
Ground
Is the resistance greater than 10000 Ohms?
Yes
GO to G6
No
REPAIR the circuit.
G6 CHECK THE GENERATOR CURRENT SENSOR FEEDBACK CIRCUIT FOR A SHORT TO VOLTAGE
Ignition OFF.
Disconnect the PCM C1915B (1.5 L EcoBoost).
Disconnect the PCM C1381B (2 L EcoBoost).
Disconnect the PCM C1551B (2.5 L Duratec).
Disconnect the PCM C1231B (2.7 L EcoBoost).
Action: Click to display the connectors
Positive lead
Measurement/Action
Negative lead
C1645-3
Ground
Is there voltage present?
Yes
REPAIR the circuit.
No
GO to G7
G7 CHECK THE GENERATOR CURRENT SENSOR FEEDBACK CIRCUIT FOR A SHORT TO THE SIGNAL RETURN CIRCUIT OR REFERENCE VOLTAGE CIRCUIT
Ignition OFF.
Action: Click to display the connectors
Positive lead
Measurement/Action
Negative lead
C1645 -3
C1645-1
C1645 -3
C1645-2
Is the resistance greater than 10000 ohms?
Yes
GO to G8
No
REPAIR the faulty circuit.
G8 CHECK THE GENERATOR CURRENT SENSOR FEEDBACK CIRCUIT FOR AN OPEN
For the 1.5L EcoBoost, measure: Click to display connectors
Positive lead
Measurement/Action
Negative lead
C1915B-94
C1645-3
For the 2.0L EcoBoost engine, measure: Click to display connectors
Positive lead
Measurement/Action
Negative lead
C1381B-94
C1645-3
For the 2.5L Duratec, measure: Click to display connectors
Positive lead
Measurement/Action
Negative lead
C1551B-45
C1645-3
For the 2.7L EcoBoost engine, measure: Click to display connectors
Positive lead
Measurement/Action
Negative lead
C1231B-94
C1645-3
Is the resistance less than 3 ohms?
Yes
GO to G9
No
REPAIR the circuit.
G9 CHECK THE GENERATOR CURRENT SENSOR CONNECTION
Ignition OFF.
Disconnect the generator current sensor C1645.
Inspect the generator current sensor connector for the following:
corrosion (install new connector or terminals - clean module pins)
damaged or bent pins - install new terminals/pins
backed-out pins - install new pins as necessary
Connect and properly seat the generator current sensor connector.
The ignition is on.
Using a diagnostic scan tool, clear all diagnostic trouble codes (DTCs) from all modules.
Using the diagnostic scan tool, perform a PCM self-test.
Did the DTC return?
Yes
REPAIR as necessary or INSTALL a new generator current sensor. REFER TO: Generator Current Sensor (414-01 Battery, Mounting and Cables, Removal and Installation). CLEAR the Diagnostic Trouble Codes (DTCs). RERUN the Self-Test. If the DTC returns, GO to G10.
No
The system is currently operating correctly. The concern may have been caused by an intermittent loose or corroded connector. REPAIR the root cause of any connector or terminal concerns.
G10 CHECK PCM (POWERTRAIN CONTROL MODULE) OPERATION
Ignition OFF.
Disconnect and inspect all PCM connectors.
Repair:
corrosion (install new connector or terminals - clean module pins)
damaged or bent pins - install new terminals/pins
backed-out pins - install new pins as necessary
Connect the PCM connectors. Make sure they are fully seated and locked.
Operate the system and determine if the concern is still present.
Is the concern still present?
Yes
CHECK in OASIS for any applicable Technical Service Bulletins (TSBs). If a TSB exists for this concern, STOP this test and FOLLOW the TSB instructions. If no TSBs apply to this concern, Click here to access the guided routine (PCM). Internet Explorer version 11 or later is required to perform this Pinpoint Test. CLEAR all diagnostic trouble codes (DTCs) in all modules.
No
The system is currently operating correctly. The concern may have been caused by module connections. ADDRESS the root cause of any connector or terminal issues.
P0620, P065B
For circuit and connector information, refer to Section 12 Wiring Diagrams.
Normal Operation and Fault Symptoms
The PCM monitors generator output through the generator monitor (GENMON) circuit. The PCM uses the generator control (GENCOM) circuit to command the generator to either increase or decrease output. If the GENCOM circuit or the "A" sensor circuit is open or shorted to ground, the PCM will not be able to control generator output. When engine speed is above 2000 rpm, the generator defaults to maintaining a steady output voltage of 13.5 volts, and the PCM requests the IPC to illuminate the charging system warning indicator. A GENCOM circuit fault can be confirmed by viewing the PCM. Generator Command Error PID (GENCMD_LF) (Status Indicator Error YES).
The PCM sets this DTC if the GENCOM circuit, the "A" sensor circuit or the B+ circuit is open or shorted to ground.
P065B
Generator Control Circuit Range/Performance
The PCM sets this DTC when the generator reports an internal regulator fault.
Possible Sources
Fuses or fusible links
Generator
Generator coupling.
PCM
Wiring, Terminals or Connectors
Visual Inspection and Preliminary Diagnosis
Inspect the high-current BJB for loose or corroded connections.
Inspect the generator drive belt.
PINPOINT TEST H: P0620, P065B
NOTE: Make sure the battery voltage is above 12.2 V before and during this precise test.
NOTE: Do not connect a battery charger during vehicle testing.
H1 PERFORM INSPECTION AND VERIFICATION
Perform the Inspection and Verification procedure in this section.
Was an obvious cause for the observed or reported concern found?
Yes
REPAIR the cause if necessary.
No
GO to H2
H2 CHECK THE GENERATOR CONNECTIONS
Ignition OFF.
Disconnect all generator connectors and inspect:
corrosion (install new connector or terminals - clean module pins)
damaged or bent pins - install new terminals/pins
backed-out pins - install new pins as necessary
Connect the generator connectors. Make sure they are fully seated and locked.
Measure and record:
Positive lead
Measurement/Action
Negative lead
Action: Click to display the connectors
Positive lead
Measurement/Action
Negative lead
C102C-1
Ground
Is the voltage within 0.5 V of the recorded battery voltage?
Yes
GO to H3
No
TIGHTEN or INSTALL a new generator B+ nut as necessary. For the 1.5 L EcoBoost, REFER TO: Generator - 1.5 L EcoBoost (118 kW/160 L PS) - I4 (414-02 Generator and Regulator, Removal and Installation). For the 2 L EcoBoost, REFER TO: Generator - 2 L EcoBoost (184 kW/250 L PS) - MI4 (414-02 Generator and Regulator, Removal and Installation). For the 2.5 L Duratec, REFER TO: Generator - 2.5 L Duratec (125 kW/170 L PS) (414-02 Generator and Regulator, Removal and Installation). For the 2.7 L EcoBoost, REFER TO: Generator - 2.7 L EcoBoost (238 kW/324 L PS) (414-02 Generator and Regulator, Removal and Installation). CHECK the high-current BJB MEGA 8 fuse (275A) is OK. If OK, REPAIR the circuit. If not OK, REFER TO the Electrical Circuit Diagrams to determine possible causes of the short circuit.
H3 CHECK THE GENERATOR B+ CIRCUIT VOLTAGE DROP
Start the engine.
With the engine running at idle, headlamps on and blower motor on high, measure: Click to display connectors
Positive lead
Measurement/Action
Negative lead
C102C-1
Perform a wiggle test on the generator wiring and connections while measuring the voltage drop.
Is the voltage drop less than 0.5 volts?
Yes
GO to H4
No
CHECK and REPAIR any corrosion in the generator B+ circuit or battery positive cable connections.
H4 SENSE "A" CIRCUIT LOAD TEST
NOTICE: The following step uses a test light to simulate normal circuit loads. Use only the test light recommended in the Special Service Tools table at the beginning of this section. To avoid damaging connector terminals, use the Flex Probe Kit to connect the test light probe to the vehicle. Do not use the test light probe directly on any connector.
Ignition OFF.
Disconnect the generator C1558A (for the 2 L EcoBoost or 2.5 L Duratec).
Disconnect the generator C102A (all other engines).
The ignition is on.
Measure and record:
Positive lead
Measurement/Action
Negative lead
For the 2.0L EcoBoost or 2.5L Duratec, install the test lamp between: Click to display connectors
Positive lead
Measurement/Action
Negative lead
C1558A-3
Ground
For all other engines, install the test lamp between: Click to display connectors
Positive lead
Measurement/Action
Negative lead
C102A-3
Ground
Perform the generator harness wiggle test while monitoring the voltage.
For the 2.0L EcoBoost or 2.5L Duratec engine, perform the generator harness wiggle test and monitor: Click to display connectors
Positive lead
Measurement/Action
Negative lead
C1558A-3
Ground
For all other engines, perform the generator harness wiggle test and monitor: Click to display connectors
Positive lead
Measurement/Action
Negative lead
C102A-3
Ground
Is the measured "A" voltage within ±0.5 V of the recorded battery voltage?
Yes
GO to H5
No
CHECK the high-current BJB fuse 55 (10A) for proper operation. If OK, REPAIR the circuit. If not OK, REFER to the Wiring Diagrams Manual to determine the possible causes of the short circuit.
H5 CHECK GENERATOR CONTROL CIRCUIT FOR SHORT TO VOLTAGE
Ignition OFF.
Disconnect the PCM C1915B (1.5 L EcoBoost).
Disconnect the PCM C1381B (2 L EcoBoost).
Disconnect the PCM C1551B (2.5 L Duratec).
Disconnect the PCM C1231B (2.7 L EcoBoost).
The ignition is on.
For the 2.0L EcoBoost or 2.5L Duratec engine, perform the generator harness wiggle test and monitor: Click to display connectors
Positive lead
Measurement/Action
Negative lead
C1558A-2
Ground
For all other engines, perform the generator harness wiggle test and monitor: Click to display connectors
Positive lead
Measurement/Action
Negative lead
C102A-2
Ground
Is there voltage present?
Yes
REPAIR the circuit.
No
GO to H6
H6 CHECK GENERATOR CONTROL CIRCUIT FOR SHORT TO GROUND
Ignition OFF.
For the 2.0L EcoBoost or 2.5L Duratec engine, perform the generator harness wiggle test and monitor: Click to display connectors
Positive lead
Measurement/Action
Negative lead
C1558A-2
Ground
For all other engines, perform the generator harness wiggle test and monitor: Click to display connectors
Positive lead
Measurement/Action
Negative lead
C102A-2
Ground
Is the resistance greater than 10000 Ohms?
Yes
GO to H7
No
REPAIR the circuit.
H7 CHECK GENERATOR CONTROL CIRCUIT FOR OPEN
For the 1.5L EcoBoost engine, perform the generator harness wiggle test and monitor: Click to display connectors
Positive lead
Measurement/Action
Negative lead
C1915B-59
C102A-2
For the 2.0L EcoBoost engine, perform the generator harness wiggle test and monitor: Click to display connectors
Positive lead
Measurement/Action
Negative lead
C1381B-59
C1558A-2
For the 2.5L Duratec engine, perform the generator harness wiggle test and monitor: Click to display connectors
Positive lead
Measurement/Action
Negative lead
C1551B-64
C1558A-2
For the 2.7L EcoBoost engine, perform the generator harness wiggle test and monitor: Click to display connectors
Positive lead
Measurement/Action
Negative lead
C1231B-59
C102A-2
Is the resistance less than 3 ohms?
Yes
GO to H8
No
REPAIR the circuit.
H8 COMPARE GENERATOR MONITOR (GENMON) AND GENERATOR COMMAND (GENCMD) PIDS
Ignition OFF.
Connect BJB Fuse 7 (20A).
Connect PCM C1915B (1.5 L EcoBoost).
Connect PCM C1381B (2 L EcoBoost).
Connect PCM C1551B (2.5 L Duratec).
Connect PCM C1231B (2.7 L EcoBoost).
For the 2.0L EcoBoost or 2.5L Duratec, connect the fused jumper: Click to display connectors
Positive lead
Measurement/Action
Negative lead
C1558A-1
C1558A-2
For all other engines, connect the fused jumper: Click to display connectors
Positive lead
Measurement/Action
Negative lead
C102A-1
C102A-2
Start the engine.
Using a diagnostic scan tool, view the PCM Parameter Identifications (PIDs).
Monitor the PCM Parameter Identifications (PID) GENMON and GENCMD.
Perform the generator harness and connections wiggle test.
Are the Parameter Identifications (PIDs) read within 5% of each other?
Yes
REMOVE the fusible link. GO to H10.
No
REMOVE the fusible link. GO to H9.
H9 CHECK PCM (POWERTRAIN CONTROL MODULE) OPERATION
Ignition OFF.
Disconnect and inspect all PCM connectors.
Repair:
corrosion (install new connector or terminals - clean module pins)
damaged or bent pins - install new terminals/pins
backed-out pins - install new pins as necessary
Connect the PCM connectors. Make sure they are fully seated and locked.
Operate the system and determine if the concern is still present.
Is the concern still present?
Yes
CHECK in OASIS for any applicable Technical Service Bulletins (TSBs). If a TSB exists for this concern, STOP this test and FOLLOW the TSB instructions. If no TSBs apply to this concern, Click here to access the guided routine (PCM). Internet Explorer version 11 or later is required to perform this Pinpoint Test. CLEAR all diagnostic trouble codes (DTCs) in all modules.
No
The system is currently operating correctly. The concern may have been caused by module connections. ADDRESS the root cause of any connector or terminal issues.
H10 CHECK GENERATOR CLUTCH OPERATION
Ignition OFF.
Perform the alternator decoupler component check. GO to Pinpoint Test K.
Is the alternator decoupler pulley OK?
Yes
INSTALL a new alternator. For 1.5 L EcoBoost, REFER TO: Alternator - 1.5 L EcoBoost (118 kW/160 L PS) - I4 (414-02 Alternator and Regulator, Removal and Installation). For 2 L EcoBoost REFER TO: Alternator - 2 L EcoBoost (184 kW/250 L PS) - MI4 (414-02 Alternator and Regulator, Removal and Installation). For 2.5 L Duratec, REFER TO: Alternator - 2.5 L Duratec (125 kW/170 L PS) (414-02 Alternator and Regulator, Removal and Installation). For 2.7 L EcoBoost REFER TO: Alternator - 2.7 L EcoBoost (238 kW/324 L PS) (414-02 Alternator and Regulator, Removal and Installation).
No
INSTALL a new generator clutch. Refer to: Generator Pulley (414-02 Generator and Regulator, Removal and Installation).
Diagnostic Trouble Code P0625 or P0626
For circuit and connector information, refer to Section 12 Wiring Diagrams.
Normal Operation and Fault Symptoms
The PCM monitors generator output through the generator monitor (GENMON) circuit (generator field terminal circuit). If the PCM cannot read the GENMON circuit due to an open or short to ground when engine speed is above 2000 rpm, the generator defaults to a fixed regulated voltage of 13.5 volts and the PCM sends a request to the IPC to illuminate the charging system warning indicator. A GENMON duty cycle of 3% or less indicates a short to ground and sets DTC P0625 in the PCM. A GENMON duty cycle of 98% or more indicates an open or short to battery voltage and sets DTC P0626 in the PCM.
The PCM sets this DTC if the GENMON circuit is shorted to ground, the sense "A" circuit is open, or the B+ circuit is open. This DTC can also be set by a faulty PCM or generator.
P0626
Generator Field Terminal Circuit High
The PCM sets this DTC if the GENMON circuit is open or shorted to a power supply circuit. This DTC can also be set by a faulty PCM or generator.
Possible Sources
Battery
Fuses or fusible links
Generator
Generator coupling.
PCM
Wiring, Terminals or Connectors
Visual Inspection and Preliminary Diagnosis
Excessive current draw with ignition off
Inspect the high-current BJB for loose or corroded connections.
Inspect the generator drive belt.
PINPOINT TEST I: DTC P0625 OR P0626
I1 PERFORM INSPECTION AND VERIFICATION
Perform the Inspection and Verification procedure in this section.
Was an obvious cause for the observed or reported concern found?
Yes
REPAIR the cause if necessary.
No
CHARGE or INSTALL a new battery as necessary. REFER TO: Battery (414-01 Battery, Mounting and Cables, Removal and Installation).
I2 CHECK GENERATOR CONNECTIONS
Ignition OFF.
Disconnect all generator connectors and inspect:
corrosion (install new connector or terminals - clean module pins)
damaged or bent pins - install new terminals/pins
backed-out pins - install new pins as necessary
Connect the generator connectors. Make sure they are fully seated and locked.
Measure and record:
Positive lead
Measurement/Action
Negative lead
Action: Click to display the connectors
Positive lead
Measurement/Action
Negative lead
C102C-1
Ground
Is the voltage within 0.5 V of the recorded battery voltage?
Yes
GO to I3
No
TIGHTEN or INSTALL a new generator B+ nut as necessary. For the 1.5 L EcoBoost, REFER TO: Generator - 1.5 L EcoBoost (118 kW/160 L PS) - I4 (414-02 Generator and Regulator, Removal and Installation). For the 2 L EcoBoost, REFER TO: Generator - 2 L EcoBoost (184 kW/250 L PS) - MI4 (414-02 Generator and Regulator, Removal and Installation). For the 2.5 L Duratec, REFER TO: Generator - 2.5 L Duratec (125 kW/170 L PS) (414-02 Generator and Regulator, Removal and Installation). For the 2.7 L EcoBoost, REFER TO: Generator - 2.7 L EcoBoost (238 kW/324 L PS) (414-02 Generator and Regulator, Removal and Installation). CHECK the high-current BJB MEGA 8 fuse (275A) is OK. If OK, REPAIR the circuit. If not OK, REFER TO the Electrical Circuit Diagrams to determine possible causes of the short circuit.
I3 CHECK GENERATOR B+ CIRCUIT VOLTAGE DROP
Start the engine.
With the engine running at idle, headlamps on and blower motor on high, measure: Click to display connectors
Positive lead
Measurement/Action
Negative lead
C102C-1
Perform a wiggle test on the generator wiring and connections while measuring the voltage drop.
Is the voltage drop less than 0.5 volts?
Yes
For DTC P0625 GO to I4 For DTC P0626 GO to I5
No
CHECK and REPAIR any corrosion in the generator B+ circuit or battery positive cable connections.
I4 SENSE "A" CIRCUIT LOAD TEST
NOTICE: The following step uses a test light to simulate normal circuit loads. Use only the test light recommended in the Special Service Tools table at the beginning of this section. To avoid damaging connector terminals, use the Flex Probe Kit to connect the test light probe to the vehicle. Do not use the test light probe directly on any connector.
Ignition OFF.
Disconnect the generator C1558A (for the 2 L EcoBoost or 2.5 L Duratec).
Disconnect the generator C102A (all other engines).
The ignition is on.
Measure and record:
Positive lead
Measurement/Action
Negative lead
For the 2.0L EcoBoost or 2.5L Duratec, install the test lamp between: Click to display connectors
Positive lead
Measurement/Action
Negative lead
C1558A-3
Ground
For all other engines, install the test lamp between: Click to display connectors
Positive lead
Measurement/Action
Negative lead
C102A-3
Ground
For the 2.0L EcoBoost or 2.5L Duratec engine, perform the generator harness wiggle test and monitor: Click to display connectors
Positive lead
Measurement/Action
Negative lead
C1558A-3
Ground
For all other engines, perform the generator harness wiggle test and monitor: Click to display connectors
Positive lead
Measurement/Action
Negative lead
C102A-3
Ground
Is the measured "A" voltage within ±0.5 V of the recorded battery voltage?
Yes
GO to I5
No
CHECK the high-current BJB fuse 55 (10A) for proper operation. If OK, REPAIR the circuit. If not OK, REFER to the Wiring Diagrams Manual to determine the possible causes of the short circuit.
I5 CHECK GENERATOR CONTROL CIRCUIT FOR SHORT TO VOLTAGE
Ignition OFF.
Disconnect the PCM C1915B (1.5 L EcoBoost).
Disconnect the PCM C1381B (2 L EcoBoost).
Disconnect the PCM C1551B (2.5 L Duratec).
Disconnect the PCM C1231B (2.7 L EcoBoost).
The ignition is on.
For the 2.0L EcoBoost or 2.5L Duratec engine, perform the generator harness wiggle test and monitor: Click to display connectors
Positive lead
Measurement/Action
Negative lead
C1558A-1
Ground
For all other engines, perform the generator harness wiggle test and monitor: Click to display connectors
Positive lead
Measurement/Action
Negative lead
C102A-1
Ground
Is there voltage present?
Yes
REPAIR the circuit.
No
GO to I6
I6 CHECK GENERATOR CONTROL CIRCUIT FOR SHORT TO GROUND
Ignition OFF.
For the 2.0L EcoBoost or 2.5L Duratec engine, perform the generator harness wiggle test and monitor: Click to display connectors
Positive lead
Measurement/Action
Negative lead
C1558A-1
Ground
For all other engines, perform the generator harness wiggle test and monitor: Click to display connectors
Positive lead
Measurement/Action
Negative lead
C102A-1
Ground
Is the resistance greater than 10000 Ohms?
Yes
GO to I7
No
REPAIR the circuit.
I7 CHECK GENERATOR CONTROL CIRCUIT FOR OPEN
For the 1.5L EcoBoost engine, perform the generator harness wiggle test and monitor: Click to display connectors
Positive lead
Measurement/Action
Negative lead
C1915B-26
C102A-1
For the 2.0L EcoBoost engine, perform the generator harness wiggle test and monitor: Click to display connectors
Positive lead
Measurement/Action
Negative lead
C1381B-26
C1558A-1
For the 2.5L Duratec engine, perform the generator harness wiggle test and monitor: Click to display connectors
Positive lead
Measurement/Action
Negative lead
C1551B-26
C1558A-1
For the 2.7L EcoBoost engine, perform the generator harness wiggle test and monitor: Click to display connectors
Positive lead
Measurement/Action
Negative lead
C1231B-26
C102A-1
Is the resistance less than 3 ohms?
Yes
GO to I8
No
REPAIR the circuit.
I8 CHECK GENERATOR B+ INTERNAL RESISTANCE
NOTE: Failure to disconnect the battery will result in false resistance readings. Disconnect the battery. REFER TO: Battery Disconnect and Connect (414-01 Battery, Mounting and Cables, General Procedures).
Disconnect alternator C102C.
Action: Click to display the connectors
Positive lead
Measurement/Action
Negative lead
Generator B+ terminal
Generator Housing
Is the resistance greater than 25 kOhm?
Yes
GO to I9
No
GO to I12
I9 CHECK VOLTAGE REGULATOR INTERNAL CIRCUIT RESISTANCE
Action: Click to display the connectors
Positive lead
Measurement/Action
Negative lead
Generator Pin 1 (component side)
Generator Housing
Generator Pin 2 (component side)
Generator Housing
Generator Pin 3 (component side)
Generator Housing
Is the resistance greater than 10000 ohms?
Yes
GO to I10
No
GO to I12
I10 COMPARE GENMON AND GENCMD PIDS
Connect PCM C1915B (1.5 L EcoBoost).
Connect PCM C1381B (2 L EcoBoost).
Connect PCM C1551B (2.5 L Duratec).
Connect PCM C1231B (2.7 L EcoBoost).
For the 2.0L EcoBoost or 2.5L Duratec, connect the fused jumper: Click to display connectors
Positive lead
Measurement/Action
Negative lead
C1558A-1
C1558A-2
For all other engines, connect the fused jumper: Click to display connectors
Positive lead
Measurement/Action
Negative lead
C102A-1
C102A-2
Start the engine.
Using a diagnostic scan tool, view the PCM Parameter Identifications (PIDs).
Using the Active Command, set the GENVDSD PID to 14 volts.
Monitor the PCM Parameter Identifications (PID) GENMON and GENCMD.
Perform the generator harness and connections wiggle test.
Are the Parameter Identifications (PIDs) read within 5% of each other?
Yes
REMOVE the fusible link. GO to I12.
No
REMOVE the fusible link. GO to I11.
I11 CHECK PCM (POWERTRAIN CONTROL MODULE) OPERATION
Ignition OFF.
Disconnect and inspect all PCM connectors.
Repair:
corrosion (install new connector or terminals - clean module pins)
damaged or bent pins - install new terminals/pins
backed-out pins - install new pins as necessary
Connect the PCM connectors. Make sure they are fully seated and locked.
Operate the system and determine if the concern is still present.
Is the concern still present?
Yes
CHECK in OASIS for any applicable Technical Service Bulletins (TSBs). If a TSB exists for this concern, STOP this test and FOLLOW the TSB instructions. If no TSBs apply to this concern, Click here to access the guided routine (PCM). Internet Explorer version 11 or later is required to perform this Pinpoint Test. CLEAR all diagnostic trouble codes (DTCs) in all modules.
No
The system is currently operating correctly. The concern may have been caused by module connections. ADDRESS the root cause of any connector or terminal issues.
I12 CHECK GENERATOR CLUTCH OPERATION
Ignition OFF.
Perform the alternator decoupler component check. GO to Pinpoint Test K.
Is the alternator decoupler pulley OK?
Yes
INSTALL a new alternator. For 1.5 L EcoBoost, REFER TO: Alternator - 1.5 L EcoBoost (118 kW/160 L PS) - I4 (414-02 Alternator and Regulator, Removal and Installation). For 2 L EcoBoost REFER TO: Alternator - 2 L EcoBoost (184 kW/250 L PS) - MI4 (414-02 Alternator and Regulator, Removal and Installation). For 2.5 L Duratec, REFER TO: Alternator - 2.5 L Duratec (125 kW/170 L PS) (414-02 Alternator and Regulator, Removal and Installation). For 2.7 L EcoBoost REFER TO: Alternator - 2.7 L EcoBoost (238 kW/324 L PS) (414-02 Alternator and Regulator, Removal and Installation).
No
INSTALL a new generator clutch. Refer to: Generator Pulley (414-02 Generator and Regulator, Removal and Installation).
Load shed message displayed in the message center
For circuit and connector information, refer to Section 12 Wiring Diagrams.
Normal Operation and Fault Symptoms
When the engine is off, the ignition is in the on or accessory position, and the BCM determines that the battery state of charge is below 50% or 45 minutes have elapsed, a load shed message is sent over the CAN bus. This message turns off the audio/navigation system to conserve the remaining battery charge. In this case, the load shed message will be displayed to notify the driver that battery protection actions are active:
System off for battery conservation. Ignition off display on the FCDIM (non-touchscreen).
SYSTEM OFF FOR BATTERY CONSERVATION PLEASE TURN IGNITION OFF OR START ENGINE on the FDIM display (touchscreen).
Battery conservation: System Off is displayed on the FDIM (with SYNC).
Display of these messages may be normal operation and does not indicate a malfunction. Refer to the owner literature and REFER TO: Charging System – System Operation and Component Description (414-00 Charging System – General Information, Description and Operation). Load shed messages displayed with the engine running or only on the FCDIM or FDIM (touchscreen) indicate that the audio system has detected a malfunction.
Possible Sources
Normal operation
Audio System
Battery
BCM
Fuses or fusible links
Generator
Wiring, Terminals or Connectors
Visual Inspection and Preliminary Diagnosis
Inspect the high-current BJB for loose or corroded connections.
Inspect the battery for loose or corroded connections.
Inspect the generator for loose or corroded connections.
Inspect the BJB for loose or corroded connections.
Inspect the high-current BJB for loose or corroded connections.
Inspect C146 for loose or corroded connections.
Inspect the battery and engine ground cables for loose or corroded connections.
PINPOINT TEST J: LOAD SHED MESSAGES DISPLAYED IN MESSAGE CENTER
J1 PERFORM INSPECTION AND VERIFICATION
Perform the Inspection and Verification procedure in this section.
Was an obvious cause for the observed or reported concern found?
Yes
REPAIR the cause if necessary.
No
GO to J2
J2 VERIFY CUSTOMER CONCERN
Verify the customer concern by operating the charging system.
Did the customer state that the battery saver message appears only in the center stack with the engine running ?
Yes
Without touchscreen and Sony audio system. REFER TO: Information and Entertainment System (415-00 Information and Entertainment System - General Information). With touchscreen, REFER TO: Information and Entertainment System (415-00 Information and Entertainment System - General Information). With Sony Audio, REFER TO: Information and Entertainment System (415-00 Information and Entertainment System - General Information).
No
GO to J3
J3 CHECK THE NETWORK
The ignition is on.
Using a scan tool, perform the network test.
Did the APIM, BCM and PCM pass the network test?
Yes
GO to J4
No
REFER TO: Communication Network (418-00 Communication Network, Diagnosis and Testing).
J4 PERFORM PCM (POWERTRAIN CONTROL MODULE) SELF-TEST
The ignition is on.
Using the diagnostic scan tool, perform a PCM self-test.
Were any diagnostic trouble codes (DTCs) related to the battery or charging system retrieved?
Yes
Refer to the PCM DTC Chart in this section.
No
GO to J5
J5 RETRIEVE ALL CONTINUOUS MEMORY DIAGNOSTIC TROUBLE CODES (CMDTCS)
The ignition is on.
Using the diagnostic scan tool, retrieve all Continuous Monitor Diagnostic Trouble Codes (CMDTCs).
Were any diagnostic trouble codes (DTCs) related to the battery or charging system retrieved?
Yes
For BCM diagnostic trouble codes (DTCs), refer to the BCM DTC chart in this section. For APIM or ACM DTCs, refer to the appropriate procedure in Group 415. For other DTCs related to the battery or charging system, REFER TO: Diagnostic Trouble Code (DTC) Charts (100-00 General Information, Diagnosis and Testing).
No
GO to J6
J6 CHECK THE BCM (BODY CONTROL MODULE) BAT_ST_CHRG PID (PARAMETER IDENTIFICATION)
The ignition is on.
Using the diagnostic scan tool, view the BCM parameter identification (PID) data.
Monitor the BCM BAT_ST_CHRG PID.
Does the PID show 50% or more?
Yes
GO to J8
No
GO to J7
J7 RELEARN THE BATTERY STATE OF CHARGE
Remove all accessories from the cigar lighter, all power outlets and the DC/AC inverter.
NOTE: Do not leave the key in the vehicle. Place it in a secure location away from the vehicle, such as the key box. Allow the vehicle to sit for at least 6 hours.
The ignition is on.
Using the diagnostic scan tool, view the BCM parameter identification (PID) data.
Monitor the BCM BAT_ST_CHRG PID.
Does the PID show 50% or more?
Yes
The concern may have been caused by a low battery state of charge. REVIEW the power management operation with the customer and return the vehicle to the customer.
No
GO to J8
J8 CHECK THE INLINE CONNECTOR
Inspect inline connector C146 for a secure connection.
Disconnect inline connector C146.
Inspect for:
corrosion (install new connector or terminals - clean module pins)
damaged or bent pins - install new terminals/pins
backed-out pins - install new pins as necessary
Were any concerns found?
Yes
REPAIR the cause if necessary.
No
GO to J9
J9 CHECK BCM (BODY CONTROL MODULE) OPERATION
Ignition OFF.
Disconnect and inspect all BCM connectors.
Repair:
corrosion (install new connector or terminals - clean module pins)
damaged or bent pins - install new terminals/pins
backed-out pins - install new pins as necessary
Reconnect the BCM connectors. Make sure they are fully seated and locked.
Operate the system and determine if the concern is still present.
Is the concern still present?
Yes
CHECK in OASIS for any applicable Technical Service Bulletins (TSBs). If a TSB exists for this concern, STOP this test and FOLLOW the TSB instructions. If no TSBs apply to this concern, Click here to access the guided procedure (BCM). Internet Explorer version 11 or later is required to perform this Pinpoint Test. CLEAR all diagnostic trouble codes (DTCs) in all modules.
No
The system is currently operating correctly. The concern may have been caused by module connections. ADDRESS the root cause of any connector or terminal issues.
Generator Clutch Component Check
For circuit and connector information, refer to Section 12 Wiring Diagrams.
Normal Operation and Fault Symptoms
The generator clutch allows the generator rotor to continue rotating when the engine or FEAD system decelerates. The clutch must slide smoothly in the clockwise direction. It must not turn freely in the counterclockwise direction. A loose FEAD belt or a weak or seized tensioner can cause the pulley to overheat. REFER TO: Charging System - System Operation and Component Description (414-00 Charging System - General Information, Description and Operation).
PINPOINT TEST K: GENERATOR CLUTCH COMPONENT TEST
K1 CHECK THE GENERATOR CLUTCH
Remove the generator. For 1.5 L EcoBoost, REFER TO: Generator - 1.5 L EcoBoost (118 kW/160 L hp) - I4 (414-02 Generator and Regulator, Removal and Installation). For 2 L EcoBoost, REFER TO: Generator - 2 L EcoBoost (184 kW/250 L hp) - MI4 (414-02 Generator and Regulator, Removal and Installation). For 2.5 L Duratec, REFER TO: Generator - 2.5 L Duratec (125 kW/170 L hp) (414-02 Generator and Regulator, Removal and Installation). For 2.7 L EcoBoost, REFER TO: Generator - 2.7 L EcoBoost (238 kW/324 L hp) (414-02 Generator and Regulator, Removal and Installation).
Inspect the generator clutch for heat damage.
Are there signs of heat damage?
Yes
INSTALL a new generator clutch. REFER TO: Generator Pulley (414-02 Generator and Regulator, Removal and Installation). CHECK the FEAD system. For 1.5 L EcoBoost, REFER TO: Accessory Drive (303-05A Accessory Drive - 1.5 L EcoBoost (118 kW/160 L hp) - I4, Diagnosis and Testing). For 2 L EcoBoost, REFER TO: Accessory Drive (303-05B Accessory Drive - 2 L EcoBoost (184 kW/250 L hp) - MI4, Diagnosis and Testing). For 2.5 L Duratec, REFER TO: Accessory Drive (303-05C Accessory Drive - 2.5 L Duratec (125 kW/170 L hp), Diagnosis and Testing). For 2.7 L EcoBoost, REFER TO: Accessory Drive (303-05D Accessory Drive - 2.7 L EcoBoost (238 kW/324 L hp), Diagnosis and Testing).
No
GO to K2
K2 CHECK THE GENERATOR CLUTCH FOR SMOOTH OPERATION
Using a small screwdriver or similar tool, insert the tool through the rubber button in the center of the pulley cover and pry off the cap. Discard the cap. A new cover must be installed.
Using a 17 mm hex socket (such as Snap-on® SAM17E2 or equivalent) and a ratchet, fit the 17 mm hex socket onto the end of the clutch shaft.
Holding the clutch pulley firmly by hand, rotate the clutch shaft clockwise. The clutch shaft must rotate smoothly and freely.
Does the clutch shaft rotation feel rough or seized?
Yes
INSTALL a new generator clutch. Refer to: Generator Pulley (414-02 Generator and Regulator, Removal and Installation).
No
GO to K3
K3 CHECK REVERSE ROTATION RESISTANCE
Holding the clutch pulley firmly by hand, rotate the clutch shaft counterclockwise.
Is there any resistance (spring feel)?
Yes
GO to K4
No
INSTALL a new generator clutch. Refer to: Generator Pulley (414-02 Generator and Regulator, Removal and Installation).
K4 CHECK FOR REVERSE ROTATION
Holding the clutch pulley firmly by hand, rotate the clutch shaft counterclockwise.
Does the clutch shaft rotate freely?
Yes
INSTALL a new generator clutch. Refer to: Generator Pulley (414-02 Generator and Regulator, Removal and Installation).
No
INSTALL a new alternator. For 1.5 L EcoBoost, REFER TO: Alternator - 1.5 L EcoBoost (118 kW/160 L PS) - I4 (414-02 Alternator and Regulator, Removal and Installation). For 2 L EcoBoost REFER TO: Alternator - 2 L EcoBoost (184 kW/250 L PS) - MI4 (414-02 Alternator and Regulator, Removal and Installation). For 2.5 L Duratec, REFER TO: Alternator - 2.5 L Duratec (125 kW/170 L PS) (414-02 Alternator and Regulator, Removal and Installation). For 2.7 L EcoBoost REFER TO: Alternator - 2.7 L EcoBoost (238 kW/324 L PS) (414-02 Alternator and Regulator, Removal and Installation).
?
Test yourself
A quick Ford Fusion quiz: every answer comes with an explanation and a link to the manual page.




 Generator Housing



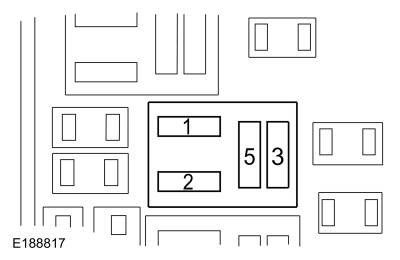 BJB PCM relay pin 3

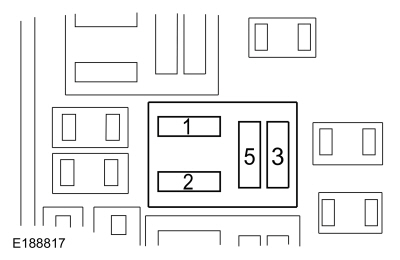 BJB PCM relay pin 5


 Click here to access the guided routine (PCM).
 Internet Explorer version 11 or later is required to perform this Pinpoint test.


 Generator Housing

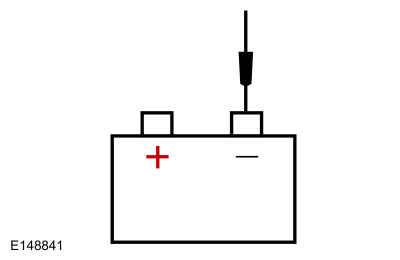


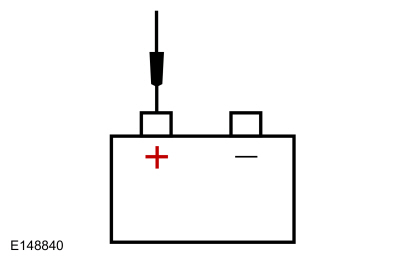

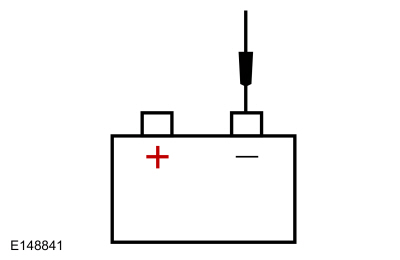


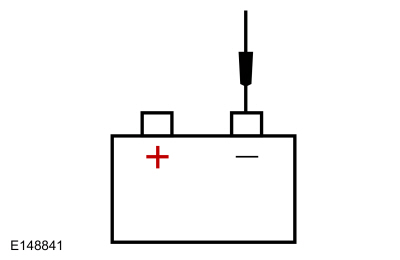


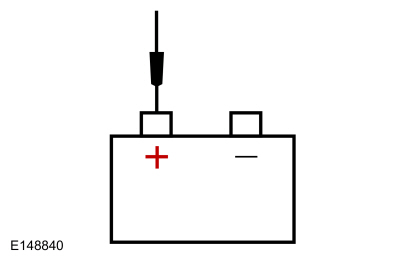


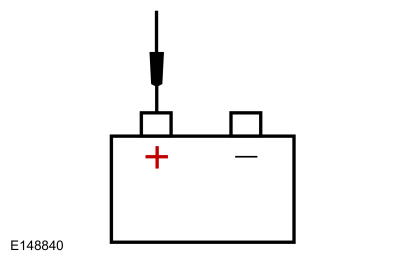


 Click here to access the guided routine (PCM).
 Internet Explorer version 11 or later is required to perform this Pinpoint Test.


 Click here to access the guided procedure (BCM).
 Internet Explorer version 11 or later is required to perform this Pinpoint Test.
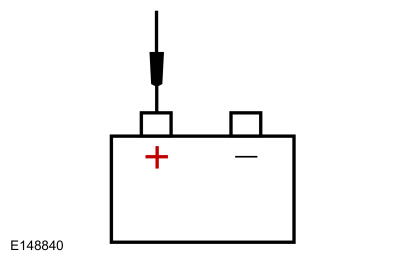

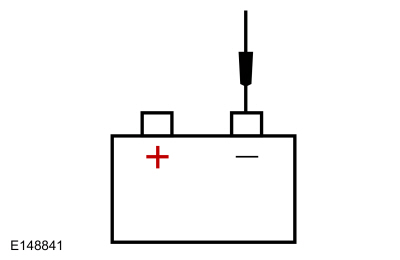


 Click here to access the guided procedure (BCM).
 Internet Explorer version 11 or later is required to perform this Pinpoint Test.


 Click here to access the guided routine (PCM).
 Internet Explorer version 11 or later is required to perform this Pinpoint Test.
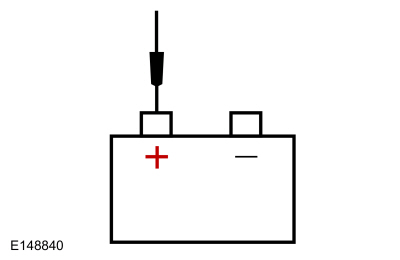


 Click here to access the guided routine (PCM).
 Internet Explorer version 11 or later is required to perform this Pinpoint Test.


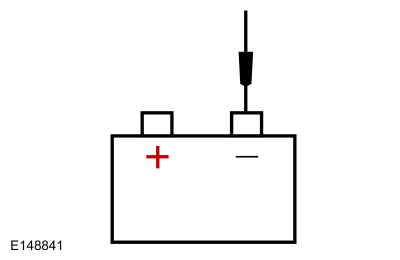


 Click here to access the guided routine (PCM).
 Internet Explorer version 11 or later is required to perform this Pinpoint Test.
 Click here to access the guided procedure (BCM).
 Internet Explorer version 11 or later is required to perform this Pinpoint Test.