Lower Arm - Removal, Installation
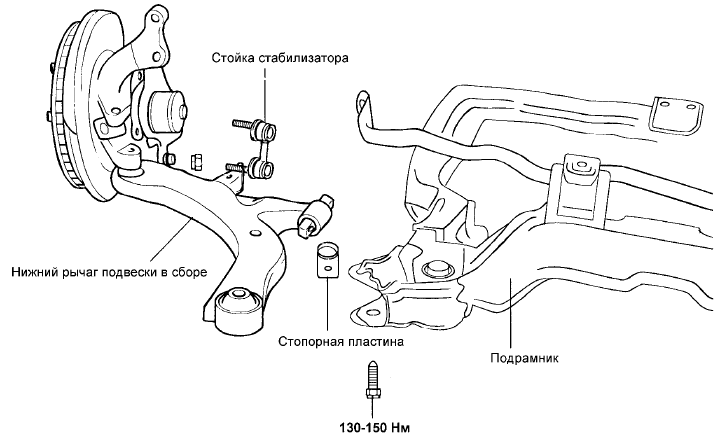
LOWER ARM - COMPONENTS
REMOVAL 1. Remove the front wheel.
2. Remove the cotter pin, remove the drive shaft hub nut, and remove the washer.
3. Loosen the nut securing the lower arm ball joint to the steering knuckle.
(Do not remove the nut completely).
4. Remove the two bolts (lower) securing the front strut to the steering knuckle.
5. Pull the wheel hub outward from the vehicle and separate the drive shaft from it.
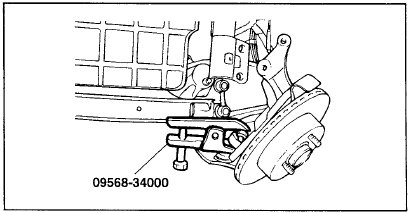
6. Using the special service tool (09568-34000), disconnect the lower arm ball joint from the lower arm.
7. Temporarily install the bolts (lower) securing the front strut to the steering knuckle.
8. Remove the stabilizer bar link nut.
9. Remove the two bolts securing bushings "A" and "G" of the lower arm.
10. Remove the lower arm assembly.
INSTALLATION
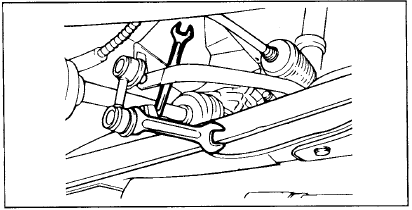
1. When tightening the stabilizer bar link, hold the ball joint stud from turning with a 14 mm wrench, then tighten the self-locking nut.
Test yourself
A quick Hyundai Elantra CN7 quiz: every answer comes with an explanation and a link to the manual page.