Front Strut Assembly - Strut Disposal, Installation
STRUT DISPOSAL
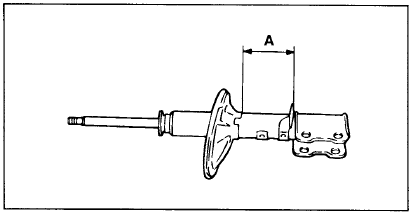
1. Fully extend the shock absorber piston rod.
2. Drill a hole at the location marked "A" in the illustration and release the gas from the shock absorber.
The gas itself is harmless; however, drilling chips may be expelled with the gas, so be careful (
always wear protective glasses).
INSTALLATION
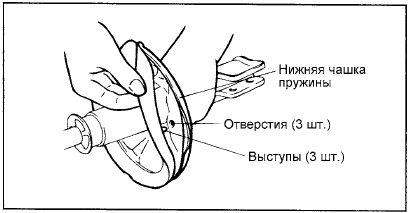
1. Install the lower spring insulator so that its projections align with the holes in the lower spring seat.
2. Install the dust boot on the shock absorber.
3. Using the special service tool (J38402, A-42), compress the spring.
After fully compressing the spring, install it on the shock absorber.
NOTE
Install the spring so that the identification mark faces the steering knuckle side.
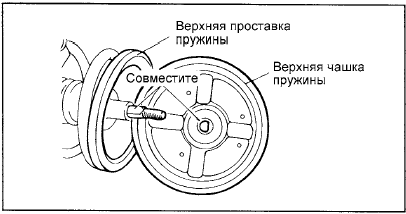
4. Fully extend the shock absorber piston rod, then install the upper spring seat and the strut mount assembly.
Align the flat part of the D-shaped hole in the upper spring seat with the flat on the unthreaded portion of the shock absorber piston rod.
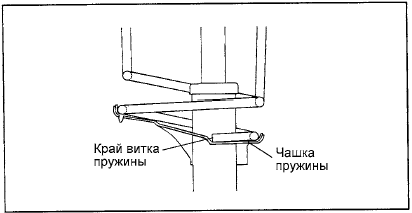
5. Align the upper and lower spring ends with the corresponding recesses in the upper and lower spring seats of the strut, then temporarily tighten the self-locking nut.
6. Remove the special service tool.
7. Tighten the self-locking nut to the specified torque.
Tightening torque: 50 - 70 N·m 8. Apply the specified grease to the strut mount bearing and install the protective cap.
Be careful when applying grease. Do not allow grease to get onto the rubber part of the strut mount.
Recommended grease: MS511-11 or equivalent
Test yourself
A quick Hyundai Elantra CN7 quiz: every answer comes with an explanation and a link to the manual page.