All-Wheel Drive (AWD) System
AWD Control Module Repair Procedures
In this manual: All-Wheel Drive (AWD) System
21steps
~126min
4/5difficulty
Done 0 of 21
Removal
- Turn the IG key to "ON".
- Connect the GDS to the vehicle.
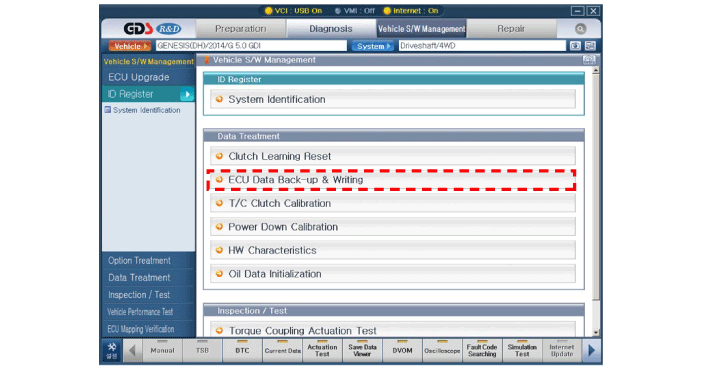
- To read the transfer case data from the old ITA (ECU), select the GDS "ECU Backup & Restore" service.
- Turn the IG key to "OFF".
- Remove the under cover. (Refer to Engine Mechanical System - "Engine Room Under Cover")
- Disconnect the ITA (ECU) connector (A).

- Remove the 2 screws (A).
- Remove the 4WD ITA (ECU) (B).

Installation
|

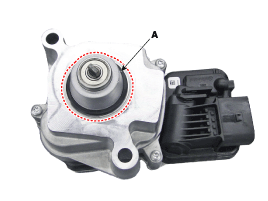
- Install a new 4WD ITA (ECU) (B).
- Tighten the mounting bolts to 22 N·m.

- Check the connector pins for erosion.
- Connect the vehicle wiring and the 4WD ITA (ECU) connector (A).
- IG Key "ON", Engine OFF.
- To write the transfer case data to the new ITA, select the GDS "ECU Backup & Restore" service.
- Perform the initial calibration by selecting the GDS "T/C Clutch Calibration" service.

- Turn the IG key to "OFF" and wait about 10 seconds.
- IG key "ON", engine "OFF".
- Check that the transfer case data was written correctly using the GDS "ECU Backup & Restore" service.
- Check for DTCs. For pending DTCs, erase them.
- If pending DTCs remain or incorrect data was written, turn the ignition off and repeat the entire procedure from step 5.
- If no DTCs are present and the correct backup data is written, the service procedure is complete.
Test yourself
A quick Hyundai Genesis DH quiz: every answer comes with an explanation and a link to the manual page.
Was this page helpful?