Brake System
Brake Pedal Repair Procedures
In this manual: Brake System
13steps
~78min
3/5difficulty
Done 0 of 13
Removal
- Turn the ignition switch OFF and disconnect the negative (-) battery cable.
- Remove the emergency pad lower panel. (Refer to Body - "Emergency Pad Lower Panel")
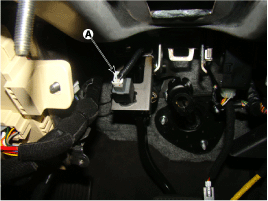
- Disconnect the stop lamp switch connector (A).
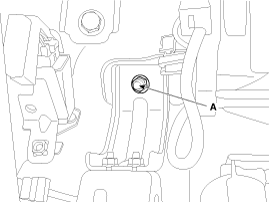
- Remove the brake pedal mounting nut (A).
Tightening torque: 19.6 - 26 N·m
- Remove the lock pin (A) and the flat head pin (B).

- Remove the nuts securing the brake pedal assembly, then remove the brake pedal assembly.
Tightening torque: 16.7 ~ 26 N·m

Inspection
- Inspect the bushing for wear.
- Inspect the brake pedal for bending or twisting.
- Inspect the brake pedal return spring for damage.
- Inspect the stop lamp switch.
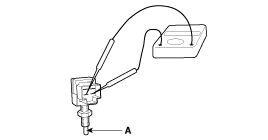
- Connect a circuit tester to the stop lamp switch connector and check for continuity when the stop lamp switch plunger is pressed and when it is released.
- The stop lamp switch is normal if there is no continuity when the plunger (A) is pressed.
Installation
- To install, reverse the removal procedure.
- Adjust the brake pedal height and free play.
- After installing the brake pedal, check the brake pedal operation.
Test yourself
A quick Hyundai Genesis DH quiz: every answer comes with an explanation and a link to the manual page.
Was this page helpful?