Automatic Transmission System (SBC)
Fluid Repair Procedures
In this manual: Automatic Transmission System (SBC)
11steps
~66min
3/5difficulty
Done 0 of 11
Service Adjustment Procedure
Fluid Level Check
|
|
- Start the engine. (Do not depress the brake and accelerator pedals at the same time.)
- Make sure the automatic transaxle fluid temperature sensor reads 50 to 60 °C using the GDS.
- Slowly shift the selector lever from "P" to "D" and from "P" to "R" with the engine at idle. Repeat once. Move the selector lever to the "N" position.
Hold each shift position for more than 2 seconds.
- Raise the vehicle, then remove the fluid level check plug (A) from the valve body cover.
The vehicle must be on level ground during this procedure.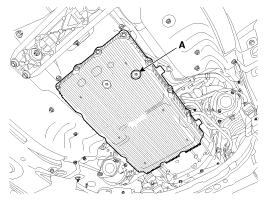
- If no fluid drains out or the amount drained is very low (within 20 cc), add 650 cc of ATF SP-IV-RR through the fluid injection hole (A).
If fluid begins to flow out of the fluid level check plug, stop adding fluid.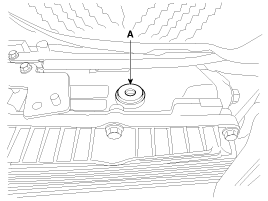
- If fluid flows out of the fluid level check plug in a thin, steady stream, the level is correct. Then complete the procedure and tighten the fluid level check plug.
Fluid Level Check Method (Overfill or Underfill)
- Overfill: The amount of fluid drained exceeds 500 cc per minute. (Allow fluid to flow until the stream becomes thin.)
- Underfill: No fluid drains after adding 650 cc of ATF. (Continue adding ATF until fluid begins to flow out.)
If there is no damage to the automatic transaxle, oil cooler, oil cooler hose, transaxle case, or valve body cover and the tightening condition is normal, ATF should flow out after performing steps 1 through 6 of the procedure above. If no fluid drips, inspect the automatic transaxle assembly.
Fluid level check plug torque: 22.6 to 24 N·m
Replace the gasket before reinstalling the fluid level check plug. - After checking or replacing the ATF, make sure to remove ATF from the outside of the automatic transaxle. (Be sure to remove any ATF residue between the transaxle case and the valve body cover.)
- Lower the vehicle using the lift.
Replacement
|
- Remove the drain plug (A) and reinstall it after the ATF has completely drained. Drain plug torque: 22.6 to 24 N·m
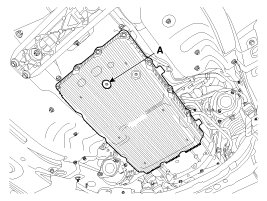
Replace the gasket before reinstalling the drain plug. - Add approximately 7.0 liters of fluid through the fluid injection hole.
- Check the fluid level. (Refer to Hydraulic System - "Fluid")
Test yourself
A quick Hyundai Genesis DH quiz: every answer comes with an explanation and a link to the manual page.
Was this page helpful?