Engine Mechanical System
Timing Chain Repair Procedures
In this manual: Engine Mechanical System
39steps
~234min
4/5difficulty
Done 0 of 39
Removal
- Set the No. 1 cylinder to top dead center (TDC)/compression.
- Turn the crankshaft pulley clockwise and align its groove with the "T" alignment mark on the lower timing chain cover.

- Make sure the marks (A) on the camshaft sprockets are in a straight line with the cylinder head surface, as shown in the illustration. If not, turn the crankshaft clockwise one full revolution (360°).
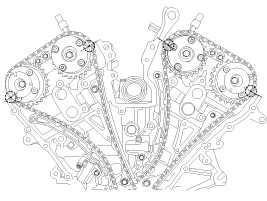
Do not turn the engine counterclockwise.
- Turn the crankshaft pulley clockwise and align its groove with the "T" alignment mark on the lower timing chain cover.
- Remove the timing chain cover. (Refer to Valve Timing - Timing Chain Cover)
Before removing the timing chain, mark the RH/LH timing chain by sprocket position, because the TDC identification mark on the chain may be worn off.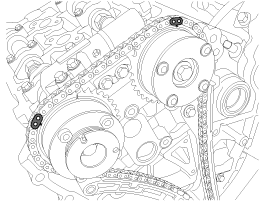
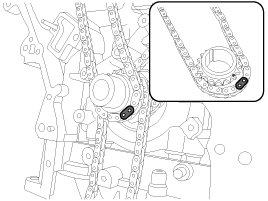
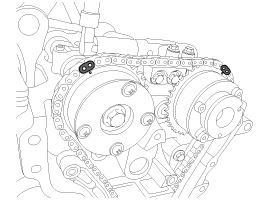
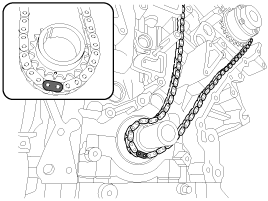
- Push down the tensioner arm (A), compress the RH timing chain tensioner piston and lock the tensioner with the stopper pin.
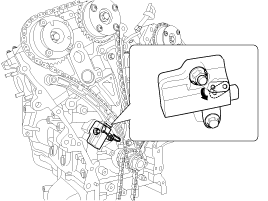
- Remove the RH timing chain cam guide (A).
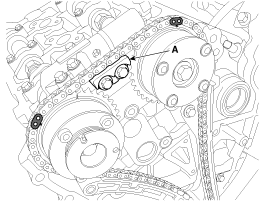
- Remove the automatic tensioner of the right timing chain (A) and the right timing chain tensioner arm (B).
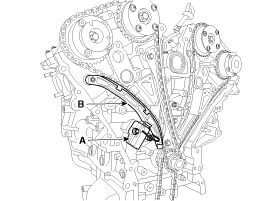
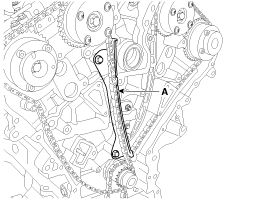
- Remove the right timing chain guide (A).
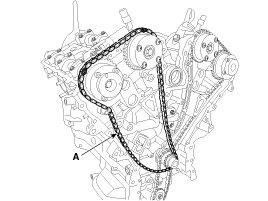
- Remove the right timing chain (A).
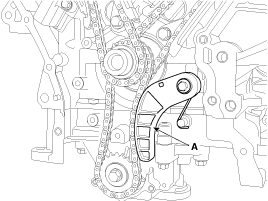
- Remove the oil pump chain tensioner assembly (A).
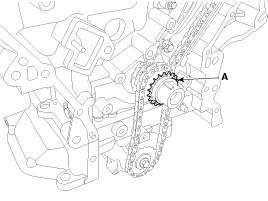
- Remove the right crankshaft sprocket (A).
- Remove the oil pump chain sprocket (A) and the oil pump chain (B).
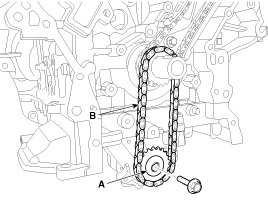
- Remove the crankshaft sprocket (A). (Intake and right camshaft drive)
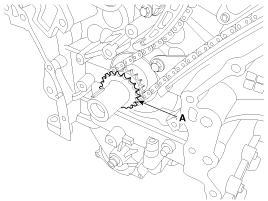
- Install the alignment pin after compressing the left timing chain tensioner.
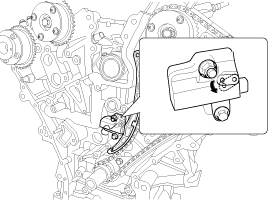
- Remove the left timing chain cam guide (A).
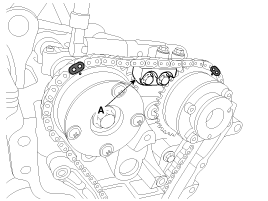
- Remove the automatic tensioner of the left timing chain (A) and the left timing chain tensioner arm (B).
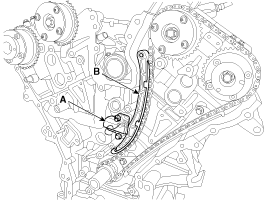
- Remove the left timing chain guide (A).
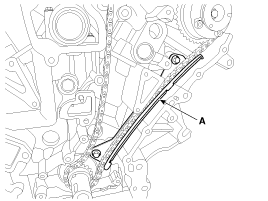
- Remove the left timing chain (A).
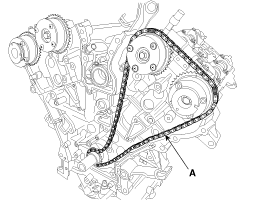
- Remove the crankshaft sprocket (A). (Left camshaft drive)
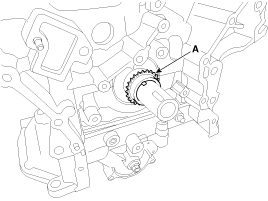
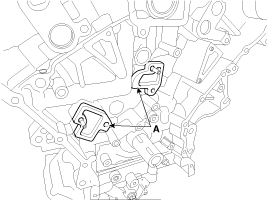
- Remove the automatic timing chain tensioner assembly adapter (A).
Inspection
Sprockets, Chain Tensioner, Chain Guide, Chain Tensioner Arm- Inspect the camshaft sprocket and the crankshaft sprocket for abnormal wear, cracks, or damage. Replace as necessary.
- Inspect the tensioner arm and chain guide for excessive wear, cracks, or damage. Replace as necessary.
- Make sure the chain tensioner plunger moves smoothly and the ratchet operates normally. Replace as necessary.
Installation
- The crankshaft key (A) must be aligned with the timing mark (B) on the timing chain cover. As a result, the No. 1 piston is at top dead center of the compression stroke.
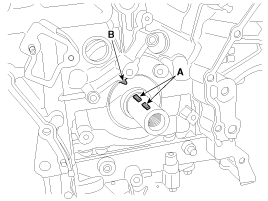
- Install the automatic timing chain tensioner adapter (A).
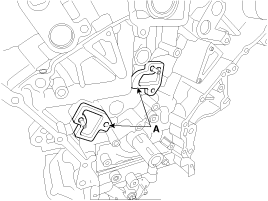
- Install the crankshaft sprocket (A). (Left camshaft drive)
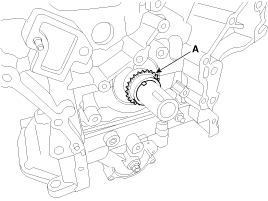
- Install the left timing chain (A).
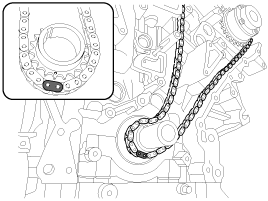
To install the timing chain without slack between each shaft (cam, crank), follow the procedure below. Crankshaft sprocket > Exhaust camshaft sprocket > Intake camshaft sprocket. The timing mark of each sprocket must align with the timing mark (colored link) of the timing chain when installing the timing chain. - Install the left timing chain guide (A).
Tightening torque: 19.6 - 24 N·m
- Install the left timing chain tensioner arm (B) and the automatic left timing chain tensioner (A). Tightening torque: A: 9.8 ~ 11.8 N·m B: 18.6 ~ 22 N·m
- Install the timing chain cam guide (A) onto the cam guide.
Tightening torque: 9.8 ~ 11.8 N·m
- Remove the stopper pin of the left automatic timing chain tensioner (A).
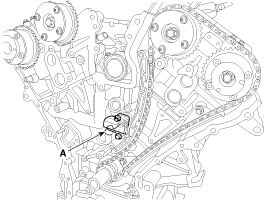
- Install the crankshaft sprocket (A).
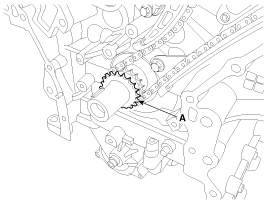
- Install the oil pump chain sprocket (A) and the oil pump chain (B).
Tightening torque: 19.6 - 24 N·m
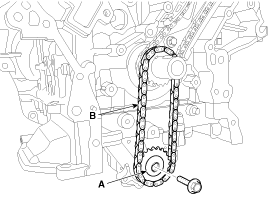
- Install the oil pump chain tensioner assembly (A).
Tightening torque: 9.8 ~ 11.8 N·m
- Install the right timing chain (A).
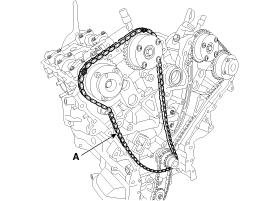
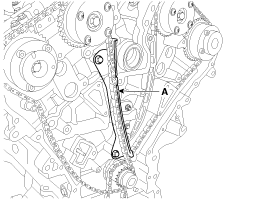
To install the timing chain without slack between each shaft (cam, crank), follow the procedure below. Crankshaft sprocket > Intake camshaft sprocket > Exhaust camshaft sprocket. The timing mark of each sprocket must align with the timing mark (colored link) of the timing chain when installing the timing chain. - Install the right timing chain guide (A).
Tightening torque: 19.6 - 24 N·m
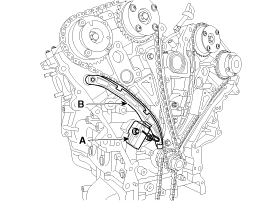
- Install the right automatic timing chain tensioner (A) and the right timing chain tensioner arm (B). Tightening torque: A: 9.8 ~ 11.8 N·m B: 18.6 ~ 22 N·m
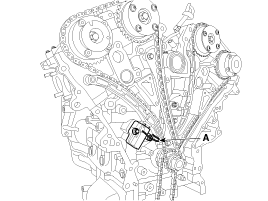
- Install the right timing chain cam guide (A) onto the cam guide.
Tightening torque: 9.8 ~ 11.8 N·m
- Remove the stopper pin of the right automatic timing chain tensioner (A).
- After turning the crankshaft two revolutions in the normal direction (clockwise when viewed from the front), check the alignment mark.
Always turn the crankshaft clockwise. Turning the crankshaft counterclockwise before building up oil pressure in the hydraulic timing chain tensioner may cause the chain to jump off the sprocket teeth. - Install the timing chain cover. (Refer to Timing System - "Timing Chain Cover")
|
Test yourself
A quick Hyundai Genesis DH quiz: every answer comes with an explanation and a link to the manual page.
Was this page helpful?