Engine Mechanical System
Drive Belt Repair Procedures
In this manual: Engine Mechanical System
9steps
~54min
2/5difficulty
Done 0 of 9
Removal and Installation
- Disconnect the negative (-) battery cable from the battery.
- Remove the engine cover. (Refer to Engine and Transaxle Assembly - "Engine Cover")
- Remove the engine room cover. (Refer to Engine and Transaxle Assembly - "Engine Cover")
- Turn the tensioner (B) clockwise to loosen it, then remove the drive belt (A).
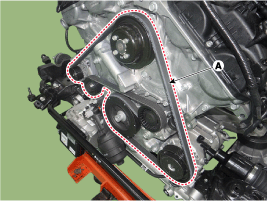
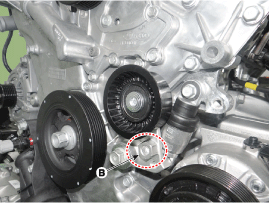
When installing the drive belt, follow the sequence below: crankshaft pulley > A/C compressor pulley > idler pulley > generator pulley > water pump pulley > drive belt auto tensioner pulley. Turn the automatic tensioner arm by turning the boss of the automatic tensioner arm (B) counterclockwise with a wrench.
- To install, reverse the removal procedure.
Inspection
Inspect the drive belt. Visually check the belt for excessive wear, frayed cords, etc. If any defect is found, replace the drive belt.
|
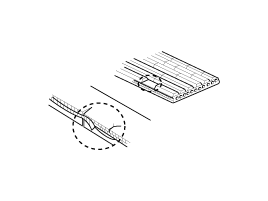
- Check the tensioner pulley for excessive oil leakage, abnormal rotation, or vibration. Replace the tensioner if necessary.
- Check the belt tensioner for excessive dust, cracks, and damage, and inspect it. Replace if necessary.
- Check the belt replacement interval, and if necessary inspect the belt for abnormal wear on the V-section and uneven wear.
- Check the crankshaft pulley and accessory pulleys for vibration during rotation, and the V-section for foreign material or contact irregularities. Replace components if necessary.
Test yourself
A quick Hyundai Genesis DH quiz: every answer comes with an explanation and a link to the manual page.
Was this page helpful?