Body Electrical System
Smart Key System Diagnosis Repair Procedures
In this manual: Body Electrical System
44steps
~264min
4/5difficulty
Done 0 of 44
Inspection
Self-Diagnosis Using GDS. Smart Key system malfunctions can be quickly diagnosed using GDS. GDS quickly operates the actuators for input/output value control and performs self-diagnosis. The following three items are critical problems in the SMART KEY system.- SMART KEY Device Input Problem.
- SMART KEY Device Problem.
- SMART KEY Device Output Problem.
- SMART KEY Device Input Problem: Switch Diagnosis
- SMART KEY Device Problem: Communication Diagnosis
- SMART KEY Device Output Problem: Antenna Diagnosis and Switch Output
- Connect the GDS cable to the data link connector in the lower driver-side crash pad cover, GDS plug.
- Select the vehicle model and the SMART KEY system.

- Select "SMART KEY Device".
- After ALL ON, select "Current Data".

- You can view the status of each switch on the scan tool after connecting the "Current Data" process.
Display Description Front Left Rocker Switch ON: The button on the door side handle is turned on. Driver. Front Right Rocker Switch ON: The button on the door side handle is turned on. Passenger. INTERIOR CHEST ON: The external line button is turned on. P Position Factor ON: The shift lever is in the P position. ALL 1 ON: The ALL switch is in the ALL position. SOUND ON: The ALL switch is in the ACC position. Push Button Switch ON: Push button switch ON. Exterior Buzzer ON: Buzzer ON. - Communication Diagnosis checks whether each connected component is operating normally.
- Connect the GDS cable to the data link connector in the lower driver-side crash pad cover to prevent collisions from the driver's side.
- After ALL ON, select "DTC".

- Connect the GDS cable to the data link connector in the lower driver-side crash pad cover to prevent collisions from the driver's side.
- After ALL ON, select "ACTIVATION TEST".

- If the smart key LED blinks, the smart key is normal.
- If the Smart Key LED does not blink, check the voltage of the Smart Key battery.
- Antenna Activation
- Antenna No. 1 INTERIOR
- Antenna No. 2 INTERIOR
- Trunk Antenna
- BUMPER/Antenna
- DRIVER DOOR Antenna
- PASSENGER DOOR Antenna
- Connect the GDS cable to the data link connector in the lower driver-side crash pad cover to prevent collisions from the driver's side.
- Select "Antenna Status Check".

- After ALL ON, select "Antenna Status Check".

- Place the Smart Key near the corresponding antenna and use with GDS.


- If the Smart Key operates normally, the corresponding antenna, Smart Key (transmission, reception) and external receiver are normal.
- Antenna Status
- Antenna No. 1 INTERIOR
- Antenna No. 2 INTERIOR
- Trunk Antenna
- BUMPER/Antenna
- DRIVER DOOR Antenna
- PASSENGER DOOR Antenna
- Connect the GDS cable to the data link connector in the lower driver-side crash pad cover to prevent collisions from the driver's side.
- Select "Serial Communication Line Control".

- Check the serial communication line using the GDS.
- If the receiver communication line operates normally, perform "ESCL Line Communication Control".

- If the Smart Key operates normally, communication with the Smart Key device, external receiver and ESCL is normal.
- If the electronic key does not operate correctly, check the following items.
- Open circuit or no response from the external receiver communication line.
- Short to ground of the external receiver communication line.
- Open circuit in ESCL or no response.
- Short to ground in ESCL.
- Place the Smart Key in the following coverage area and check ALL ON.

- If the ignition is on, the antenna operates normally.
- Check the ignition mode of the room antenna.
- Place the Smart Key in the following coverage area and activate the antenna. Make sure the Smart Key LED blinks.

- If the Smart Key LED does not blink, check the antenna in the coverage area.

- Connect the GDS cable to the data link connector in the lower driver-side crash pad cover to prevent collisions from the driver's side.
- After ALL ON, select "FOB KEY STATUS INFO".

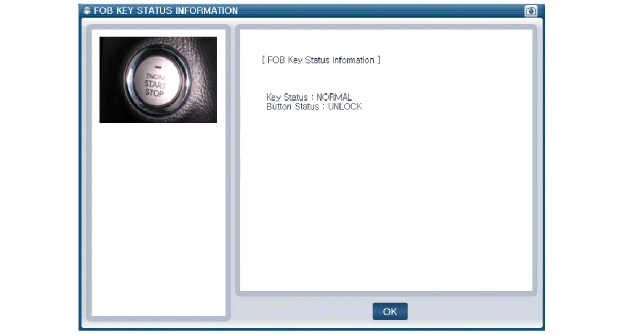
- Connect the GDS cable to the data link connector in the lower driver-side crash pad cover to prevent collisions from the driver's side.
- After ALL ON, select "SMK STATUS INFO".
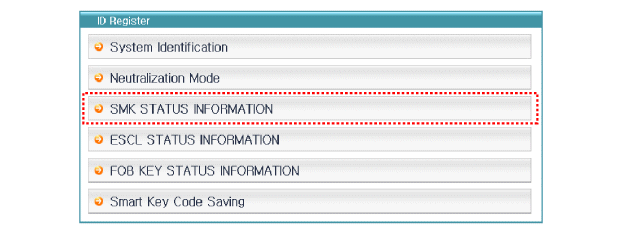

- Connect the GDS cable to the data link connector in the lower driver-side crash pad cover to prevent collisions from the driver's side.
- After ALL ON, select "ESCL STATUS INFO".

- Connect the GDS cable to the data link connector in the lower driver-side crash pad cover to prevent collisions from the driver's side.
- After ALL ON, select "Override Mode".
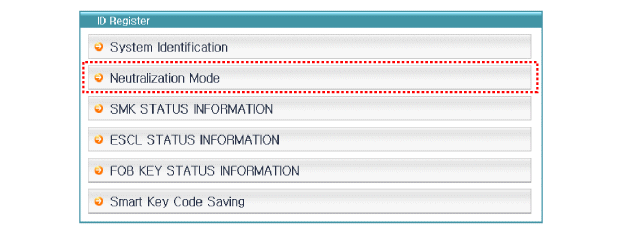

| NO | ITEM NAME | UNIT |
| 1 | SSB Switch 2 | - |
| 2 | SOUND | - |
| 3 | ALL1 | - |
| 4 | "P" Position Factor | - |
| 5 | With Brake Switch | - |
| 6 | AVG Door Lock Switch | - |
| 7 | Front Door Lock Switch | - |
| 8 | TRUNK LID SWITCH | - |
| 9 | Battery Voltage | - |
| 10 | CHARGING VOLTAGE | - |
| 11 | Key Out Indicator | - |
| 12 | IMMOBILIZER LIGHT | - |
| 13 | Exterior Buzzer | - |
| 14 | ESCL Activation | - |
Actuator List
| NO | ITEM NAME | Condition |
| 1 | Immobilizer Indicator | Ignition Switch ON Engine Stopped |
| 2 | Exterior Buzzer | Ignition Switch ON Engine Stopped |
| 3 | Interior Antenna No. 1 Active | Ignition Switch ON Engine Stopped |
| 4 | Interior Antenna No. 2 Active | Ignition Switch ON Engine Stopped |
| 5 | Trunk Antenna Active | Ignition Switch ON Engine Stopped |
| 6 | Bumper Antenna Active | Ignition Switch ON Engine Stopped |
| 7 | DRV_DR Antenna Active | Ignition Switch ON Engine Stopped |
| 8 | AST_DR Antenna Active | Ignition Switch ON Engine Stopped |
Test yourself
A quick Hyundai i20 quiz: every answer comes with an explanation and a link to the manual page.
Was this page helpful?