Engine Mechanical System
Cooling Fan Repair Procedures
In this manual: Engine Mechanical System
20steps
~120min
4/5difficulty
Done 0 of 20
Removal and Installation
Cooling Fan Assembly- Disconnect the negative battery terminal from the battery.
- Remove the air duct and air cleaner assembly. (Refer to Intake and Exhaust System - "Air Cleaner")
- Remove the engine cover. (Refer to Engine and Transaxle Assembly - Engine Cover)
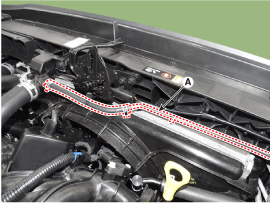
- Disconnect the overflow hose and tube (A).
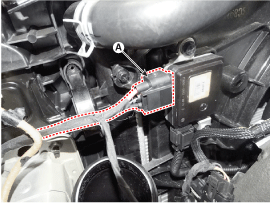
- Disconnect the wire harness connector (A).
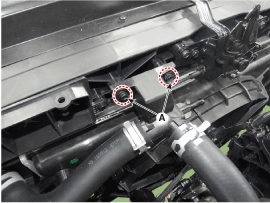
- Remove the filler neck assembly mounting bolts (A).
Tightening torque: 3.9 ~ 5.9 N·m
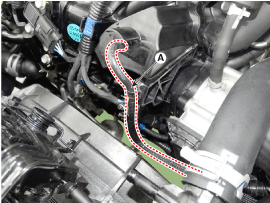
- Disconnect the RCV solenoid hose (A).
- Remove the hood latch. (Refer to Body (Interior and Exterior) - "Hood")
- Loosen the mounting bolts and remove the cooling fan (A).
Tightening torque: 4.9–7.8 N·m
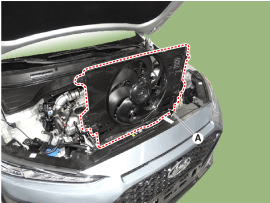
- Install in the reverse order of removal.
- Disconnect the wiring harness connector (A) and the fan motor connector (B).
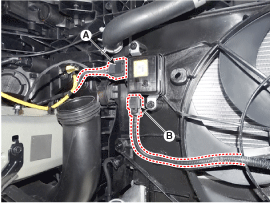
- Remove the cooling fan controller (PWM) (A) from the cooling fan shroud.
Tightening torque: 4.9–8.3 N·m
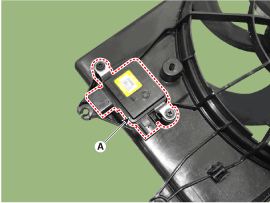
- Install in the reverse order of removal.
Disassembly
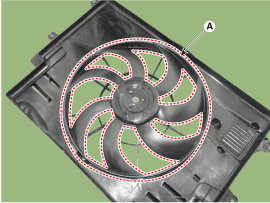
- Remove the cooling fan (A) from the cooling fan assembly.
Tightening torque: 2.7–3.2 N·m
- Disconnect the fan motor connector (A) from the cooling fan controller (PWM).
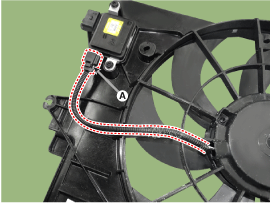
- Loosen the screws and remove the fan motor (B) from the cooling fan shroud.
Tightening torque: 3.9 ~ 5.7 N·m
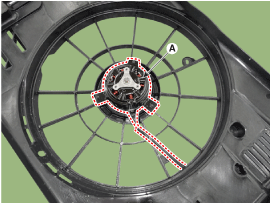
- Install in the reverse order of removal.
Inspection
Blower motor- Disconnect the fan motor connector from the cooling fan controller (PWM).
- Connect battery voltage to the "+" terminal and ground to the "-" terminal.
- Check that the cooling fan motor operates properly.
Test yourself
A quick Hyundai Kona quiz: every answer comes with an explanation and a link to the manual page.
Was this page helpful?