In this manual: Heating, Ventilation, and Air Conditioning
12steps
~72min
3/5difficulty
Done 0 of 12
Inspection
Turn the ignition off.
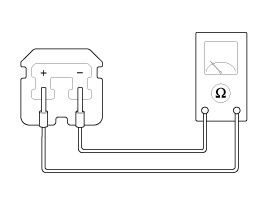
Disconnect the evaporator temperature sensor connector.
Measure the resistance between the "+" and "-" terminals of the evaporator temperature sensor.Specification
Evaporator Core Temperature [°C (°F)]
Resistance [kΩ]
Voltage [V]
-10 (14)
17,93
3.21
0 (32)
11.36
2,66
10 (50)
7.4
2.13
20 (68)
4,94
1,66
30 (86)
3,37
1,26
40 (104)
2,35
0,95
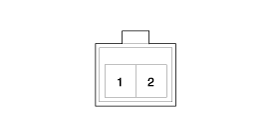
1. Sensor Ground
2. Evaporator Sensor (+)
Diagnosis Using GDS
The heating, ventilation, and air conditioning system faults can be quickly diagnosed using the Global Diagnostic System (GDS). ※ The GDS provides the following information: (1) Self-diagnosis: Check and display of diagnostic trouble codes (DTC). (2) Current data: Check the input/output status of system data. (3) Active test: Check the operating status of the system. (4) Additional functions: Other controls such as system option and zero point adjustment.
Select "Vehicle Model" and the system to be checked to inspect the vehicle with the tester.
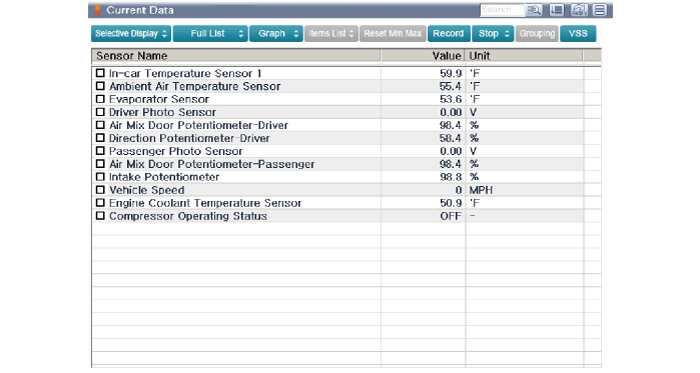
Select the "Current Data" menu to check the current input/output data status. The input/output data for the sensors related to the evaporator temperature sensor can be checked.
Replacement
Disconnect the negative (-) battery terminal.
Remove the heater and blower unit from the protective cover after loosening the mounting nuts. (Refer to Heater - "Heater")
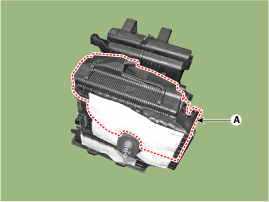
Remove the evaporator core cover (A) after loosening the mounting screws.
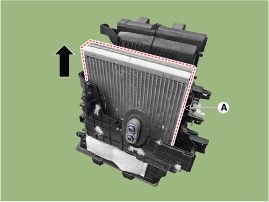
Pull out the evaporator core (A) from the heater unit.
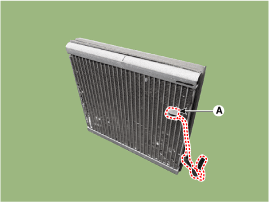
Remove the evaporator temperature sensor (A) from the evaporator core.
To install, reverse the removal procedure.
?
Test yourself
A quick Hyundai Kona quiz: every answer comes with an explanation and a link to the manual page.