Automatic Transmission System (A8LF1)
Automatic Transmission Fluid (ATF)
In this manual: Automatic Transmission System (A8LF1)
18steps
~108min
4/5difficulty
Done 0 of 18
Components and Component Location
Component Location
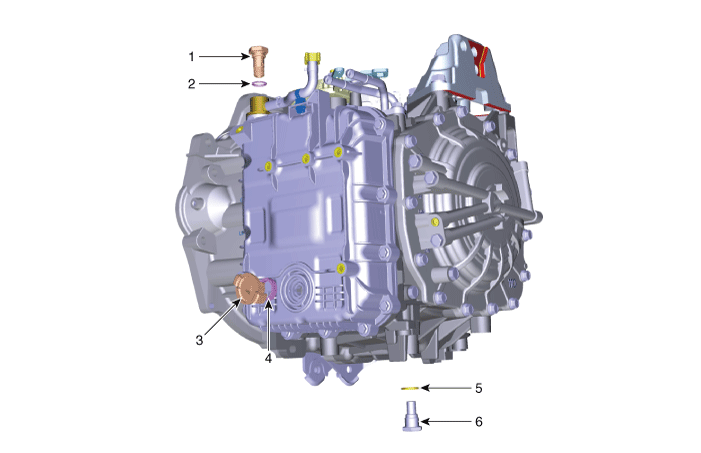
| 1. ATF Injection Plug (Eye Bolt) 2. ATF Injection Plug Gasket 3. ATF Level Check Plug |
4. ATF Level Check Plug Gasket 5. Drain Plug Gasket 6. Drain Plug |
Repair Procedures
Automatic Transmission Fluid (ATF) Level Check
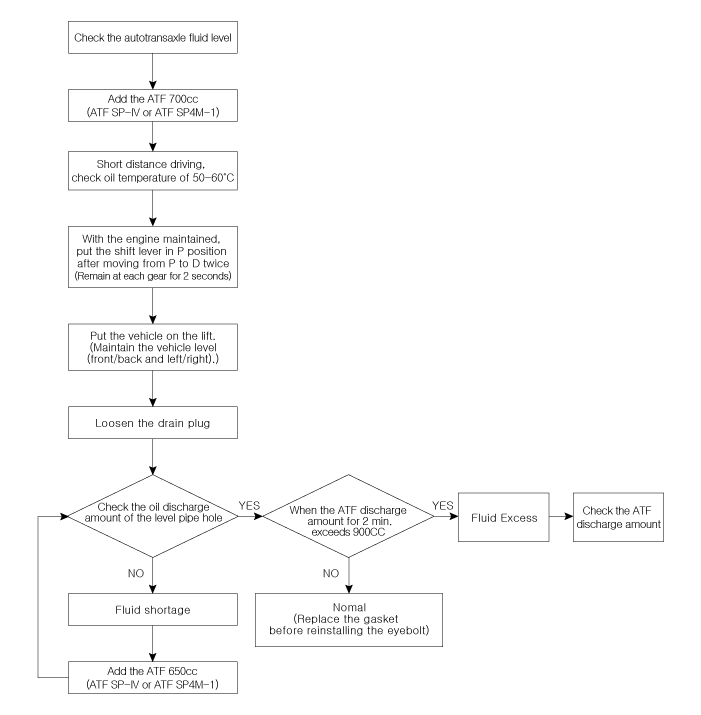
|

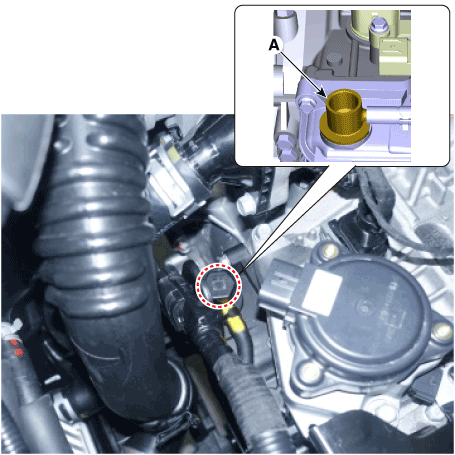
- Remove the eye bolt (A).

- Add 700 cc of ATF SP-IV or SP4M-1 through the ATF injection hole (A).
- Start the engine. (Do not depress the brake and accelerator pedals at the same time.)
- Make sure the automatic transmission fluid temperature sensor reads 50–60 °C using the diagnostic tool.
- Slowly move the selector lever from "P" to "D", then from "D" back to "P", and repeat once more at idle.

- Pause for more than 2 seconds in each gear.
- Raise the vehicle and make sure it is securely supported.
- Remove the under cover. (Refer to Engine Mechanical System - "Engine Room Under Cover")
- Remove the ATF level check plug (A) from the valve body cover.
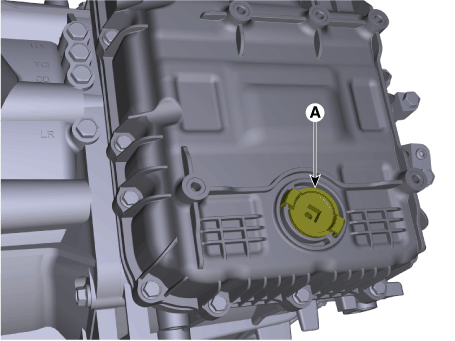

- At this time, the vehicle must be on level ground.
- If the ATF flows from the drain plug in a thin, steady stream, the ATF level is normal. Then complete the procedure and tighten the level check plug.

- Excessive: The amount of drained fluid exceeds 900 cc within a few minutes of towing. {50–60 °C}
- Insufficient: ATF does not flow from the drain plug.

- Replace the gasket before reinstalling the level check plug, then check the ATF level.
- Turn the level check plug clockwise until it is seated.
- If there is no damage to the automatic transmission, the radiator, the ATF cooler hose, the transmission case, or the valve body bolts, ATF should drip after performing steps 1 through 7 above. If no fluid drips after performing steps 1 through 7, inspect the automatic transmission assembly.
- Install the under cover. (Refer to Engine Mechanical System - "Engine Room Under Cover")
- Lower the vehicle using a hoist and tighten the eye bolt.
Eye bolt tightening torque: 4.9–5.9 N·m

- Replace the gasket (A) before reinstalling the eye bolt.
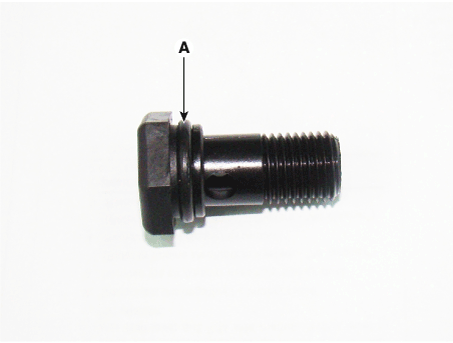
- Replace the gasket (A) before reinstalling the eye bolt.
Replacement
|

- Raise the vehicle and remove the under cover. (Refer to Engine Mechanical System - "Engine Room Under Cover")
- Remove the drain plug (A) and reinstall it after draining the ATF completely.
Drain plug tightening torque: 33.3–43 N·m
- Replace the gasket before reinstalling the drain plug.
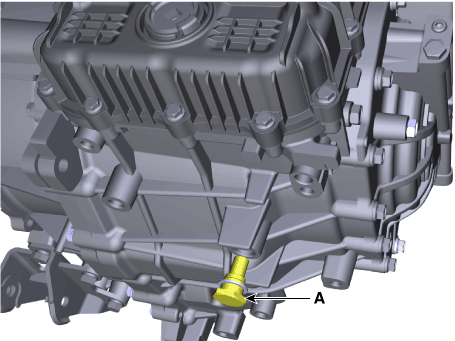
- Lower the vehicle using a hoist and remove the eye bolt (A).
- Fill approximately 5 liters of ATF up to the filler hole.
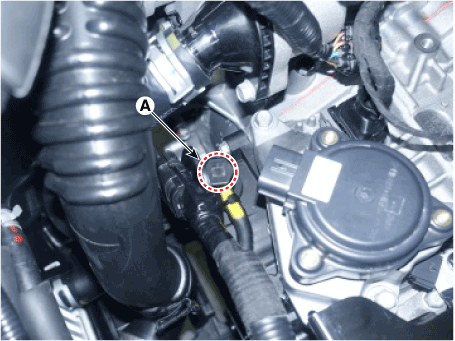
- Check the ATF level. (Refer to Automatic Transmission System - "Automatic Transmission Fluid (ATF)")
- Then complete the ATF level check procedure and install the under cover. (Refer to Engine Mechanical System - "Engine Room Under Cover")
- Lower the vehicle using a hoist and tighten the eye bolt.
Eye bolt tightening torque: 4.9–5.9 N·m

- Replace the gasket (A) before reinstalling the eye bolt.
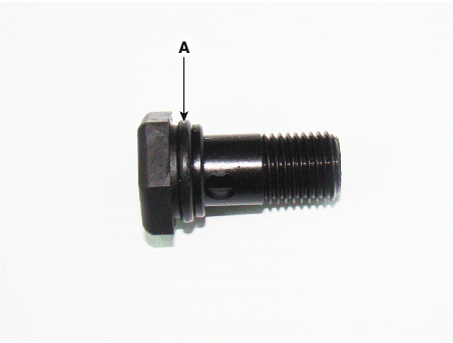
- Replace the gasket (A) before reinstalling the eye bolt.
Test yourself
A quick Hyundai Palisade quiz: every answer comes with an explanation and a link to the manual page.
Was this page helpful?