Be careful not to damage parts located under the vehicle (floor under cover, fuel filter, fuel tank, and canister) when lifting the vehicle with a lift. (Refer to General Information - Jack Lifting Points and Support Points)
Turn the ignition switch OFF and disconnect the negative (-) battery cable.
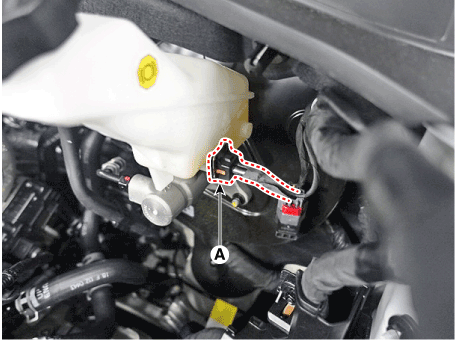
Disconnect the brake fluid level sensor connector (A).
Remove the brake fluid from the master cylinder reservoir using a syringe.
Do not spill brake fluid on the vehicle, as it may damage the paint. If brake fluid gets on the paint, wash it off immediately with water.
Make sure that dirt or other foreign matter does not contaminate the brake fluid.
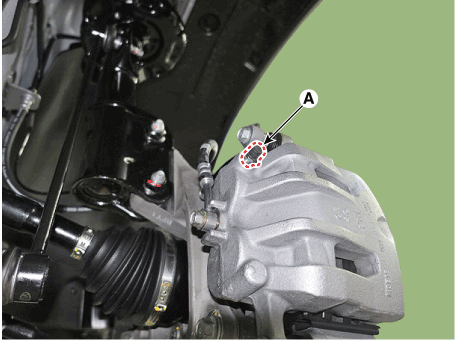
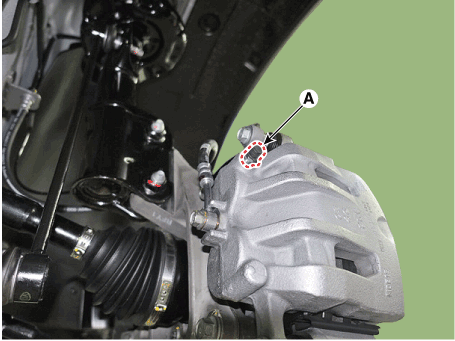
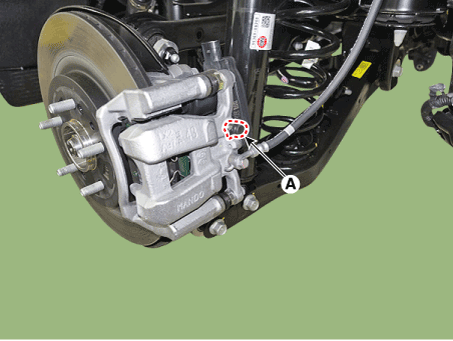
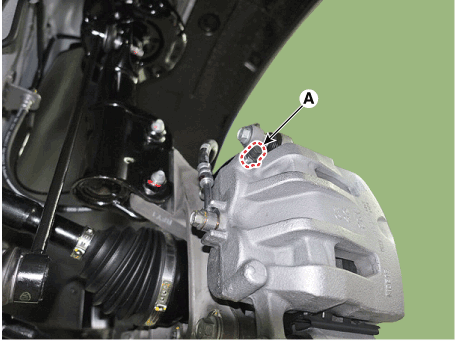
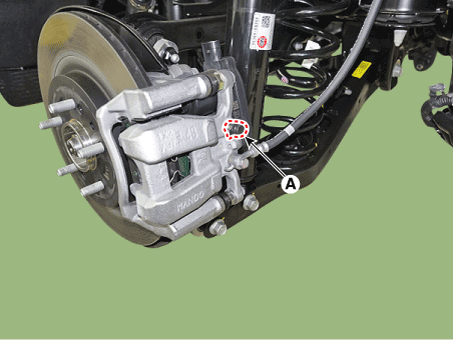
Loosen the bleeder screw (A) and depress the brake pedal several times until the brake fluid reaches the caliper cylinder. [Front][Rear]
Work in the order: rear right, front left, rear left, front right.
Do not spill brake fluid on the vehicle, as it may damage the paint. If brake fluid gets on the paint, wash it off immediately with water.
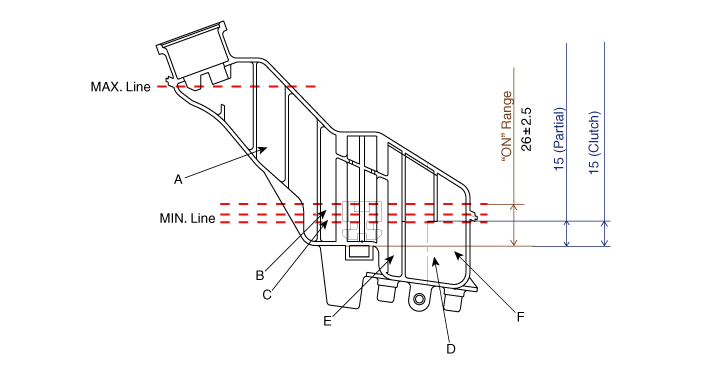
Retighten the bleeder screw, then make sure the brake fluid in the reservoir is at the MAX (upper) level line.
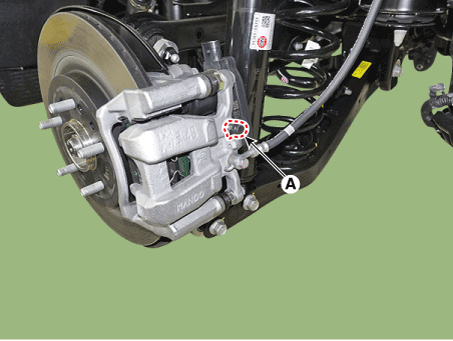
Loosen the bleeder screw on the right rear brake (A) to allow air to escape from the system. Then securely tighten the bleeder screw. [Front][Rear]
Work in the order: rear right, front left, rear left, front right.
Do not spill brake fluid on the vehicle, as it may damage the paint. If brake fluid gets on the paint, wash it off immediately with water.
Make sure the brake fluid in the reservoir is at the MAX (upper) level line.
Retighten the bleeder screw.
Have an assistant depress the brake pedal several times to build up pressure, and hold it depressed.
Depress the brake pedal several times, then loosen the bleeder screw until fluid flows out without air bubbles. Then close the bleeder screw. [Front][Rear]
Work in the order: rear right, front left, rear left, front right.
Do not spill brake fluid on the vehicle, as it may damage the paint. If brake fluid gets on the paint, wash it off immediately with water.
Make sure the brake fluid in the reservoir is at the MAX (upper) level line.
Repeat the procedure for each wheel in sequence until no air bubbles appear in the fluid for a longer period.
Connect the negative (-) battery cable.
Connect the brake fluid level sensor.
?
Test yourself
A quick Hyundai Palisade quiz: every answer comes with an explanation and a link to the manual page.