Brake System
Brake Pad
In this manual: Brake System
30steps
~185min
5/5difficulty
1special tools
Done 0 of 30
Repair Procedures
Replacement
|

- Loosen the wheel nuts slightly. Raise the vehicle and make sure it is securely supported.
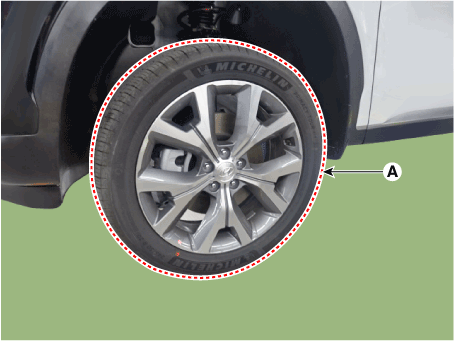
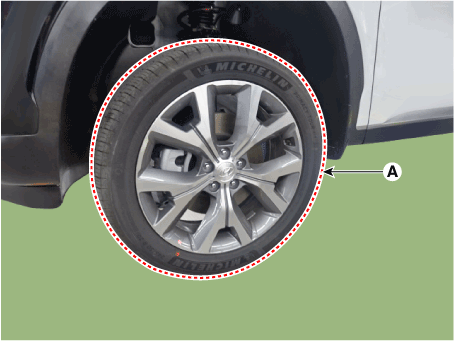
- Remove the front wheel and tire (A) from the front hub.

- Be careful not to damage the hub bolts when removing the front wheel and tire (A).
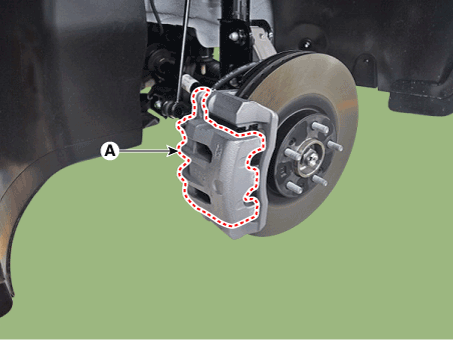
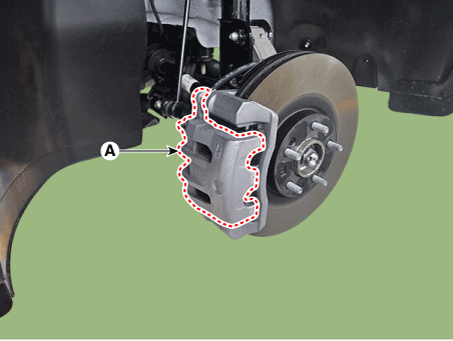
- Lift the caliper body (A) by loosening the guide rod bolt.
- Remove the brake pad (A).
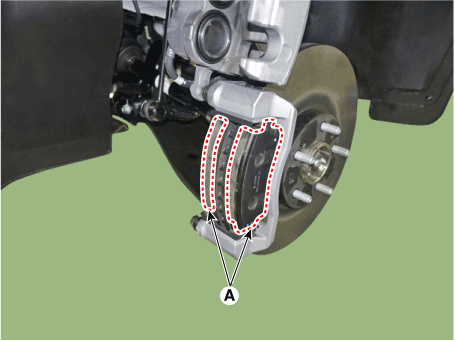
- Replace the pad retainer (A) with a new one.

- Replace the brake pad (A) with a new one.
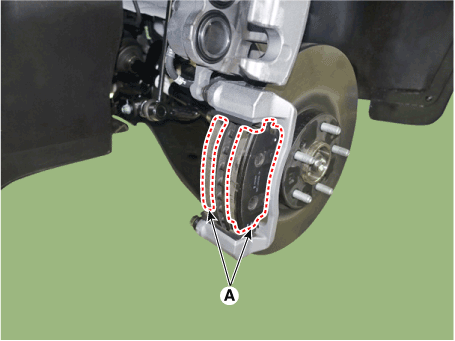

- When installing, use a new return spring (A), pad retainer (B), and inner shim (C).

- When installing, use a new return spring (A), pad retainer (B), and inner shim (C).
- Use SST (09581-11000) when installing the brake caliper assembly.
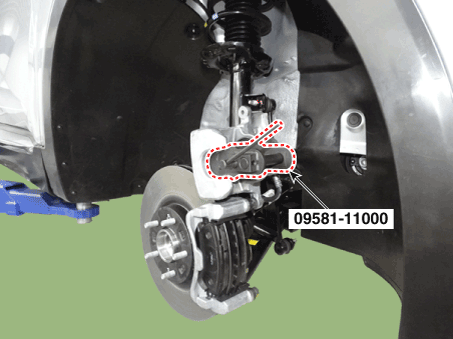
- Install the caliper body (A), then tighten the guide rod bolt.
Tightening Torque: 37.3–41 N·m
- Install the front wheel and tire (A).
Tightening torque: 107.8–127 N·m
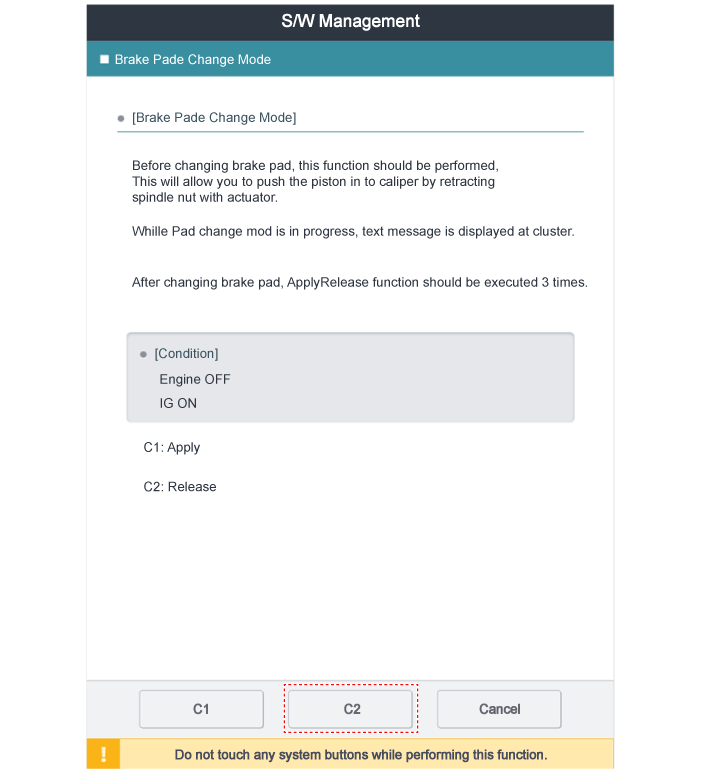
- Before removing the rear caliper, perform the "Brake Pad Replacement Mode" using GDS.
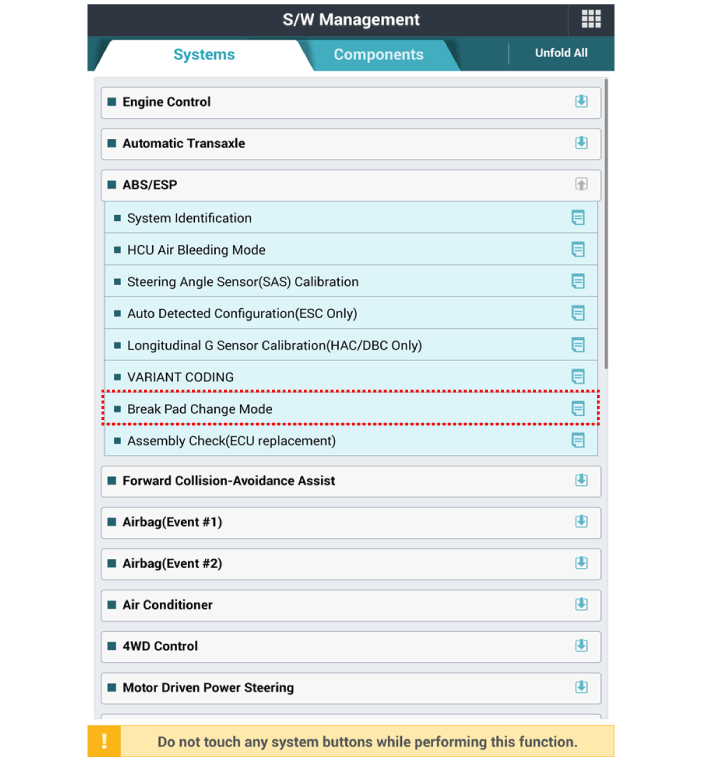
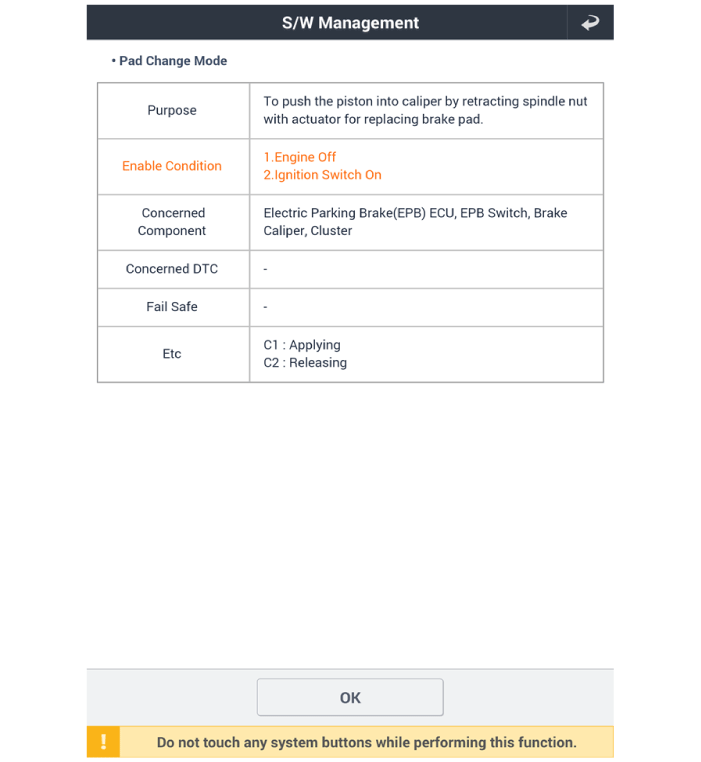
- Select C2 (Release) on the screen below.
- Loosen the wheel nuts slightly. Raise the vehicle and make sure it is securely supported.
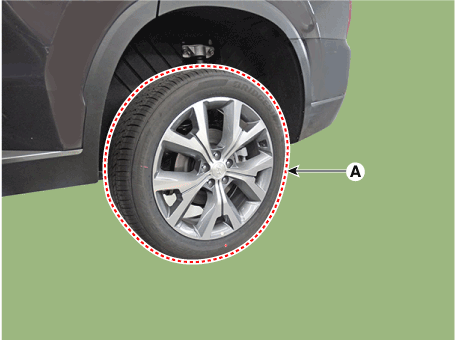
- Remove the rear wheel and tire (A) from the rear hub.

- Be careful not to damage the hub bolts when removing the rear wheel and tire (A).
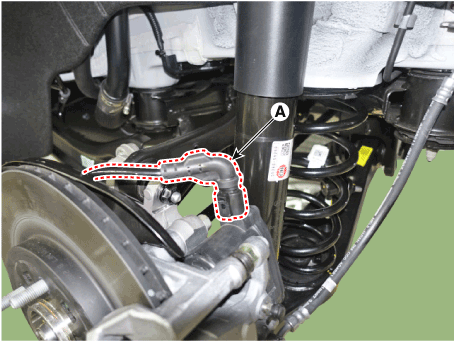
- Disconnect the EPB actuator connector (A).
- Remove the caliper body (A) after loosening the guide rod bolt.
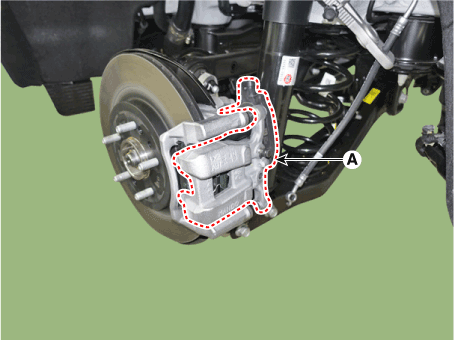
- Remove the pad return spring (A).
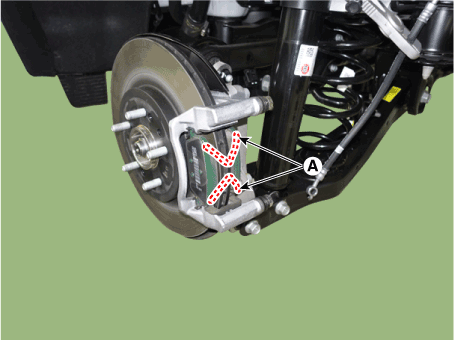
- Remove the brake pad (A).
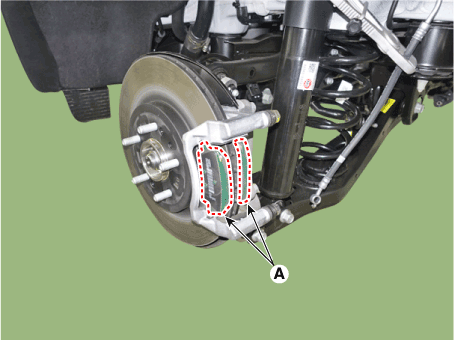
- Replace the pad retainer (A) with a new one.
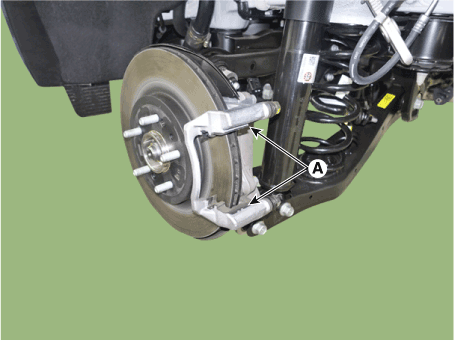
- Replace the brake pad (A) with a new one.


- When installing, use a new return spring (A), pad retainer (B), inner shim (C), and brake pad (D).
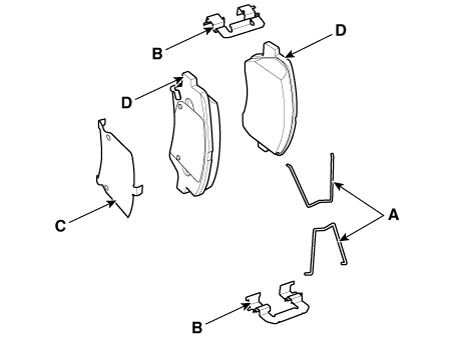
- When installing, use a new return spring (A), pad retainer (B), inner shim (C), and brake pad (D).
- Install the pad return spring (A).


- Pad return springs must be replaced with new ones every time the pads are replaced.
- Technicians must be careful not to deform the pad return springs.
- Deformed pad return springs may cause brake drag and increased fuel consumption.
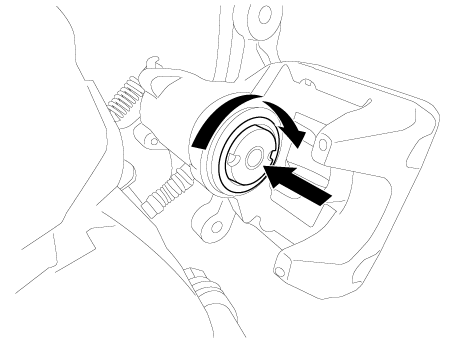
- Turn the caliper piston and press it in the direction of the arrow.
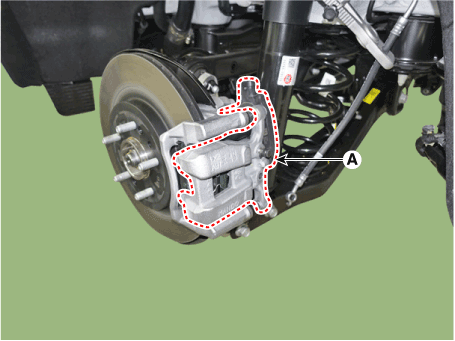
- Install the caliper body (A), then tighten the guide rod bolt.
Tightening Torque: 37.3–41 N·m
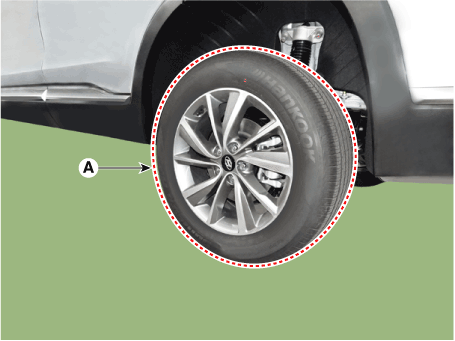
- Install the rear wheel and tire (A).
Tightening torque: 107.9–128 N·m

- Be careful not to damage the hub bolts when removing the rear wheel and tire (A).
- After replacing the brake pads (EPB applied), perform the "Brake Pad Replacement Mode" using GDS.

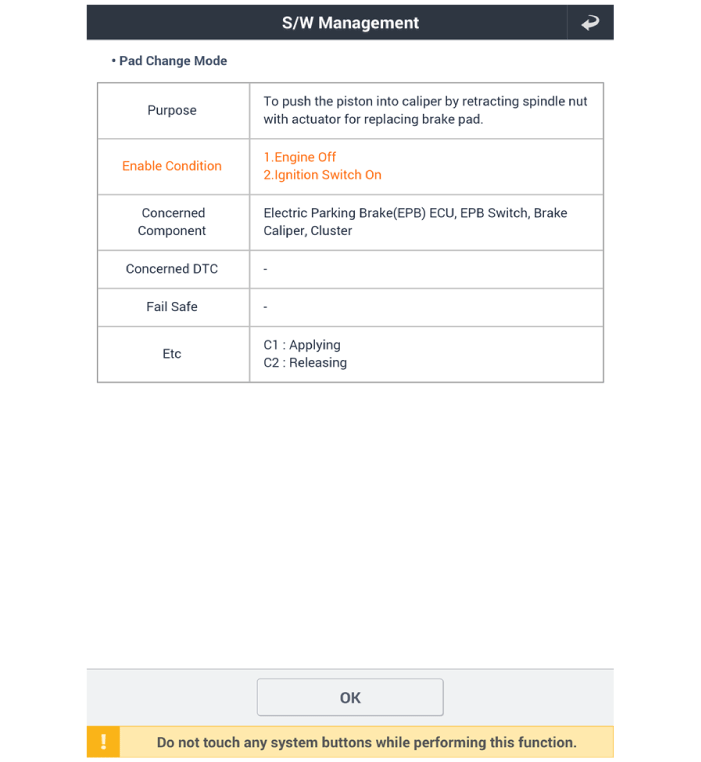
- Select C1 (Apply) on the screen below.
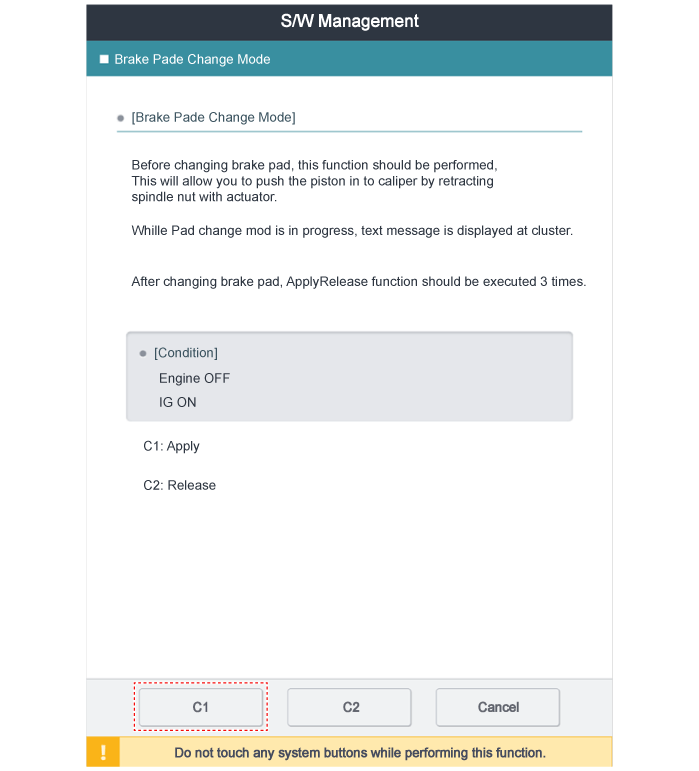

- After replacing the brake pads, make sure to repeat apply/release 3 times in the "Brake Pad Replacement Mode."
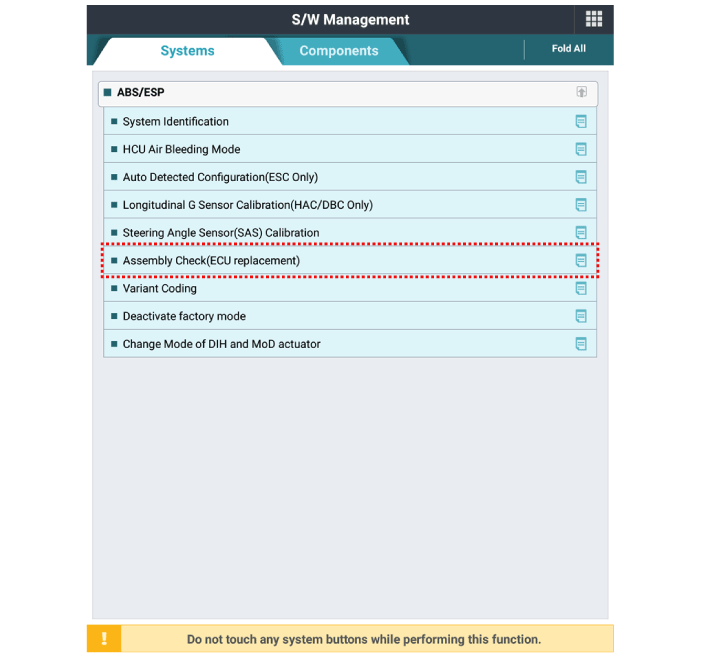
- After replacing the brake pads, make sure the caliper is installed correctly by performing "Assembly Check (ECU Replaced)" from the Special Functions option.
Inspection
Front Brake Pad Inspection- Check pad wear. Measure the pad thickness and replace if less than the specified value. Front brake pad thickness - Standard: 10.5 mm (0.41 in.) - Service limit: 2.0 mm (0.07 in.)
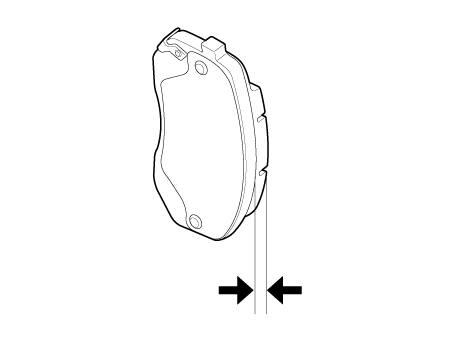
- Make sure grease is applied to the sliding contact points and pad. Check the pad and metal backing plate for damage.
- Check pad wear. Measure the pad thickness and replace if less than the specified value. Rear brake pad thickness - Standard: 10 mm (0.39 in.) - Service limit: 2.0 mm (0.07 in.)
- Check the pad and metal backing for damage and grease contamination.
Test yourself
A quick Hyundai Palisade quiz: every answer comes with an explanation and a link to the manual page.
Was this page helpful?