Brake System
Rear Disc Brake
In this manual: Brake System
24steps
~144min
4/5difficulty
Done 0 of 24
Components and Component Location
Components
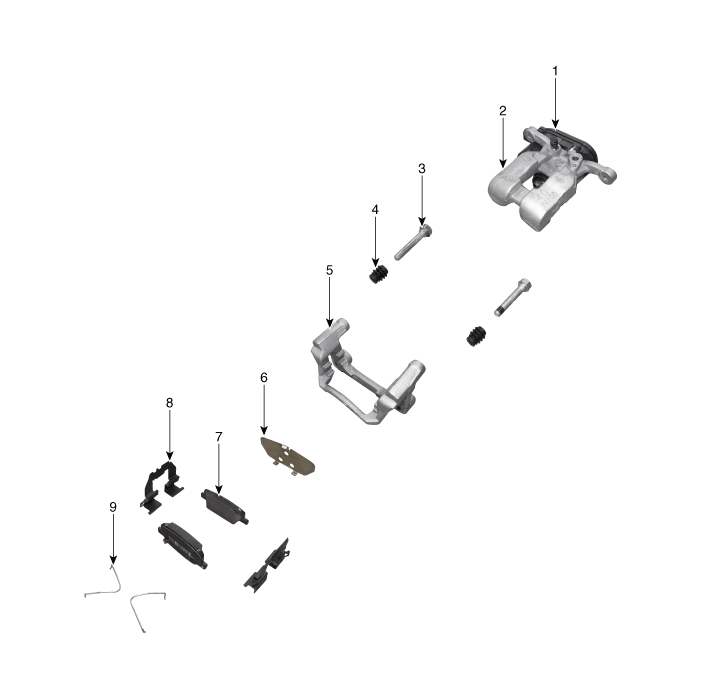
| 1. EPB Actuator 2. Caliper Body 3. Guide Rod Pin 4. Guide Rod Boot 5. Caliper Support |
6. Pad Inner Shim 7. Brake Pad 8. Pad Retainer 9. Pad Return Spring |
Repair Procedures
Removal
|

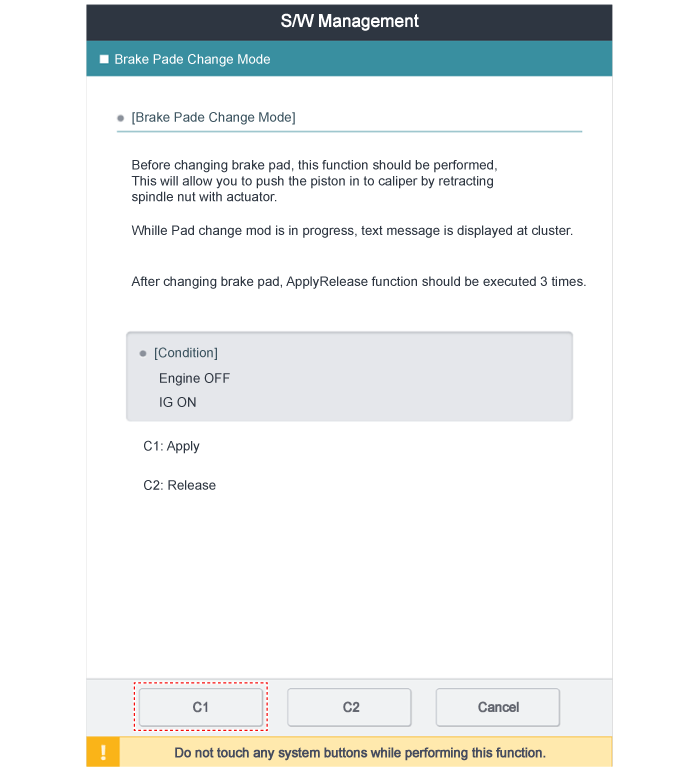
- Before removing the rear caliper, perform the "Brake Pad Replacement Mode" using GDS.
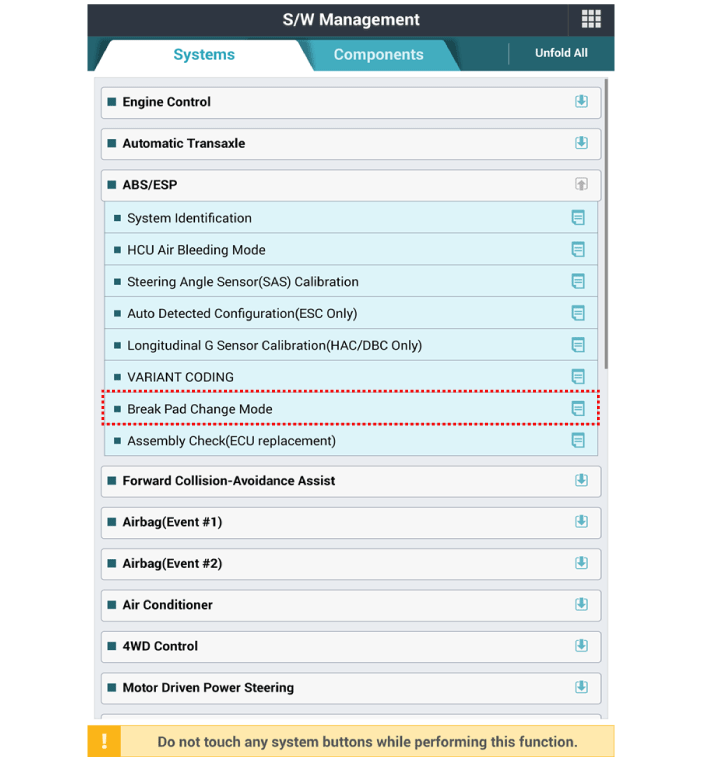
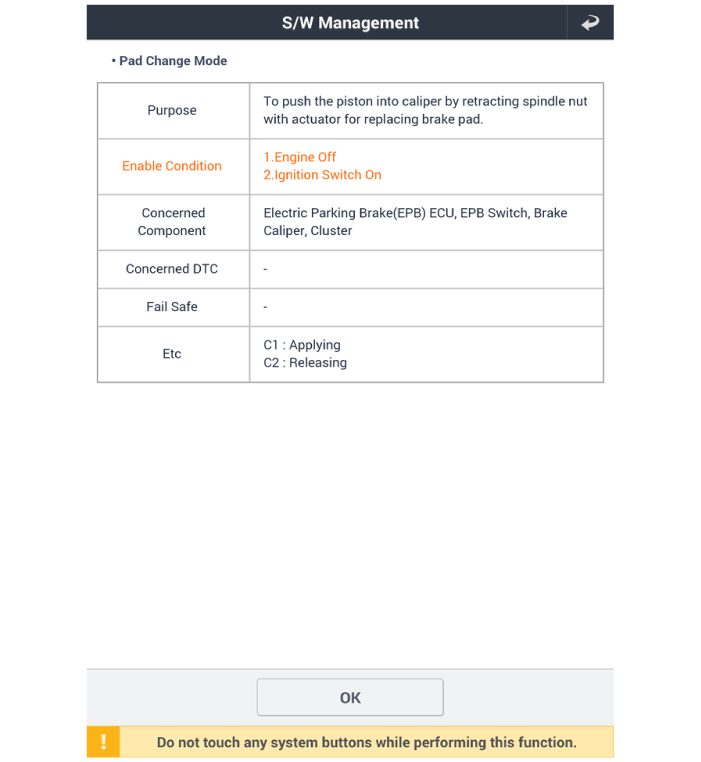
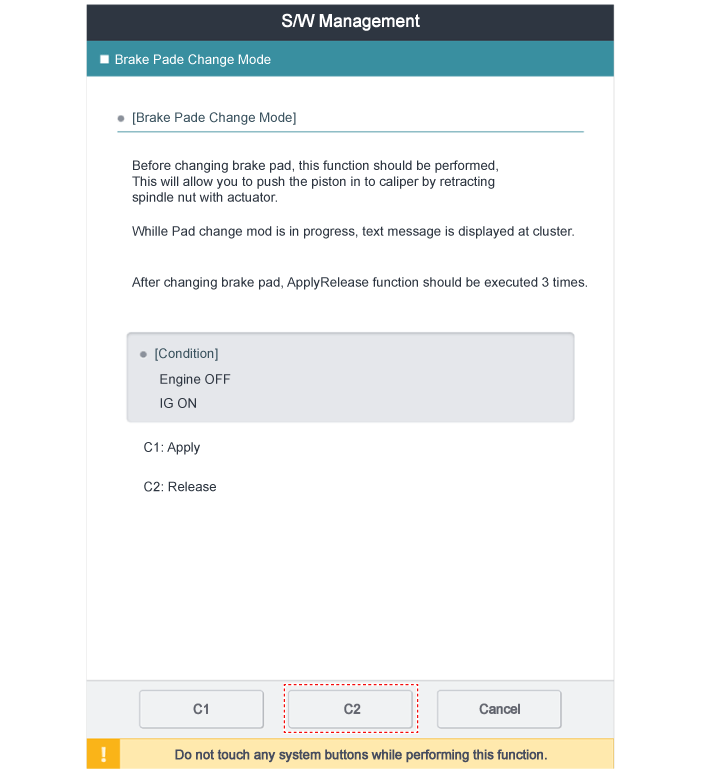
- Select C2 (Release) on the screen below.
- Loosen the wheel nuts slightly. Raise the vehicle and make sure it is securely supported.
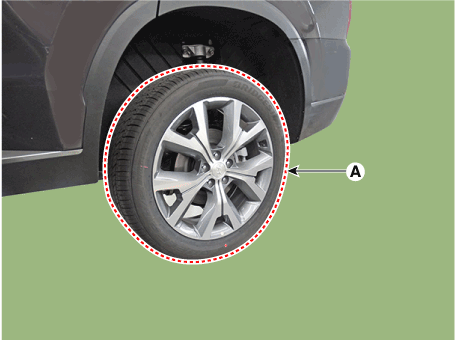
- Remove the rear wheel and tire (A) from the rear hub.
Tightening torque: 107.9–128 N·m

- Be careful not to damage the hub bolts when removing the rear wheel and tire (A).
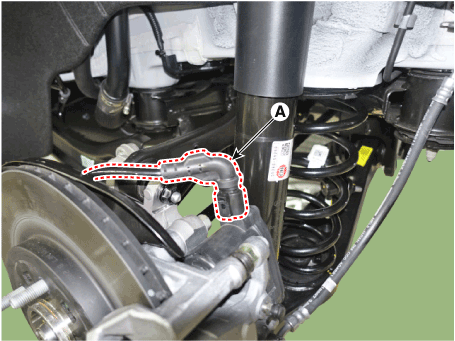
- Disconnect the EPB actuator connector (A).
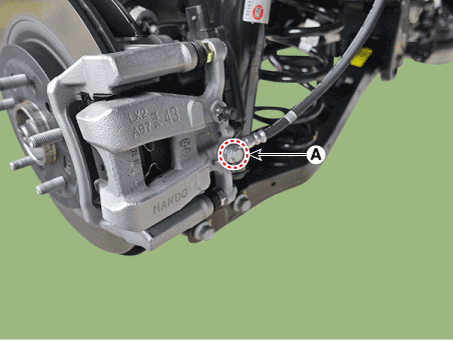
- Remove the hose after loosening the brake hose bolt (A) on the caliper.
Tightening torque: 24.5–29 N·m
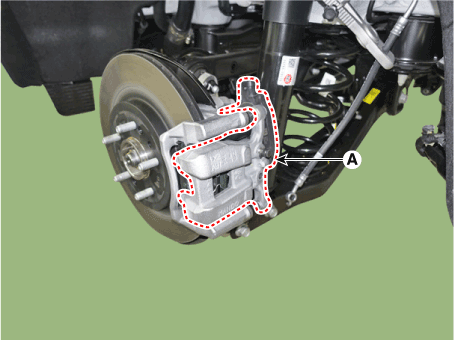
- Remove the caliper body (A) after loosening the guide rod bolt.
Tightening Torque: 37.3–41 N·m
- Remove the return spring (A).
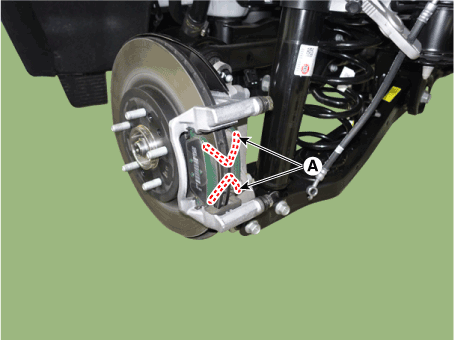
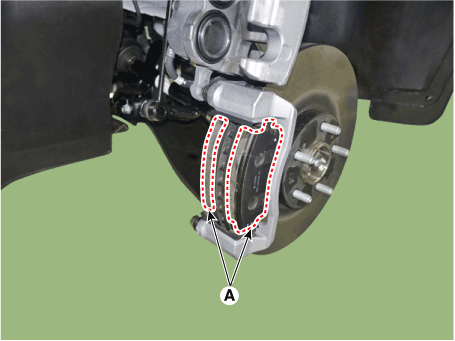
- Remove the brake pad (A).
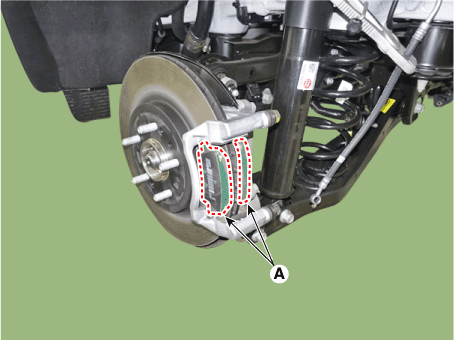
- Remove the pad retainer (A).
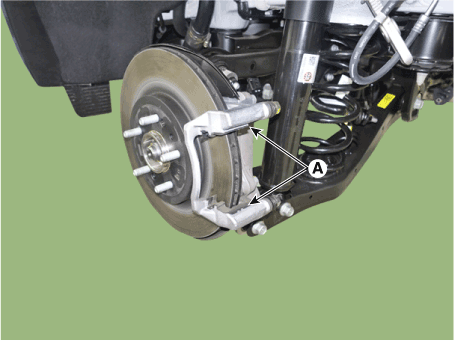
- Remove the caliper support (A) after loosening the caliper support bolt.
Tightening torque: 98.1 - 118 N·m
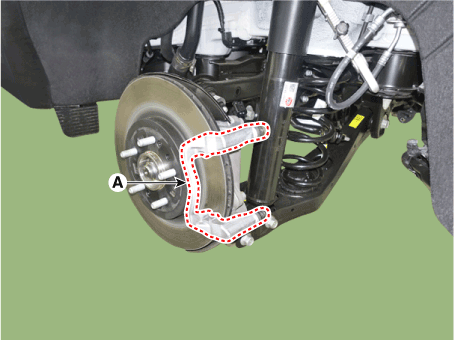
- Remove the rear brake disc (A) after loosening the screw.
Tightening torque: 4.9–5.9 N·m
Inspection
Rear brake disc thickness inspection- Inspect the brake disc for damage and cracks.
- Remove all rust and contaminants from the surface, and measure the disc thickness at 24 points, at least at the same distance (5 mm) from the outer edge of the brake disc. Rear brake disc thickness Standard: 18 mm (0.70 in.) Service limit: 16 mm (0.62 in.) Deviation: Less than 0.015 mm (0.0004 in.)

- If wear exceeds the service limit, replace the discs and pads as a set, left and right of the vehicle.
- Position a dial indicator approximately 10 mm (0.20 in.) from the outer edge of the brake disc and measure the disc runout.
Brake disc runout Limit: 0.055 mm (0.0020 in.) or less (new)

- If brake disc runout exceeds the limit, replace the disc, then measure the runout again.
- If runout cannot be corrected by changing the position of the brake disc, replace the brake disc.
Installation
- To install, reverse the removal procedure.
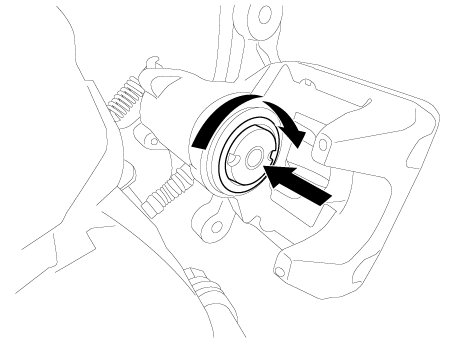
- When installing, push and turn the piston into the caliper body until it is fully retracted.

- To find the normal operating position of the brake pad, depress the brake pedal halfway several times until the brake pedal feels resistance.
- After disassembling/assembling the caliper body or replacing the brake caliper, parking brake cable, or brake disc, readjust the parking brake.
- After installation, bleed the brake system. (Refer to Brake System - "Brake System Bleeding") (Refer to Brake System - "ESP System Bleeding")
- After installing the rear caliper (EPB applied), perform the "Brake Pad Replacement Mode" using GDS.
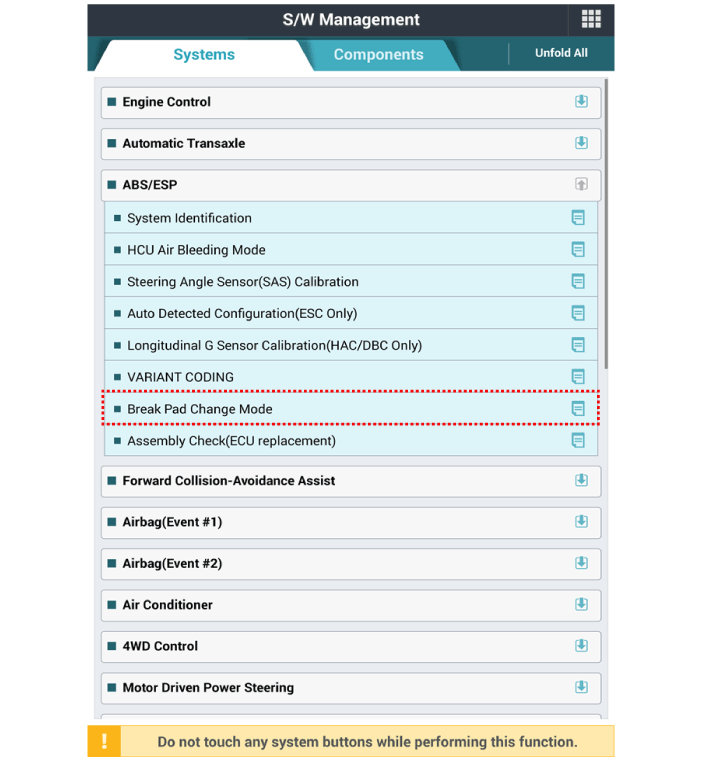
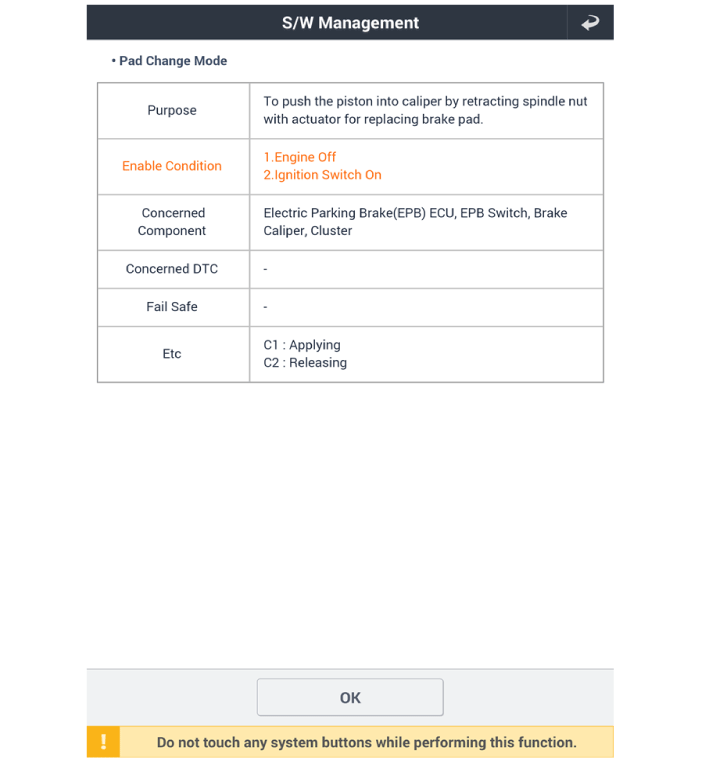
- Select C1 (Apply) on the screen below.
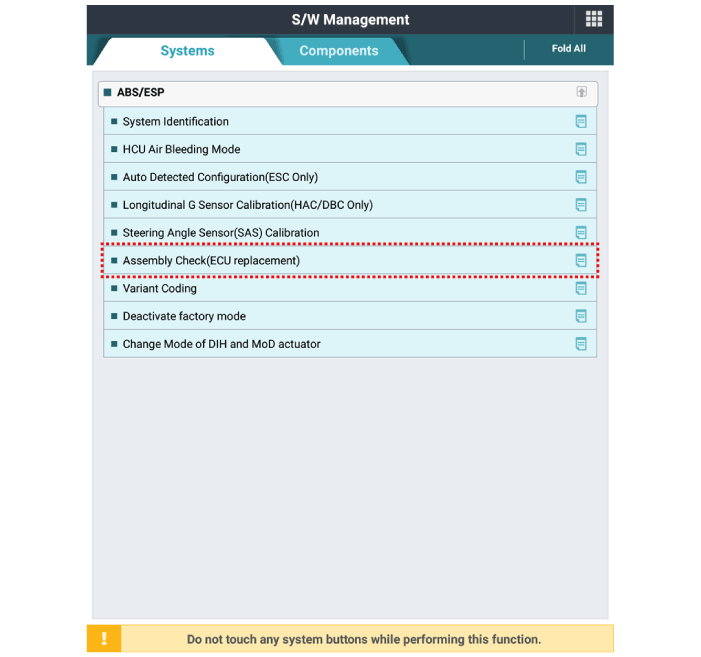
- After replacing the rear caliper, make sure the caliper is installed correctly by performing "Assembly Check (ECU Replaced)" from the Special Functions option.
Test yourself
A quick Hyundai Palisade quiz: every answer comes with an explanation and a link to the manual page.
Was this page helpful?