Engine Mechanical System
Oil Baffle
In this manual: Engine Mechanical System
23steps
~143min
5/5difficulty
1special tools
Done 0 of 23
Components and Component Location
Components
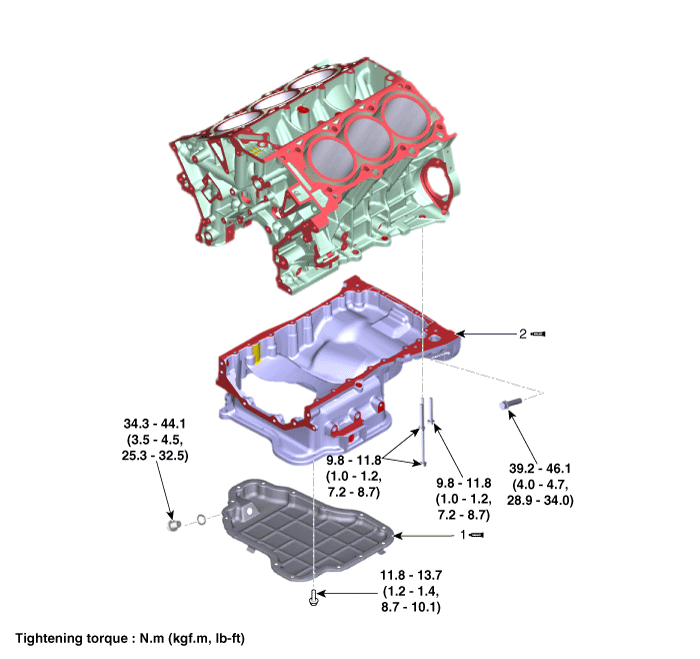
| 1. Lower Oil Pan | 2. Upper Oil Pan |
Repair Procedures
Removal
|

- Remove the engine cover. (Refer to Engine and Transaxle Assembly - Engine Cover)
- Drain the engine oil. (Refer to Lubrication System - "Engine Oil")
- Remove the lower oil pan (A). Insert the SST blade (09215-3C000) between the upper oil pan and the lower oil pan. Cut the applied sealant and remove the lower oil pan.


- Be careful not to damage the mating surfaces of the upper oil pan and the lower oil pan.

- Insert the SST between the lower oil pan and the upper oil pan by tapping it with a plastic hammer in the direction of arrow ①.
- After tapping the SST with a plastic hammer along the direction of arrow ② around more than 2/3 of the edge of the lower oil pan, remove it from the upper oil pan.
- Do not pry the SST abruptly without tapping, as the SST may be damaged.
- Remove the lower oil pan.
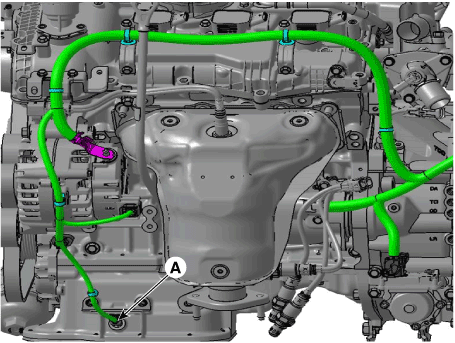
- Disconnect the wiring harness connector of the oil pump solenoid valve extension (A).
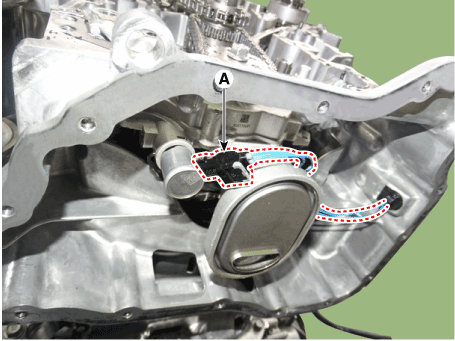
- Disconnect the oil pump solenoid valve connector (A).
- Remove the front muffler. (Refer to Intake and Exhaust System - "Muffler")
- Separate the compressor. (Refer to Heating, Ventilation, Air Conditioning - "Compressor")
- Remove the left exhaust manifold support (A).
Tightening torque: 24.5–35 N·m
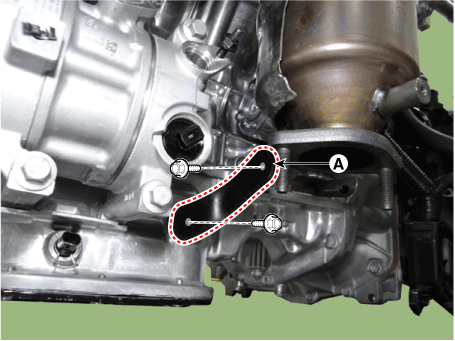
- Remove the right exhaust manifold support (A).
Tightening torque: 24.5–35 N·m
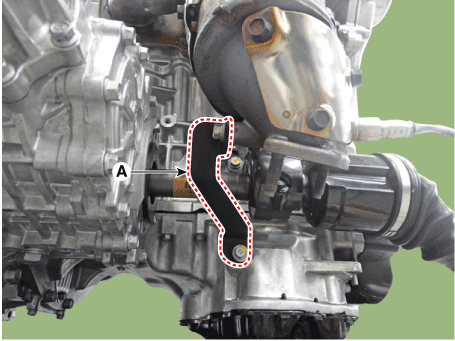
- Remove the expansion tank. (Refer to Intake and Exhaust System - "Expansion Tank")
- Remove the left and right cylinder head covers. (Refer to Cylinder Head Assembly - "Cylinder Head Cover")
- Install the engine support. (Refer to Automatic Transaxle - "Special Service Tools").
- Remove the timing chain cover. (Refer to Valve Timing - Timing Chain Cover)
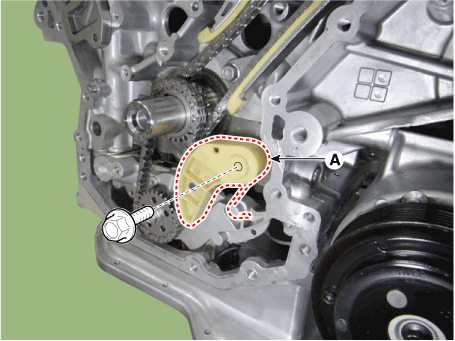
- Remove the oil pump chain tensioner (A).
Tightening Torque: 9.8–11.8 N·m
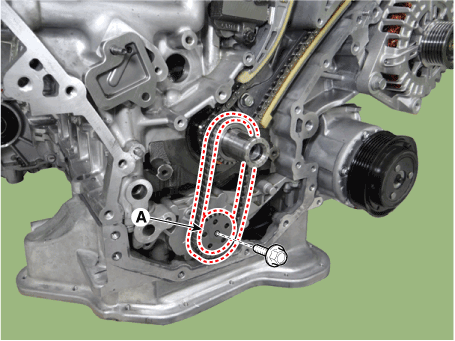
- Remove the oil pump chain sprocket (A).
Tightening torque: 19.6–24 N·m
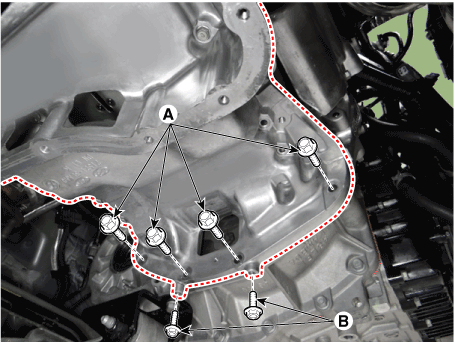
- Remove the transaxle mounting bolt (A) and the upper oil pan mounting bolt (B). Tightening torque: Bolt (A): 39.2–46 N·m; Bolt (B): 9.8–11.8 N·m
- Insert the SST blade (09215-3C000) between the upper oil pan and the cylinder block. Cut the applied sealant and remove the upper oil pan (A).
Tightening Torque: 9.8–11.8 N·m
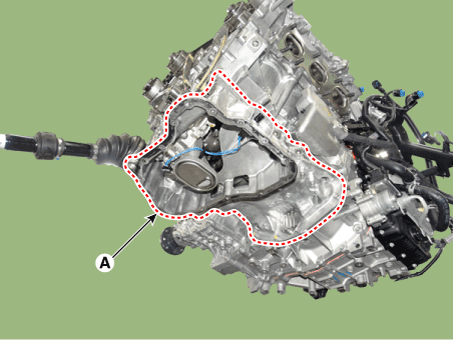
Installation
[Lower Oil Pan]- Install the lower oil pan (A).
- Using a gasket scraper, remove all old gasket material from the gasket surfaces.
- Before assembling the oil pan, apply liquid gasket TB 1217H to the oil pan. Assemble the parts within 5 minutes after applying the sealant.
Bead width: 2.5 mm (0.1 in)
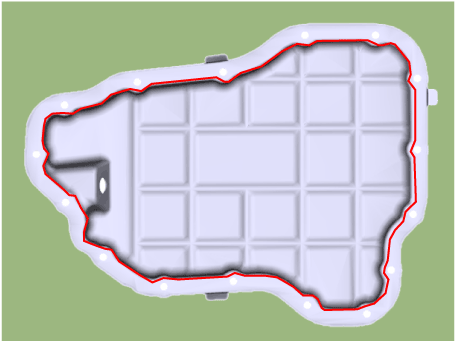

- Clean the mating surfaces before assembling the two parts.
- Remove harmful foreign material from the sealing surface before applying sealant.
- When applying the sealing gasket, make sure the sealant does not protrude into the oil pan.
- To prevent oil leaks, apply sealant to the gasket and to the internal threads of the bolt holes.
- Install the oil pan (A). Tighten the bolts evenly in several passes.
Tightening torque: 11.8–13.7 N·m
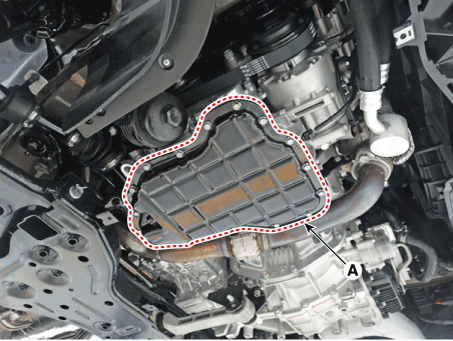
- After assembly, wait at least 30 minutes before filling the engine with oil.
- Install the remaining parts in the reverse order of removal.
- Install the upper oil pan.
a. Using a gasket scraper, remove all old gasket material from the gasket surfaces. b. Before assembling the oil pan, apply liquid gasket TB 1217H to the oil pan. Assemble the parts within 5 minutes after applying the sealant. Bead width: 2.5 mm (0.1 in)
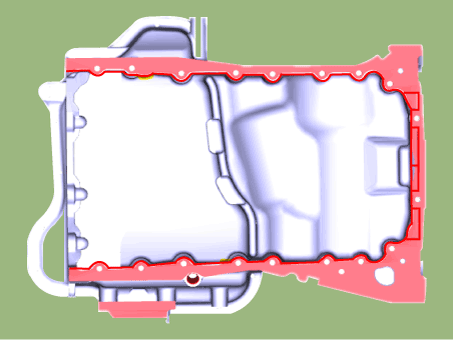

- Clean the mating surfaces before assembling the two parts.
- Remove harmful foreign material from the sealing surface before applying sealant.
- When applying the sealing gasket, make sure the sealant does not protrude into the oil pan.
- To prevent oil leaks, apply sealant to the gasket and to the internal threads of the bolt holes.
- Install the remaining parts in the reverse order of removal.
Test yourself
A quick Hyundai Palisade quiz: every answer comes with an explanation and a link to the manual page.
Was this page helpful?