In this manual: Heating, Ventilation and Air Conditioning
10steps
~60min
3/5difficulty
Done 0 of 10
Description and Operation
Description
The evaporator temperature sensor detects the temperature of the evaporator fins and cuts off power to the compressor relay to prevent the evaporator from freezing due to overcooling. The evaporator temperature sensor has a negative temperature coefficient (NTC). The electrical resistance of the NTC increases as the temperature decreases and decreases as the temperature increases.
Repair Procedures
Inspection
Turn the ignition switch to the OFF position.
Disconnect the evaporator temperature sensor connector.
Measure the resistance between terminals "+" and "-" of the evaporator temperature sensor.Specification
Evaporator fin temperature [°C (°F)]
Resistance (kOhm)
VOLTAGE (V)
-10 (14)
17,93
3.21
0 (32)
11.36
2,66
10 (50)
7.4
2.13
20 (68)
4,94
1,66
30 (86)
3,37
1,26
40 (104)
2,35
0,95
1. Sensor Mass
2. Evaporator Sensor (+)
Diagnosis with GDS
The heating, ventilation and air conditioning (HVAC) system can be diagnosed quickly (defective parts) using the Global Diagnostic System (GDS). ※ The GDS provides the following information. (1) Self-diagnosis: checks and displays diagnostic trouble codes (DTC). (2) Current data: checks the status of input/output signals. (3) Active test: checks system operating conditions. (4) Additional functions: in addition to control, such as zero point adjustment.
Select the "Vehicle Model" and the system to be checked in order to inspect the vehicle with the scan tool.
Select the "Current Data" menu to check the current status of inputs/outputs. The inputs/outputs of the sensors related to the evaporator temperature sensor can be checked.
REPLACEMENT
Disconnect the negative (-) battery terminal.
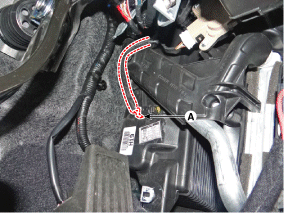
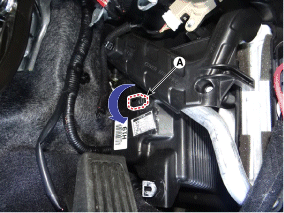
Disconnect the evaporator temperature sensor connector. (B).
Remove the evaporator temperature sensor (A) by turning it 90° counterclockwise and pulling it out.
To install, perform the removal procedure in reverse order.
?
Test yourself
A quick Hyundai Tucson quiz: every answer comes with an explanation and a link to the manual page.