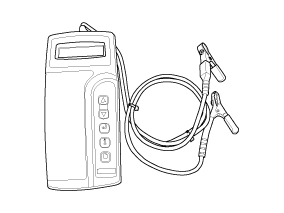
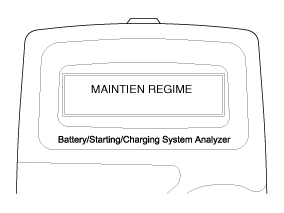
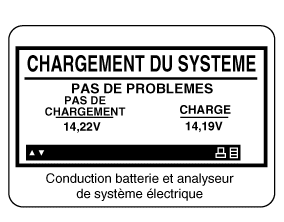
The MICRO 570 analyzer allows testing of the charging and starting system, including the battery, starter, and alternator.
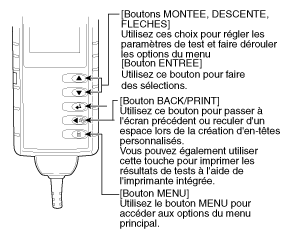
KEYPAD: The Micro 570 keypad key provides access to the following functions:BATTERY TEST PROCEDURE
Connect the tester to the battery.
Connect the red clamp to the positive (+) battery terminal.
Connect the black clamp to the negative (-) battery terminal.
The tester will ask whether the connected battery is "IN VEHICLE" or "OUT OF VEHICLE". Select using the arrow keys, then press "ENTER".
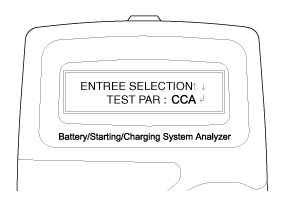
Select CCA and press the ENTER key.
Using the up and down keys, set the CCA value shown on the screen to the CCA value shown on the battery label, then press "ENTER".
The tester will perform the battery test.
The tester displays the battery test results, including voltage and battery rating. Refer to the following table and take the appropriate action recommended by the Micro 570.BATTERY TEST RESULTS
PRINT RESULT
REMEDY
Battery is good
No action required.
Good Charge
The battery is in good condition. Charge the battery, then use it. ※ You must follow the instructions below when charging the battery and perform a retest; otherwise, the test result may be inaccurate. (See "Battery Charging Method and Retest After Charging" below.)
Charge and retest
Battery incorrectly charged
Charge and retest the battery.
※ You must follow the instructions below when charging the battery and perform a retest; otherwise, the test result may be inaccurate. (See "Battery Charging Method and Retest After Charging" below.)
Replace the battery
Replace the battery and retest the charging system.
(Incorrect connection of the vehicle cables to the battery may generate the message "REPLACE BATTERY". Check the battery again after disconnecting the cables and connecting the tester directly to the battery terminals before replacing.)
Faulty cell - replace
Charge and retest the battery.
If the Micro 570 recommends "REPLACE BATTERY", replace the battery and retest the charging system.
[Battery Charging Method and Retest After Charging] Battery charging: Set the charger to "Automatic mode" (a mode in which the charging current decreases as the battery charges) and charge the battery until the charging current drops close to zero or the charger signals with an audible tone that charging is complete. (Minimum recommended charging time: more than 3 hours in the automatic mode described above)
If the battery is not fully charged, the surface charge of the battery is high when the amount of cranking current (CCA) in the battery is discharged. If you test the battery in this case, the tester may incorrectly evaluate the fact that battery sulfation has occurred, because the amount of current in the battery is too small compared to the voltage. * Surface charge: when the battery is charged, the temperature rises, the electrolyte level increases, the chemical reaction is activated, and this leads to an excessive increase in battery voltage. It is known that a full recovery requires about one day to eliminate this elevated surface charge.
Battery test after charging: Do not test the battery immediately after charging. Test the battery once the surface charge has dissipated, as described in the following procedure.
When battery charging is complete, install the battery in the vehicle.
Turn the ignition switch to the ON position and turn on the high beam headlights, then wait 5 minutes. (5-minute discharge)
Turn off the headlights, switch off the ignition, and wait 5 minutes. (5-minute wait)
Disconnect the positive (+) and negative (-) battery cables and test the battery.
STARTER TEST PROCEDURE
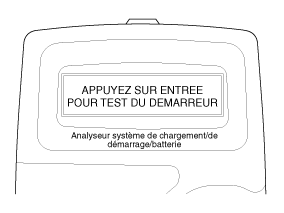
After the battery test, immediately press the ENTER key to perform the starter test.
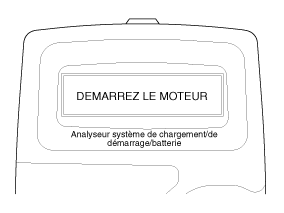
Start the engine.
The starting voltage and starter test results are shown on the screen. Refer to the following table and take the appropriate action. Recommended: Micro 570.STARTER TEST RESULTS
PRINT RESULT
REMEDY
Normal Starting Voltage
The system indicates that the starter is normal.
Low Starting Voltage
Starting voltage is below the normal value.
Check the starter
Charge the battery.
The battery charge level is too low to perform the test.
Charge the battery and repeat the test.
Replace the battery
Replace the battery.
If the vehicle does not start while the battery shows "GOOD BATTERY", check for an open circuit in the wiring, battery cable connections, and the starter, and repair or replace as necessary.
If the engine starts, inspect the fuel system.
CHARGING SYSTEM TEST PROCEDURE
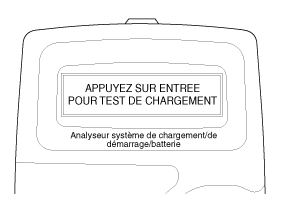
Press the ENTER key to start the charging system test.
The tester displays the actual alternator voltage. Press ENTER to continue.
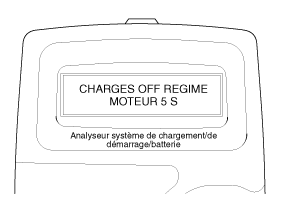
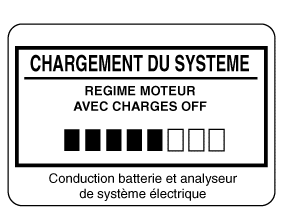
Turn off all electrical loads and crank the engine for 5 seconds by depressing the accelerator pedal. (Follow the instructions on the screen)
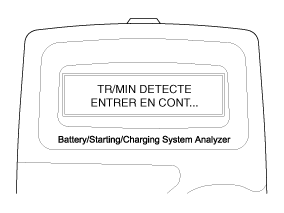
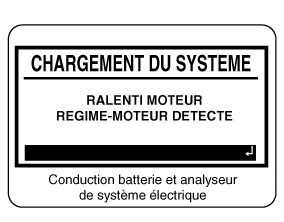
A message indicating that the engine speed has been detected is displayed on the screen. Press ENTER to continue.
If the engine speed is not detected, press ENTER after cranking the engine.
The tester performs the no-load system test.
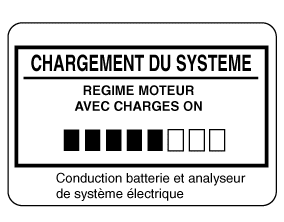
Turn on the electrical loads (air conditioner, lights, audio system, etc.). Press ENTER to continue.
The tester performs the loaded system test.
Crank the engine for 5 seconds while depressing the accelerator pedal. (Follow the instructions on the screen)
A message indicating that the engine speed has been detected is displayed on the screen. Press ENTER to continue.
If the engine speed is not detected, press ENTER after cranking the engine.
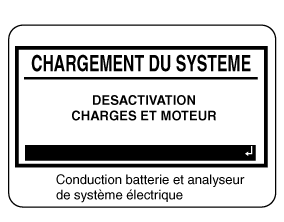
Turn off the electrical loads (air conditioning, lights, audio system, etc.). Turn off the engine.
The charging voltage and charging test results are displayed on the screen. When the engine is turned off, the tester leads are disconnected from the battery. Refer to the following table and take appropriate action as recommended by the Micro 570.CHARGING SYSTEM TEST RESULTS
PRINT RESULT
REMEDY
SYSTEM LOAD NORMAL / DIODE RIPPLE NORMAL
The charging system is functioning normally.
No Load Voltage
The alternator is not supplying charging current to the battery.
Check the belts and the connection between the alternator and the battery, and replace the belt, cable, or alternator as necessary.
Low Charging Voltage
The alternator is not supplying charging current to the battery, and there is not sufficient electrical load on the system.
Check the belts and the alternator, and replace if necessary.
High Charging Voltage
If the voltage from the alternator to the battery is above the normal limit, the voltage regulation is faulty.
Check the connections and grounds, and replace the regulator if necessary.
Check the electrolyte level in the battery.
Excessive ripple detected
One or more alternator diodes are not functioning properly.
Check the alternator assembly and belts, and replace if necessary.
MDX-670P Analyzer: The MDX-670P Battery and Electrical System Conductance Analyzer tests batteries as well as vehicle charging and starting systems. It displays test results within seconds and has a built-in printer that provides a copy of the results.
Connect the red clamp to the positive (+) terminal and the black clamp to the negative (-) terminal.
Scroll and select IN VEHICLE or OUT OF VEHICLE for a battery not connected to the vehicle.
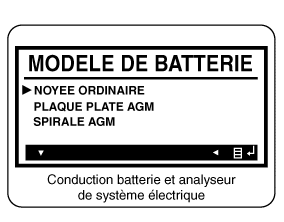
Scroll and select NORMAL LOAD, FLAT PLATE AGM, or AGM SPIRAL, as applicable.
Scroll and select the battery rating system.
CCA: Cold Cranking Amps, as specified by SAE. The most common standard is the battery cranking current at 0°F (-17.8°C).
EN: European standard
SAE: Society of Automotive Engineers, the American standard
Use the UP and DOWN keys to set the selected value to the value shown on the battery label.
Press ENTER to start the test.
After a few seconds, the tester displays the battery condition and the measured voltage. The tester also displays the selected battery rating and standard.BATTERY TEST RESULTS
PRINT RESULT
REMEDY
Battery is good
No action required.
Good Charge
The battery is in good condition. Charge the battery before use. ※ You must follow the instructions below when charging the battery and perform a new test; otherwise, the test result may be inaccurate. (See "Charging method and retest after battery charging" below.)
Charge and retest
Battery incorrectly charged
Charge and retest the battery.
※ You must follow the instructions below when charging the battery and perform a retest; otherwise, the test result may be inaccurate. (See "Battery Charging Method and Retest After Charging" below.)
Replace the battery
Replace the battery and retest the charging system.
(Incorrect connection of the vehicle cables to the battery may generate the message "REPLACE BATTERY". Check the battery again after disconnecting the cables and connecting the tester directly to the battery terminals before replacing.)
BAD BATTERY. REPLACE
Charge and retest the battery.
If the message "REPLACE BATTERY" appears, replace the battery and retest the charging system.
[Charging method and retest after battery charging] Battery charging: Set the charger to "Automatic mode" (a mode in which the charging current decreases as the battery charges) and charge the battery until the charging current drops to near zero or the charger signals with an audible tone that charging is complete. (Recommended minimum charging time: more than 3 hours in automatic mode, as described above)
If the battery is not fully charged, the surface charge of the battery is high when the amount of cranking current (CCA) in the battery is discharged. If you test the battery in this case, the tester may incorrectly evaluate the fact that battery sulfation has occurred, because the amount of current in the battery is too small compared to the voltage. * Surface charge: when the battery is charged, the temperature rises, the electrolyte level increases, the chemical reaction is activated, and this leads to an excessive increase in battery voltage. It is known that a full recovery requires about one day to eliminate this elevated surface charge.
Battery test after charging: Do not test the battery immediately after charging. Test the battery once the surface charge has dissipated, as described in the following procedure.
When battery charging is complete, install the battery in the vehicle.
Turn the ignition switch to the ON position and turn on the high beam headlights, then wait 5 minutes. (5-minute discharge)
Turn off the headlights, switch off the ignition, and wait 5 minutes. (5-minute wait)
Disconnect the positive (+) and negative (-) battery cables and test the battery.
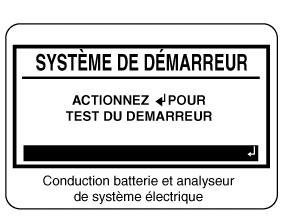
Press the ENTER button to start the starter test.
Start the engine when prompted.
The tester displays the starting system condition, ignition voltage and ignition timing in milliseconds.STARTER TEST RESULTS
PRINT RESULT
REMEDY
Normal Starting Voltage
The system indicates that the starter is normal.
Low Starting Voltage
Starting voltage is below the normal value.
Check the starter
Charge the battery.
The battery charge level is too low to perform the test.
Charge the battery and repeat the test.
Replace the battery
Replace the battery.
If the vehicle does not start while the battery shows "GOOD BATTERY", check for an open circuit in the wiring, battery cable connections, and the starter, and repair or replace as necessary.
If the engine starts, inspect the fuel system.
Step 3. Inspect the charging system
Press the ENTER button to start the load test.
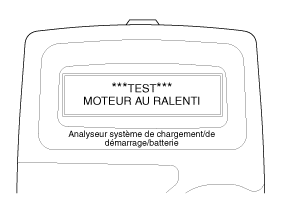
Run the engine with no load. (Follow the instructions on the screen)
The screen displays a message that the engine speed has been detected. Set the engine to idle.
Turn on the electrical loads (air conditioner, lights, audio system, etc.). Press ENTER to continue.
Turn on the electrical loads (air conditioner, lights, audio system, etc.). Press ENTER to continue.
The screen displays a message that the engine speed has been detected. Set the engine to idle.
Stop the load and the engine.
The charging system condition is displayed at the end of the procedure.
PRINT RESULT
REMEDY
NO PROBLEM
The system shows normal generator output.
NO OUTPUT
No generator output detected.
Check all connections to and from the generator, especially the battery connection. If a connection is loose or heavily corroded, clean or replace the cable and repeat the test.
If the belts and connections are in good condition, replace the alternator. (Older vehicles use external voltage stabilizers, which may only require replacement of the voltage regulator.)
Low Output
The alternator is not supplying charging current to the battery, and there is not sufficient electrical load on the system.
Check the belts and the alternator, and replace if necessary.
HIGH OUTPUT
If the voltage from the alternator to the battery is above the normal limit, the voltage regulation is faulty.
Check the connections and grounds, and replace the regulator if necessary.
Check the electrolyte level in the battery.
EXCESSIVE RIPPLE
If the voltage from the alternator to the battery is above the normal limit, the voltage regulation is faulty.
Check the alternator assembly and belts, and replace if necessary.
Charge the battery.
Starter voltage is low, the battery is discharged. Fully charge the battery and repeat the starter system test.
Replace the battery
The battery must be replaced before the system can be tested.
Press the BACK/PRINT button to save the test results, or MENU to return to the options menu.
?
Test yourself
A quick Hyundai Tucson quiz: every answer comes with an explanation and a link to the manual page.