Engine Mechanical System
Thermostat
In this manual: Engine Mechanical System
13steps
~78min
3/5difficulty
Done 0 of 13
Components and Component Location
COMPONENTS
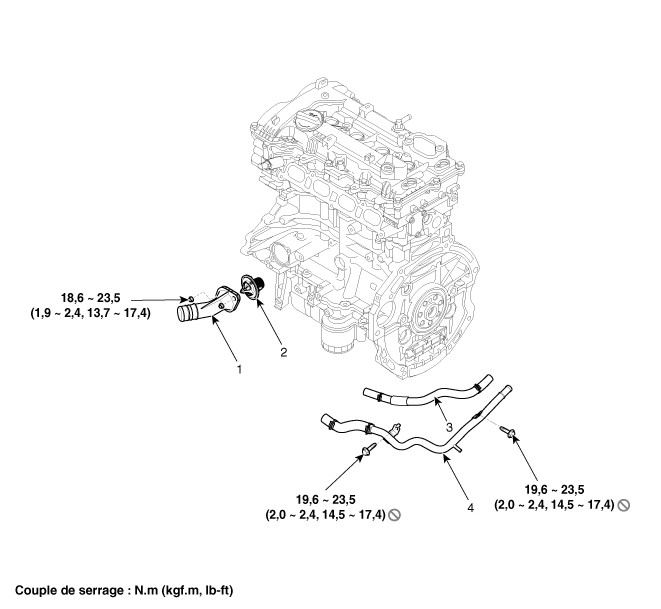
| 1. Water inlet connection 2. Thermostat |
3. Bypass hose 4. Heater hose and pipe assembly |
Repair Procedures
Removal and Installation
- Drain the coolant so that its level is below the thermostat. (Refer to Cooling System – "Coolant".)
- Remove the lower radiator hose. (Refer to Cooling System – "Radiator Hose".)
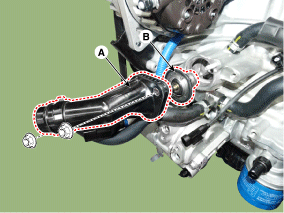
- Remove the water inlet connection (A) and the thermostat (B).
Tightening torque: 18.6~24 N·m
- Remove the intake manifold. (Refer to Exhaust and Intake System - "Intake Manifold")
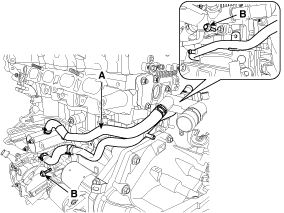
- Remove the bypass hose (A).
- Loosen the heater pipe mounting bolts (B) and remove it.
Torque: 19.6 ~ 24 N·m
- To install, perform the removal procedure in reverse order.
- Refill the engine coolant. (Refer to Cooling System – "Coolant".)
- Start the engine and check for leaks.
- Recheck the coolant level.
Inspection
- Immerse the thermostat in water and gradually heat the water.
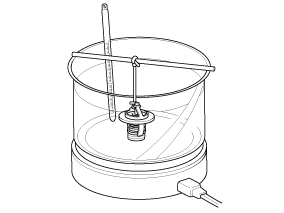
- Check the valve opening temperature. If the valve opening temperature does not match the specified values, replace the thermostat. Valve opening temperature: 88 ± 1.5 °C Fully open temperature: 100 °C
- Check the valve lift. If the valve lift does not match the specified value, replace the thermostat.
Valve lift: 8 mm (0.3 in) or more at 100 °C
Troubleshooting
TROUBLESHOOTING
| Symptoms | POSSIBLE CAUSES | REMEDY | ||
| Coolant Leakage |
|
Check the mounting nuts. |
|
|
| Make sure the seal is not damaged. |
|
|
||
| Excessive cooling |
|
Visually inspect after removing the radiator cap. |
|
|
| GDS Check and Engine Start |
|
|
||
| Remove the thermostat and check. |
|
|
||
| Overheating |
|
Visually inspect after removing the radiator cap. |
|
|
| GDS Check and Engine Start |
|
|
||
| Immerse the thermostat in boiling water and check. |
|
|
||
Test yourself
A quick Hyundai Tucson quiz: every answer comes with an explanation and a link to the manual page.
Was this page helpful?