Body Electrical System
Blind Spot Detection Unit
In this manual: Body Electrical System
24steps
~199min
5/5difficulty
11special tools
Done 0 of 24
Circuit Diagrams
Wiring Diagram

Repair Procedures
DEPOSIT
- Disconnect the negative (-) battery terminal.
- Remove the rear bumper cover. (Refer to Body - "Rear Bumper")
- Loosen the mounting bolts, then remove the BSD unit (A).


REMEDY
- Install the BSD units to the rear bumper.
- Install the rear bumper cover.
- Connect the negative (-) battery terminal.
Inspection
Overview of Adjustment: When replacing the BSD sensor or BSD components due to a rear or side collision on a vehicle equipped with BSD, the BSD mounting angle must be checked. Inspection before adjustment.- When DTC [C2702 (Main)] or [C2703 (Sub)] is output, check the following before making corrections.
- Check the vehicle condition and verify that the BSD unit or bracket is not deformed (mounting angle, body distortion, etc.).
Vehicle Operation Normal Abnormal (deformation of bracket or rivet area). 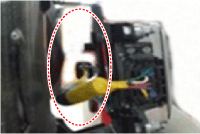
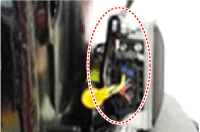
Vehicle Operation Normal Abnormal (deformation of bracket or rivet area). 
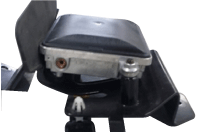
- Check the nut tightening torque. Check for foreign matter.
Vehicle Operation Normal Abnormal (deformation of bracket or rivet area). 

- After replacing the BSD unit or bracket with the bumper removed, use the BSD unit alignment tool kit (Special Service Tool: 09958-3T000) to perform angle adjustment.
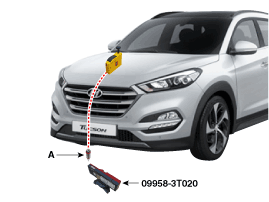
- Attach the vertical guide (Special Service Tool: 09958-3T010) to the hood and lower the wire (A) to the ground so that it passes through the center of the emblem.
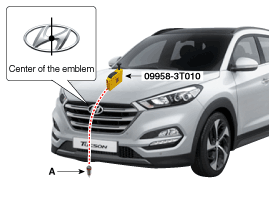
- Install the optical receiver (Special Service Tool: 09958-3T020) under the filler (A).
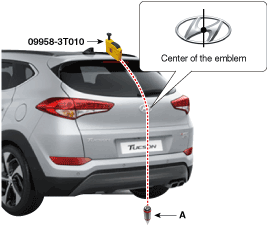
- Attach the vertical guide (Special Service Tool: 09958-3T010) to the trunk lid (or tailgate) and lower the wire (A) to the ground so that it goes to the center of the emblem.
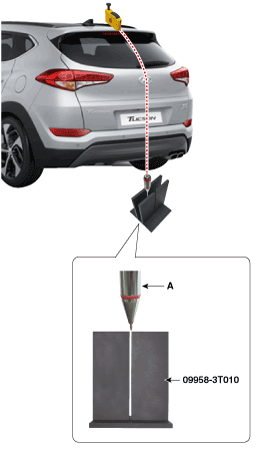
- Install the rear alignment template (Special Service Tool: 09958-3T030) so that the hole is directly below the filler (A).
- Place the laser holder (Special Service Tool: 09958-3T040) at a distance of 2 m from the rear of the vehicle and install the laser level (Special Service Tool: 09958-3T060) above the laser support.

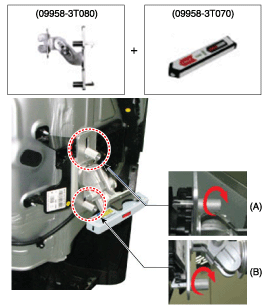
- Install the BSD unit mounting adapter (Special Service Tool: 09958-3T080) on the BSD unit and attach the laser level (Special Service Tool: 09958-3T070).
- Install the angle measuring plate (Special Service Tool: 09958-3T050) where the center laser beam (A) and the horizontal laser beam (B) intersect.
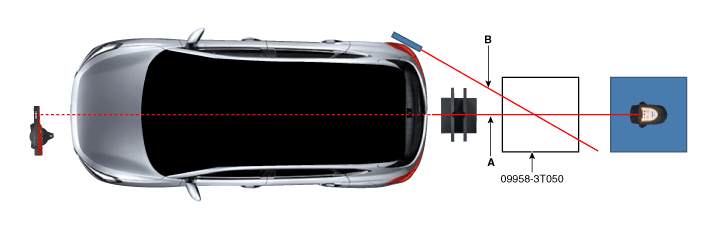
- Measure the angle (C) between the center line (A) of the angle measuring plate and the horizontal laser beam (B) using the digital protractor (Special Service Tool: 09958-3T090).
Horizontal angle (C): 37° ± 2°

- Use the digital inclinometer (Special Service Tool: 09958-3T100) to measure the vertical angle of the BSD unit.
Vertical angle: 90° ± 1°
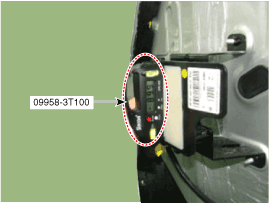
- Measure the horizontal and vertical angles of the right and left BSD units. If the measured values deviate from the specified values, insert a shim between the BSD unit bracket.
Specifications: Horizontal angle: 37° ± 2° Vertical angle: 90° ± 1°

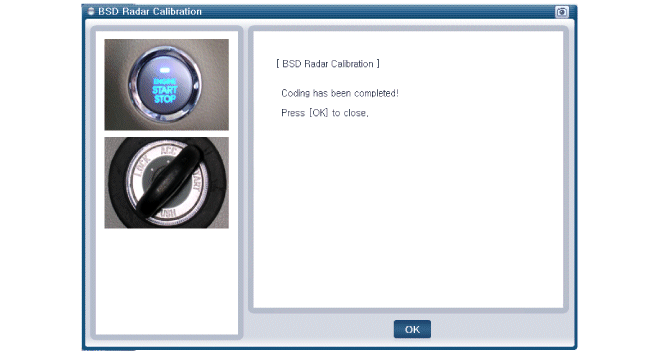
- After inspecting and correcting the BSD unit angle, perform the BSD Radar Calibration Procedure.
- Vehicles with rear bumper damage and vehicles whose BSD units have been replaced must perform BSD unit alignment using GDS.
- Select the "BSD Radar Calibration" procedure in the BSD system.
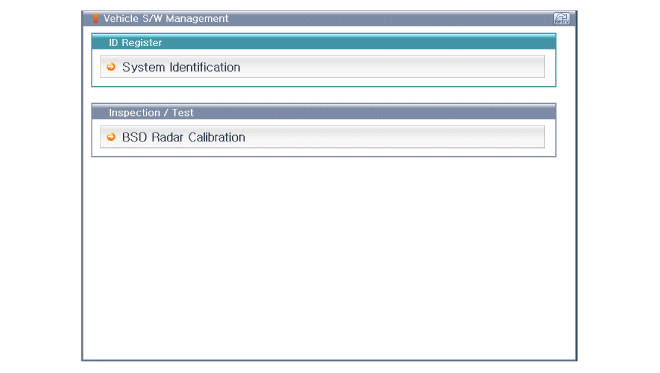
- Perform the "BSD Radar Calibration" procedure according to the message on the GDS screen.
Test yourself
A quick Hyundai Tucson quiz: every answer comes with an explanation and a link to the manual page.
Was this page helpful?