Body (Interior and Exterior)
Front Door Repair Procedures
In this manual: Body (Interior and Exterior)
50steps
~300min
4/5difficulty
Done 0 of 50
Replacement
Front Door Trim Replacement
|
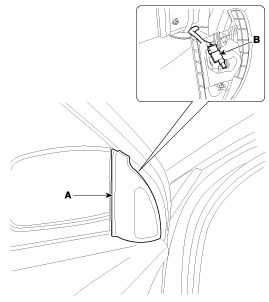
- Using a screwdriver or remover, remove the quadrant inner cover (A).
- Disconnect the tweeter connector (B).
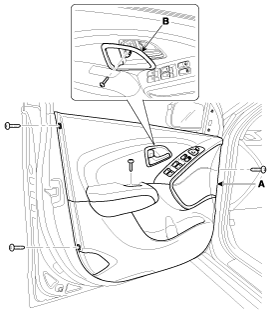
- Loosen the mounting screws, then remove the door inside handle bezel (B).
- Loosen the mounting screws, then remove the door trim (A).
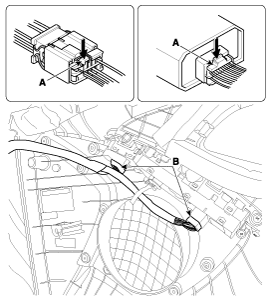
- Press the lock pin (A), then disconnect the connectors (B).
- Install in the reverse order of removal.

- Check that the connectors are connected correctly and that each rod is securely connected.
- Check that the door locks/unlocks and opens/closes properly.
- Replace any damaged clips.
- Remove the door trim.
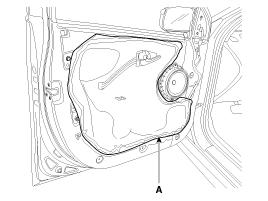
- Remove the door waterproof film (A).
- Replace the damaged film.
- Loosen the mounting screws, then remove the inside handle (A).
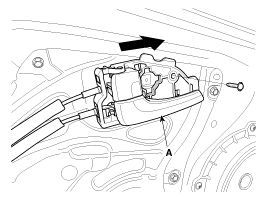
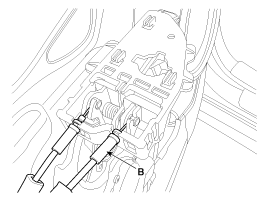
- Disconnect the inside handle cable (B).
- Install in the reverse order of removal.
- Check that the door locks/unlocks and opens/closes properly.
- Replace any damaged clips.
- Remove the front door trim panel.
- Remove the door waterproof film.
- Remove the glass mounting plug hole.

- Be careful not to drop the glass or scratch the glass surface.
- Carefully adjust the glass (B) until the bolts are visible, then loosen them. Separate the glass from the glass run and carefully pull the glass out through the window opening.
Tightening torque: 6.9 ~ 10.8 N·m
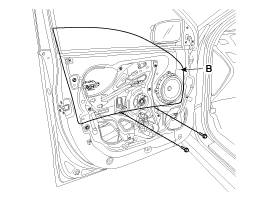
- Install in the reverse order of removal.
- Move the glass up and down to make sure it moves smoothly without binding.
- If necessary, adjust the glass position.
- Replace any damaged clips.
- Check that the door locks/unlocks and opens/closes properly.
- Remove the door trim.
- Remove the door waterproof film.
- Loosen the mounting screws, then remove the speaker (B).
- Disconnect the speaker connector (A).
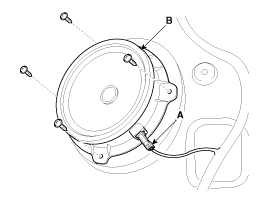
- Install in the reverse order of removal.
- Use sheet metal screws to secure the speaker.
- Replace any damaged clips.
- Check that the door locks/unlocks and opens/closes properly.
- Check that the connectors are connected correctly and that each rod is securely connected.
- Remove the door trim.
- Remove the door waterproof film.
- Disconnect the connector (A), then loosen the mounting screws.
- Remove the window regulator motor (B).
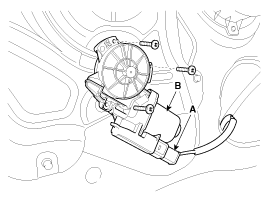
- Install in the reverse order of removal.
- Apply grease to areas with moving parts and springs.
- Move the glass up and down to make sure it moves smoothly without binding.
- Replace any damaged clips.
- Check that the door locks/unlocks and opens/closes properly.
- Remove the following parts:
A. Front Door Trim B. Door waterproof film. C. Glass D. Outside Handle - Loosen the outside handle base mounting screw (A).
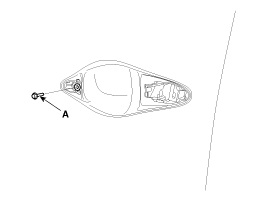
- Disconnect the outside handle connector (A).
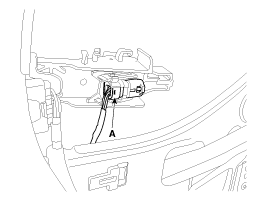
- Loosen the module mounting bolts.
- Loosen the latch mounting nuts, then remove the module (A).
Tightening torque: 6.9 ~ 10.8 N·m
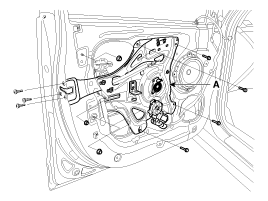
- Disconnect the connector (A) and clip.
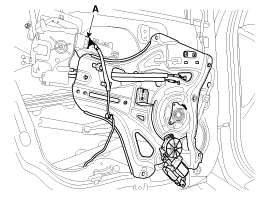
- Install in the reverse order of removal.
- Apply a sufficient amount of grease to the moving parts.
- Check that the connectors are connected correctly and that each rod is securely connected.
- Check that the door locks/unlocks and opens/closes properly.
- Replace any damaged clips.
- Remove the cover, then loosen the mounting bolt.
- Remove the outside handle cover (A).
Tightening torque: 6.9 ~ 10.8 N·m
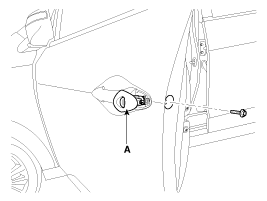
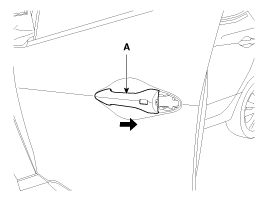
- Remove the outside handle (A) by sliding it rearward.
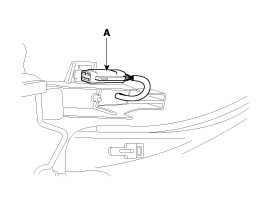
- Disconnect the outside handle connector (A).
- Install in the reverse order of removal.
- Check that the door locks/unlocks and opens/closes properly.
Adjustment
Window Adjustment
|
- Remove the door trim.
- Remove the door waterproof film.
- Carefully move the glass (A) until the glass mounting bolts are visible, then loosen them.
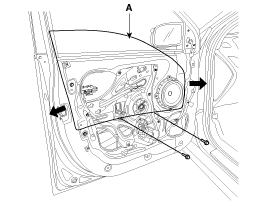
- Make sure the glass moves smoothly.
- Loosen the screws (B) just enough to allow the latch to move.
Tightening Torque (B): 8.8 ~ 13.7 N·m
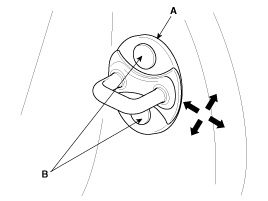
- Tap the striker with a plastic hammer to adjust it. The striker will not move much, but will allow some adjustment.
- While holding the outside handle, press the door against the body to make sure the striker allows flush seating. If the door latches correctly, tighten the screws and recheck.
|
- When adjusting the doors, place the vehicle on a hard, level surface.
- Make sure the door and body edges are parallel.
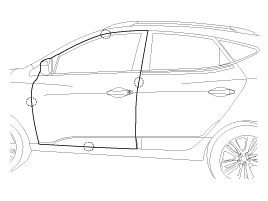
- Adjust at the hinges (A):
A. Slightly loosen the door mounting bolts and move the door INWARD or OUTWARD until it is flush with the body. B. Slightly loosen the hinge mounting bolts and move the door forward or backward, up or down, to align the gaps.
Tightening Torque: (B): 34.3 ~ 41 N·m (C): 9.8 ~ 19.6 N·mC. Place a shop towel on the jack to avoid damaging the door during adjustment. 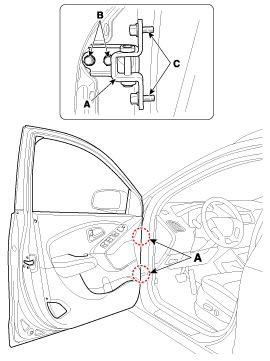
- Lubricate the moving parts of the specified hinges.
- Check for water leaks.
Test yourself
A quick Hyundai Tucson LM quiz: every answer comes with an explanation and a link to the manual page.
Was this page helpful?