Engine Mechanical System
Intake Manifold Repair Procedures
In this manual: Engine Mechanical System
9steps
~54min
2/5difficulty
Done 0 of 9
Removal and Installation
- Remove the engine cover.
- Disconnect the negative battery cable.
Tightening torque: 3.9 ~ 5.9 N·m
- Disconnect the wiring connectors and harness clips, then remove the wiring and protectors from the intake manifold.
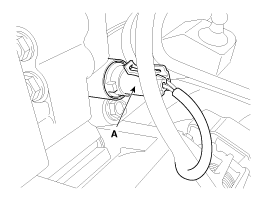
- OCV (Oil Control Valve) Intake Connector (A)
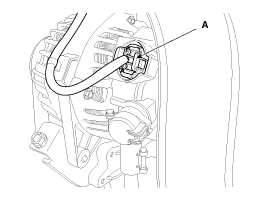
- Alternator Connector (A)
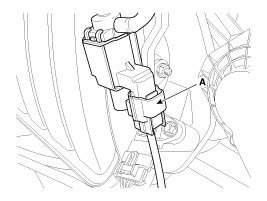
- VIS (Variable Intake System) Connector (A)
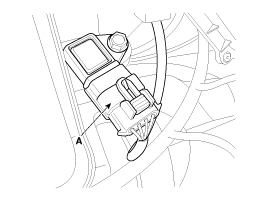
- MAPS (Manifold Absolute Pressure Sensor) and IATS (Intake Air Temperature Sensor) Connector (A)
- ETC (Electronic Throttle Control) Connector (A)
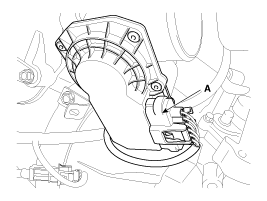
- OCV (Oil Control Valve) Intake Connector (A)
- Disconnect the PCV (Positive Crankcase Ventilation) hose (A).
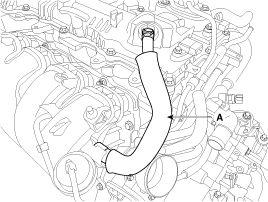
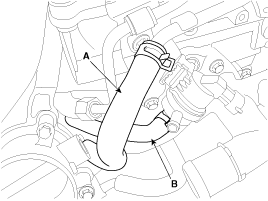
- Disconnect the vacuum hose (A) and the PCSV (Purge Control Solenoid Valve) hose (B).
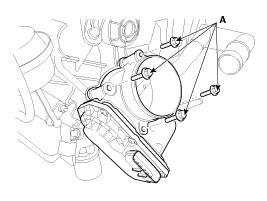
- Remove the ETC (Electronic Throttle Control) module bolts (A). (Refer to Engine Control/Fuel System - ETC System)
Tightening torque: 9.8 ~ 11.8 N·m
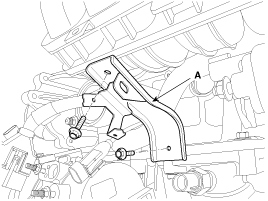
- Remove the intake manifold support (A).
Tightening Torque: 18.6 ~ 24 N·m
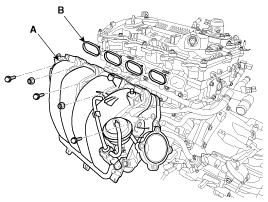
- Remove the intake manifold (A) and gasket (B).
Tightening Torque: 18.6 ~ 24 N·m
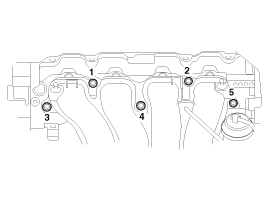
When installing the intake manifold, tighten the bolts and nuts to the preliminary torque, then tighten the bolts and nuts to the specified torque in the sequence shown.
- Installation is the reverse of removal.
When installing, replace the gaskets with new ones.
Test yourself
A quick Hyundai Tucson LM quiz: every answer comes with an explanation and a link to the manual page.
Was this page helpful?