Suspension System
Rear Upper Arm Repair Procedures
In this manual: Suspension System
9steps
~54min
2/5difficulty
Done 0 of 9
Removal
- Remove the rear wheel and tire.
Tightening torque: 88.3 ~ 108 N·m
Be careful not to damage the hub bolts when removing the rear wheel and tire.
- Remove the rear shock absorber. (Refer to Rear Suspension System - "Rear Shock Absorber").
- Position a transmission jack (A) under the lower arm (B).
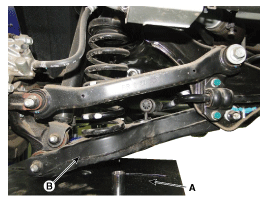
- Loosen the bolt and nut, then remove the rear upper arm (A) from the rear axle.
Tightening torque: 137.3 ~ 157 N·m
- When removing the bolt, remove the upper arm without load using a transmission jack.
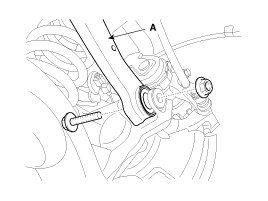
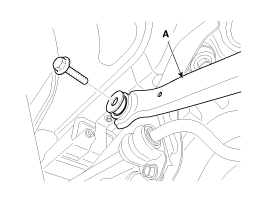
- Loosen the bolt and nut, and remove the rear upper arm (A) from the subframe.
Tightening torque: 156.9~176 N·m
- When removing the bolt, remove the upper arm without load using a transmission jack.
Installation
- Installation is the reverse of removal.
- If you do not install a jack, the bolt may shear due to the large working load on the upper arm mounting bolt.
- Install the component with the specified torque.
- When installing the bolt, install the upper arm without load using a transmission jack.
- Install the rear upper arm to the subframe with the bolt in the horizontal position.
- If the bolt is tightened without aligning the bolt holes of the rear upper arm and the subframe horizontally, the rear upper arm mounting bolt to the subframe may loosen, resulting in rust and noise later.
Inspection
- Inspect the bushing for wear and damage.
- Inspect the rear lower arm for deformation.
- Check the coil spring and spring seat for wear and deformation.
- Check that all bolts and nuts are present.
Test yourself
A quick Kia Cadenza VG Owner's Manual quiz: every answer comes with an explanation and a link to the manual page.
Was this page helpful?