Engine Mechanical System
Engine and Transaxle Assembly Repair Procedures
In this manual: Engine Mechanical System
32steps
~192min
4/5difficulty
Done 0 of 32
Removal
|
|

|

- Disconnect the high voltage circuit (refer to "High Voltage Disconnection Procedure" in this group).
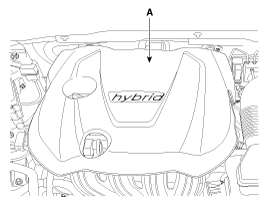
- Remove the engine cover (A).
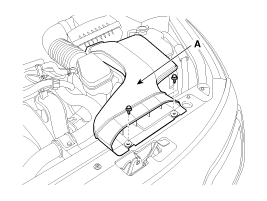
- Remove the air duct (A).
Tightening torque: 7.8 ~ 9.8 N·m
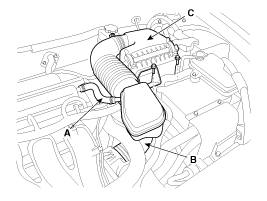
- Remove the air cleaner assembly.
- Disconnect the breather hose (A).
- Disconnect the air intake hose (B) and remove the air cleaner assembly (C). Tightening torque: Hose clamp bolt: 2.9 ~ 4.9 N·m Air cleaner mounting bolts: 7.8 ~ 9.8 N·m

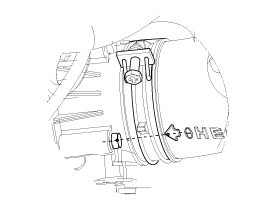
- When installing the air intake hose, align the clamp plate with the hose stopper.
- When installing the air intake hose, align the center of the mark on the hose with the rib of the throttle body.
- Remove the lower covers (A, B).
Tightening torque: 7.8 ~ 11.8 N·m
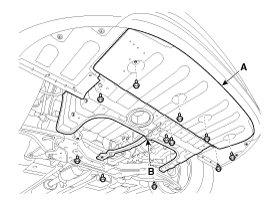
When removing the lower cover (B), remove the mounting bolts of the bracket, then remove the lower cover and the mounting bracket assembly. - Loosen the drain plug and drain the engine coolant. Remove the radiator cap to drain the coolant faster. (Refer to Cooling System in this group.)
- Loosen the drain plug and drain the inverter coolant. Remove the reservoir cap to drain the coolant faster. (Refer to HT Group - "Coolant".)
- Disconnect the upper radiator hose (A) and lower hose (B).
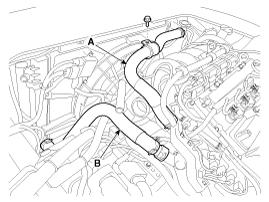
- Remove the Hybrid Power Control Unit (HPCU). (Refer to HC Group - "HPCU".)
- Remove the inverter pan (A).
Tightening torque: 8.8 - 13.7 N·m
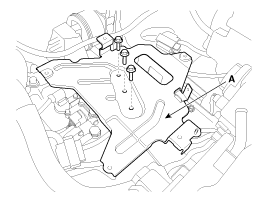
- Recover the refrigerant, then remove the high pressure line (A) and low pressure line (B). (Refer to HA Group - "Electric Compressor".)
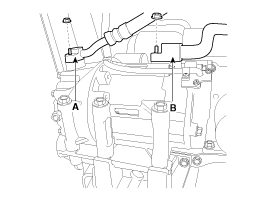
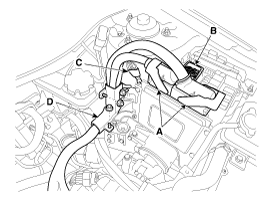
- Disconnect the ECM connectors (A) from the ECM, the fuse block connector (B) from the fuse/relay block, and the engine ground wire (C). Then remove the wiring protector (D).
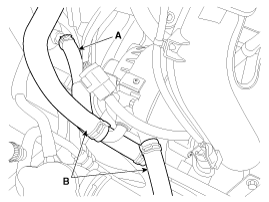
- Disconnect the cooling system hoses from the Hybrid Starter Generator (HSG) (A) and the Electric Water Pump (EWP) (B).
- Disconnect the transaxle harness connectors and the control cable from the transaxle. (Refer to AT Group.)
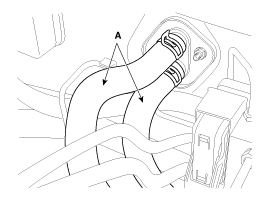
- Disconnect the heater hoses (A).
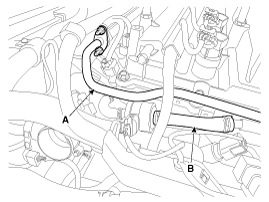
- Disconnect the fuel hose (A) and the hose (B) of the purge control solenoid valve (PCSV).
- Remove the front muffler (A).
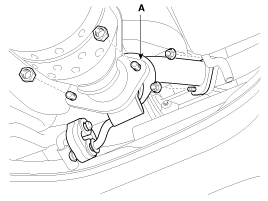
- Remove the steering universal joint mounting bolt (A). (Refer to ST Group.)
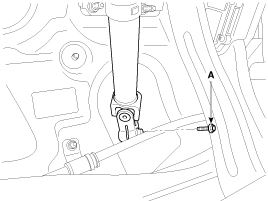
- Remove the front wheels. (Refer to SS Group - "Wheel".)
- Remove the lower arms (A). (Refer to SS Group - "Front Lower Arm".)
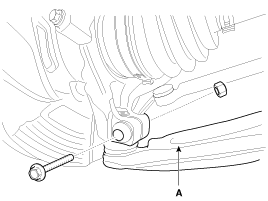
- Remove the stabilizer bar links (A). (Refer to SS Group - "Front Stabilizer Bar".)
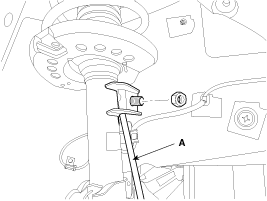
- Remove the tie rod ends (A). (Refer to ST Group - "Steering Gear Box".)
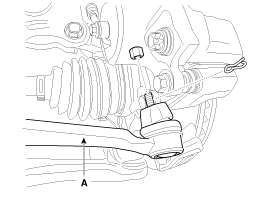
- Disconnect the drive shafts (A) from the axle hubs. (Refer to DS Group - "Front Axle Hub / Knuckle".)
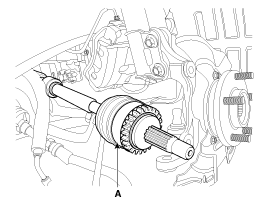
- Remove the roller rod bracket (A). Tightening torque: Bolt (B): 107.9 ~ 128 N·m Bolt (C): 49.0 ~ 64 N·m
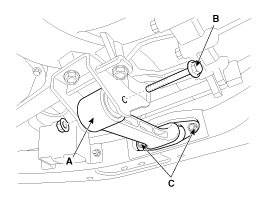
- Remove the roller rod bracket (A).
Tightening torque: 49.0 ~ 69 N·m
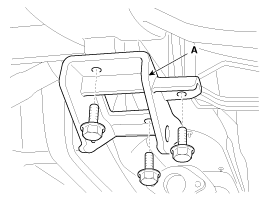
- Support the subframe (A) with a jack, then remove the subframe mounting bolts and nuts. (Refer to SS Group - "Front Crossmember".) Tightening torque: Subframe mounting bolts and nuts: 156.9 ~ 176 N·m (16.0 ~ 18.0 kgf·m, 115.7 ~ 130.2 ft-lbf) Stopper bolts: 44.1 ~ 59 N·m
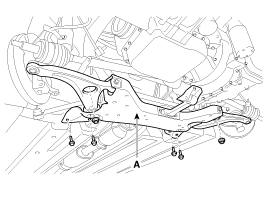
- After removing the subframe mounting bolts and nuts, the engine and transaxle assembly may drop. Support it securely with a floor jack.
- Before removing the engine and transaxle assembly, make sure all hoses and connectors are disconnected.
- Support the engine and transaxle assembly with a floor jack.
- Disconnect the engine ground cable (A).
Tightening torque: 10.8 ~ 13.7 N·m
- Remove the engine mount bracket (B).
Tightening torque: 88.3 ~ 108 N·m
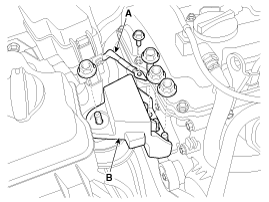
- Disconnect the transaxle ground cable (A).
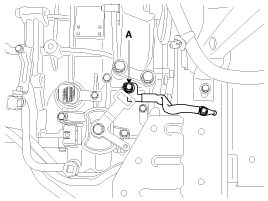
- Remove the automatic transaxle support bracket bolt (B) after removing the cover (A).
Tightening Torque: 107.9 ~ 128 N·m
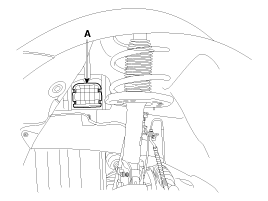
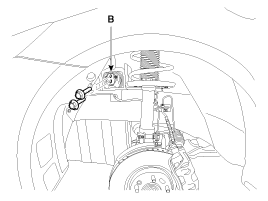
- Lower the jack together with the engine and transaxle assembly, then remove the engine and transaxle assembly by raising the vehicle.
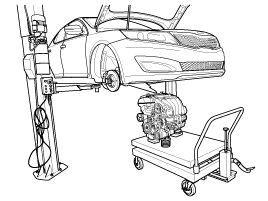
When removing the engine and transaxle, be careful not to damage surrounding parts or body components.
Installation
Installation is in the reverse order of removal. Add all required fluids and check for leaks. Connect the GDS. Check for DTCs, note them, and clear them. Recheck.
|
|
Test yourself
A quick Kia Optima Hybrid Owner's Manual quiz: every answer comes with an explanation and a link to the manual page.
Was this page helpful?