Antenna Amplifier Inspection
1. Disconnect the negative battery cable..
2. Remove the rain sensor cover. (Vehicles with auto light/wiper system).
3. Disconnect the rain sensor connector. (Vehicles with auto light/wiper system)
4. Partially peel back the seaming welts.
5. Remove the following parts:
a. Sunroof seaming welt (vehicles with sunroof)
b. A-pillar trim.
c. Front scuff plate.
d. Rear scuff plate.
e. B-pillar lower trim.
f. Upper anchor of the front seat belt.
g. B-pillar upper trim.
h. Rear seat cushion.
i. Tire house trim.
j. C-pillar trim.
k. Map light.
l. Sunvisor.
m. Assist handle.
n. Headliner.
6. Connect the negative battery cable..
7. Switch the ignition to ON.
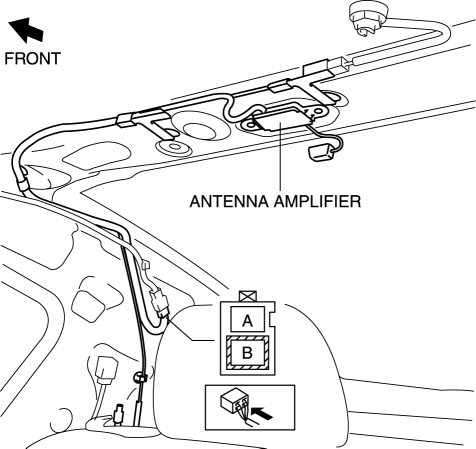
8. Verify that voltage is B+ at the antenna amplifier terminal A.
With audio unit (without display)
With audio unit (with display)
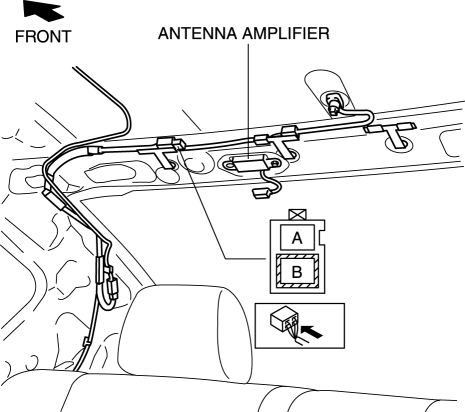
If the battery voltage can be verified, replace the antenna amplifier.
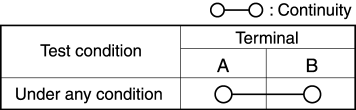
9. Verify that the continuity between antenna amplifier terminals is as indicated in the table. (with SIRIUS satellite radio system)
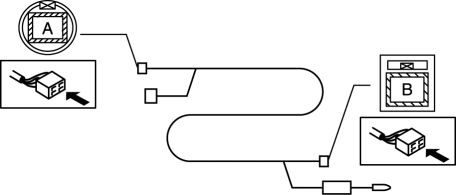
If not as indicated in the table, replace antenna amplifier.
Test yourself
A quick Mazda 3 quiz: every answer comes with an explanation and a link to the manual page.