Supplier Identification Procedure [Audio]
1. Disconnect the negative battery cable..
2. Remove the center panel..
3. Remove the audio unit..
4. Verify the supplier by referring to the label attached to each unit.
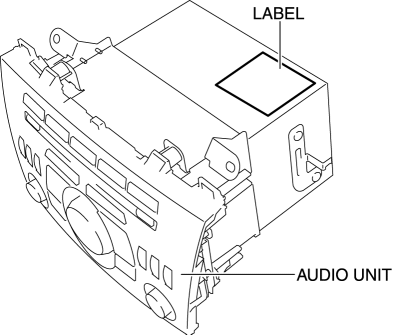
Verify Using the Diagnostic Assist Function Without display
1. Switch the ignition to ACC or ON.
2. Turn the audio unit power to ON.
3. While pressing the POWER/VOLUME switch, simultaneously press the PRESET switch 5 for 3 s or more.
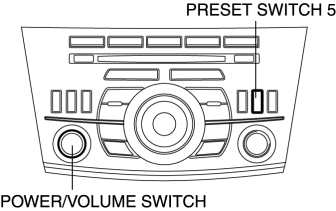
4. Identify the supplier code by referring to the information display.

Supplier code |
Supplier name |
01 |
SANYO Automedia |
02 |
Panasonic |
03 |
Clarion |
04 |
Pioneer |
05 |
VISTEON |
NOTE:
The supplier code can also be identified from the DTC displays screen.

5. Cancel the diagnostic assist function by either turning off the audio unit power or by switch the ignition to off.
With display1. Switch the ignition to ACC or ON.
2. Verify that the audio is turned on. If the audio is turned off, press the POWER/VOLUME switch to turn it on.
3. Press the POWER/VOLUME switch and SEEK switch (up) simultaneously to launch the diagnostic assist function.
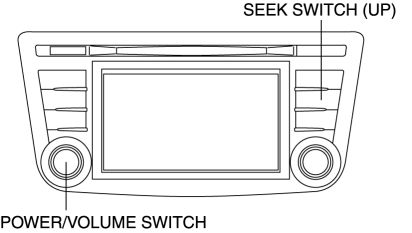
4. Verify that the launched diagnostic assist function is displayed on the screen.
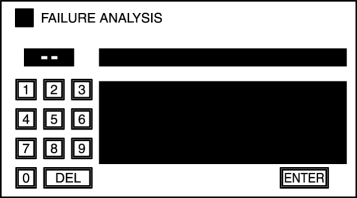
5. Input diagnostic assist code "06".
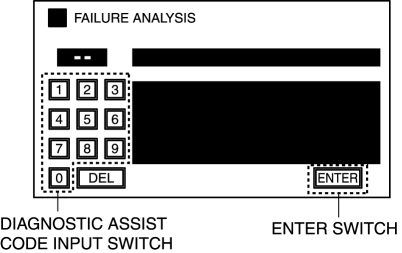
6. Select "ENTER switch".
7. Identify the supplier code by referring to the display.
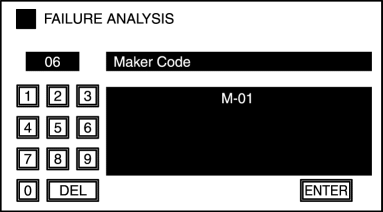
Supplier code |
Supplier name |
M-01 |
SANYO Automedia |
M-02 |
Panasonic |
M-03 |
Clarion |
M-04 |
Pioneer |
M-05 |
VISTEON |
8. Press the POWER/VOLUME switch and return to the diagnostic assist screen.
9. Press the POWER/VOLUME switch and end the diagnostic assist function.
Test yourself
A quick Mazda 3 quiz: every answer comes with an explanation and a link to the manual page.