Fillet molding
Exploded View
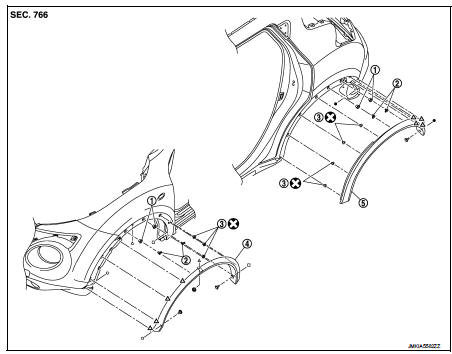
1. Grommet
2. Clip
3. Clip
4. Front fillet molding 5. Rear fillet molding
 : Pawl
 : Do not reuse
Front fillet molding
FRONT FILLET MOLDING : Removal and InstallationREMOVAL
1. Remove front fillet molding fixing clips.2. Remove front fillet molding front side fixing pawls.
 : Pawl
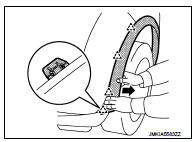
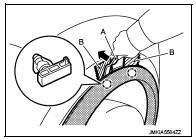
3. Using remover tool (A), disengage the clips from front fillet molding by starting from front side.
 : Clip
CAUTION:
• Apply a protective tape (B) on the body to protect the painted surface from damage.
• Never pull fillet molding strongly.
INSTALLATION
Note the following items, and then install in the reverse order of removal.
CAUTION:• Always replace fillet molding fixing clips.
• When installing front fillet molding, check that blind clips and pawls are securely fitted in panel holes on body, and then press them in.
Rear fillet molding
REAR FILLET MOLDING : Removal and InstallationREMOVAL
1. Remove filet molding fixing clip from end of sill cover.2. Remove rear fillet molding rear side fixing pawls.
 : Pawl
CAUTION:
Never pull the rear fillet molding strongly.
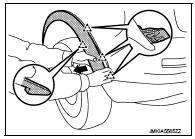
3. Using remover tool (A), disengage the clips from rear fillet molding by starting from rear side.
 : Clip
CAUTION:
• Apply a protective tape (B) on the body to protect the painted surface from damage.
• Never pull the rear fillet molding strongly.

INSTALLATION
Note the following items, and then install in the reverse order of removal. CAUTION:• Always replace fillet molding fixing clips.
• When installing rear fillet molding, check that blind clips and pawls are securely fitted in panel holes on body, and then press them in.