Front bumper
Exploded View
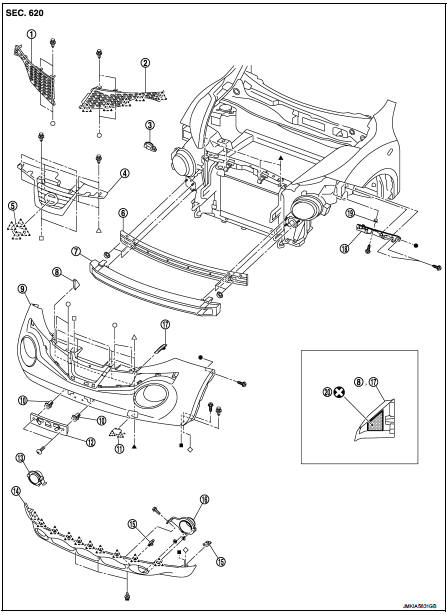
1. Front side grille RH 2. Front side grille LH 3. Bumper side bracket RH 4. Front center grille
5. Emblem
6. Bumper reinforcement
7. Energy absorber
8. Bumper end rubber RH 9. Bumper fascia
10. Screw grommet
11. Bumper bracket cover 12. License plate bracket 13. Front fog bracket RH 14. Bumper fascia lower 15. U nut
16. Front fog bracket LH 17. Bumper end rubber LH 18. Bumper side bracket LH 19. Screw grommet
20. double-sided tape
[t: 1.2 mm (0.047 in)]
 : Pawl
 : Do not reuse
Removal and Installation
CAUTION:Bumper fascia is made of resin. Never apply strong force to it, and be careful to prevent contact with oil.
REMOVAL
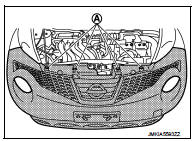
1. Fully open hood assembly.2. Remove clips (A) of bumper upper side.
3. Remove front fillet molding front side. Refer toEXT-26, "FRONT FILLET MOLDING : Removal and Installation".
4. Remove bumper fascia assembly fixing screws (A) (LH and RH).
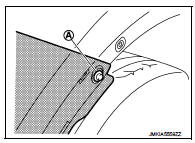
5. Remove air guide fixing screws, and then remove air guide (LH and RH).Refer to EXT-22, "Exploded View". 6. Remove clips of bumper lower side.
7. Pull bumper fascia side toward the vehicle side to disengage the fitting of bumper side bracket and bumper fascia side as shown by the arrow in the figure.
 : Pawl
8. CAUTION:
When removing bumper fascia assembly, 2 workers are required so as to prevent it from dropping.
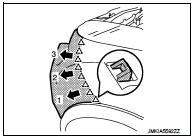
9. Disconnect front fog lamp harness connectors. (with fog lamp) 10. Remove bumper fascia assembly. 11. Remove the following parts after removing bumper fascia assembly.
• Front fog lamp assembly (LH and RH). (with fog lamp) • Front fog lamp finishers (LH and RH). (with out fog lamp) • Bumper fascia lower
• License plate bracket
14. Remove bumper side bracket mounting screws, and then remove bumper side bracket.
INSTALLATION
Note the following items, and then install in the reverse order of removal.
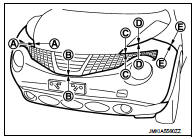
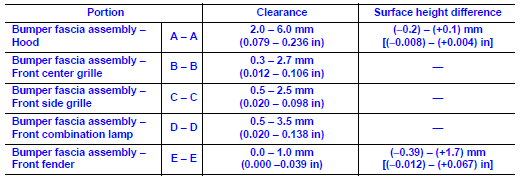
NOTE:• The following table shows the specified values for checking normal installation status.
• Fitting adjustment cannot be performed.